
DIY Handstamped Paper Bunting Birthday Card
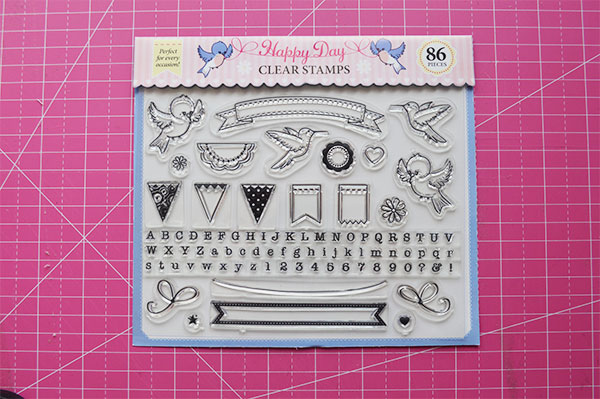
It’s happened, the change. No I’m not talking about the menopause, I’m talking about the switch from fashion and gossip magazines to crafting and diy glossies. I’ll let you in to a secret, I love a free gift and this month in Papercraft Inspirations was one of the best free gifts that I’ve ever had from a magazine – the 86 piece stamp set! Not only does it include a whole typewriter-esque alphabet but it also has various bunting stamps, banners, birds and small embellishments. The possibilities for this set are literally endless and the stamps are really good quality – I’ve paid for stamps that don’t print as well as these beauties.
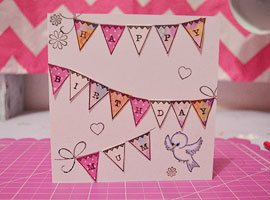
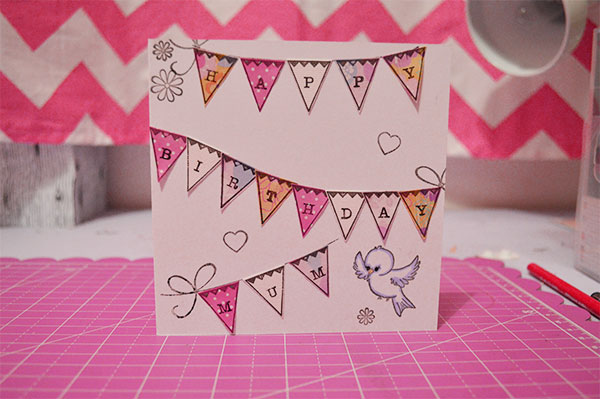
It’s my mum’s birthday this week and I thought a birthday card would be a good place to try out my new stamp set for the first time! I used three of the free papers from the magazine plus some textured cardstock that I already had in my stash. I started by stamping the plain triangular pennant onto the various papers until I had a banner for each letter in my intended message. Then I cut out each banner leaving about 1mm gap from the printed line.

I then stamped each letter of ‘HAPPY BIRTHDAY MUM’ on the banners making sure that the were in sequential order of the various papers.
It’s best to try various layouts ahead of actually sticking the bunting down so that you can make sure everything fits. As you can see on my card, the word “birthday” was a bit too long so I needed to overlap the pennants and lay them out in a curved line so they’d fit nicely onto the front of the card. To stick them down I used a tip I saw on Create and Craft TV the other day (another recent 30 something development…) which to put a blob of glue on the back of your hand, spread it out and then gently drag the piece your sticking over the glue. This gives just the right amount to stick down the card without too much excess. It’s also pretty fun to peel the excess glue off your hand when you’re done!
Make sure you align the banners so it looks like they’re on a string – there was a string stamp in the set which I used for the ‘Mum’ line of bunting. With the banners in place I added some of the string tie stamps at the edges – a full one for the bottom string and partials over the edge of the cards for the other lines. I stamped the little bird in the bottom corner and coloured it with Spectrum Noir markers from the pastel pack that I bought from eBay. I added a few extra stamped shapes for embellishment and a birthday sentiment inside to finish.
It’s still early days for me at papercraft but I really enjoyed making this card and am pleased with the result. I still need a lot more practice but this is first card that I feel has ended up how I wanted it. I’m always looking for inspiration and I’d love to see your cards – especially if you’ve made any with the same stamp set. Get in touch!

4 Comments
Josie
Aww that card is too cute – Your Mum will have been so delighted with it!
Catherine
Thanks Josie! 🙂
Ashley
It such a lovely idea my dear, the designs are awesome and photos are lovely, good job :).
thanks for sharing. 🙂 thumbs up 🙂 🙂
Catherine
Thank you Ashley! 🙂