Bedroom Wallpaper Mural | Bedroom Makeover | Photowall Review
This Bedroom Wallpaper Mural post contains gifted products.
I’ve always wanted a bedroom wallpaper mural and wanted to do something to make our master bedroom in the new house really special. I was so excited when I was approached by Photowall.co.uk to try out one of their gorgeous wall murals or designer wallpapers ! What’s even better is that you can get 25% off everything on their site with the exclusive code they’ve give me! Simply scroll to the end of the post to find out the details!
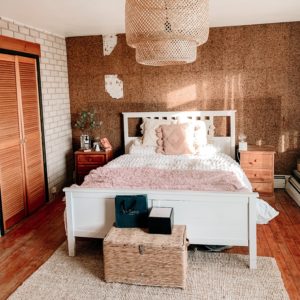
Our new house was built in the 60s and has some very 1960s decor! For example, our bedroom has two walls lined with cork panels! I do quite like the effect of the cork but the only problem was that during viewings, some bright spark had torn a piece of the cork off the wall to see what was behind it (the house was vacant at the time). This meant at least one of the walls had to be stripped because it would be impossible to match. It was also super old and had bubbled in places so a clean slate was definitely needed!
Preparation
I won’t dwell too long on removing the cork wall (but I will do a separate post on it because whilst it’s niche, it might help someone!). It was a much bigger job than I expected though, especially having to remove the glue residue! In the end I used plenty of Goo Gone Gel, a wallpaper stripper and a wallpaper steamer!
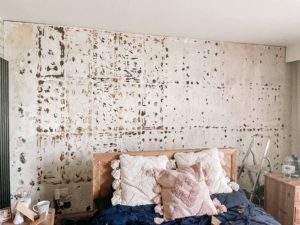
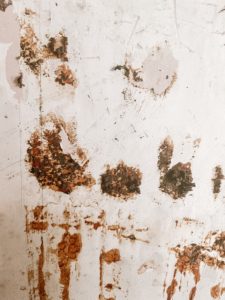
Eventually, I had a clean surface to work on. I used a mouse sander to sand off any small remnants of glue and uneven patches. The smoother the surface of the wall, the better your bedroom wall mural will look!
Buying The Wallpaper
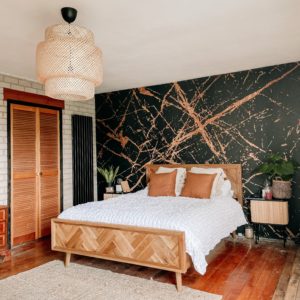
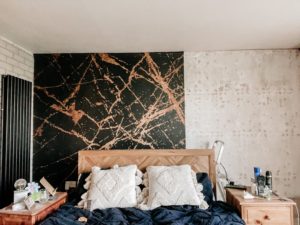
Then it was time for the exciting part: the wallpaper! Photowall kindly sent me a discount code to use on their website. I knew I wanted something dark and dramatic that fitted the sixties vibe of our home without being too kitsch or retro. They have so many designs that it can be a huge decision but because I knew that I wanted a black base I was able to filter by colour to narrow down the selection. I knew ‘Sun’ was the one I wanted as soon as I saw it!
What I will say here, is that I thought the design was metallic gold and it wasn’t. When it arrived the gold effect is a printed browny coloured shimmer. Luckily for me, it actually looks quite a lot like cork so ties in almost perfectly with the cork wall on the other side of the room! (Which will be staying put as it was so difficult getting it off the other side and it’s still in really good condition!) If I’d had my heart set on it being gold though I would have been disappointed so it’s really important to closely examine the photos of your paper before you purchase!
Next, I had to measure my bedroom wall so that the mural wallpaper would fit exactly. To remove any margin for error I added 10cm to each as the website advises and then typed the dimensions into the box on the website. It cleverly shows a preview of your design and you can reposition the pattern exactly as you want it to fit your space.
There are two types of wallpaper to choose from: standard and premium. Both are paste the wall wallpapers which is great as it makes the whole wallpapering process so much easier and, even better, the paste is included in your order! The main difference is that the premium Photowall wallpaper is scrape resistant and has an extra matt, anti-reflective finish. We have almost full length windows in our bedroom so it can get quite bright and I wanted the wallpaper to be as matt as possible.
After completing the checkout my order arrived within a couple of days in a neat, small box. The paper itself was really thick and felt incredible quality, almost more like a card than a paper. This is an added bonus as any lumps or bumps that were left, despite my sanding, have not shown through at all so it’s great for walls that may have a few imperfections.
Putting Up The Wallpaper
I made up the wallpaper paste provided with my order as per the instructions on the packet. Hands up here, I did this wrong because on the instructions included in the box it says use warm water but doesn’t say ‘warm’ on the paste itself. As it turns out, cold water works out just as well but to stay safe, stick to their instructions and don’t go rogue like I did!
Once the paste had thickened up I got on with applying the wallpaper. You’ll be pleased to know this is surprisingly easy! First use a paste brush to paste the wall, if you don’t have a paste brush just use a large paintbrush (that’s what I did!). You want an even coat that isn’t too thick as you don’t want bubbles.
The wallpaper comes on a numbered roll and you can cut each strip one at a time. This is so amazing because you really don’t have to worry about pattern matching when you’re cutting and takes the usual hassle of measuring out of the process which makes it so much quicker!
Before placing your first strip, use a spirit level to make a straight vertical line on the wall. Remembering that I had added the additional 10cm excess to my order, when I placed the first piece I made sure there was about 5cm overhanging at the top. Luckily, our wall was completely straight so I didn’t need overhang at the side but use your drawn guide to place your first piece so everything is completely vertical. Once the wallpaper is place, use a flat wallpaper smoothing brush first to run down the centre and then out from the centre line to each edge. This smoothes out any bubbles and makes sure your wallpaper is perfectly placed. I also used a small edge roller to make sure everything was firmly in place.
From there, I just had to cut out each piece along the big dotted lines, paste the next section of wall, line it up and smooth it down. Make sure that the edges of the paper are pressed tightly against each other, any space will stay that way and maybe even get slightly bigger as the wallpaper contracts as it dries. There wasn’t much shrinkage on mine but it’s still important to bear this in mind.
Lining up the paper was so easy, because you can line up the overhang at the top, there are only milimetres of adjustment to make. I flew through the process and it took me way less than an hour to have the whole wall finished! I carefully wiped off any wallpaper residue I could see and then left it to set.
Finishing Touches
Once it was dry I used a metal ruler and a Stanley Knife to trim the top and bottom of the paper to get a super smooth line. If you do this when the paper is still wet it can tear more easily so best to wait if you can. The rule makes sure that you’re trimming exactly along the floor/ceiling line and so your end result is perfect.

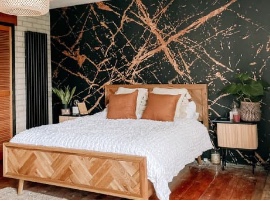
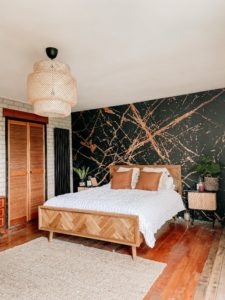
The finished bedroom wallpaper mural is so stunning! It has the dramatic effect I was looking for but doesn’t overpower the room. The connection between it and the other cork wall is so much better than had it been gold as I originally thought because the whole room is tied together so nicely. I would definitely use Photowall wallpaper again because it was such a simple process with such an amazing final result!
Photowall.co.uk Discount Code – 25% off Everything!
What do you think? Which bedroom wallpaper mural would you choose? To get 25% off everything at Photowall.co.uk especially for readers of Ohhidiy.com just enter: ohhidiy25 before 15th August 2021. Happy wallpapering!
You May Also Like
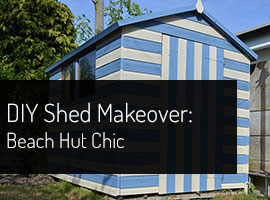
DIY Shed Makeover – Beach Hut Chic
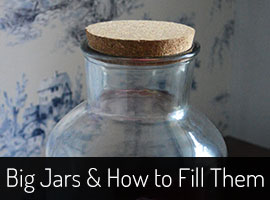
Things To Do With Jars