

DIY Fabric Rose Bouquet – My Hillary’s Country Crafts Competition Entry
Mother’s Day is coming up and there’s no better gift than a handmade gift – particularly for mums (my mum still has drawings I did for her when I was 3)! The timing of this tied in nicely with the Hillary’s Blinds Country Crafts Competition. Hillary’s have come up with a great competition where there’s a £1000 prize up for grabs. Using a 1m square piece of one of their fabrics you have to create an individual project and blog about it. I chose the Patina fabric because I’m a sucker for dogtooth!
No Mother’s Day is complete without a bunch of flowers so I thought I’d use my fabric to make some flowers that my mum can keep for ever (double the brownie points right?).
You’ll need: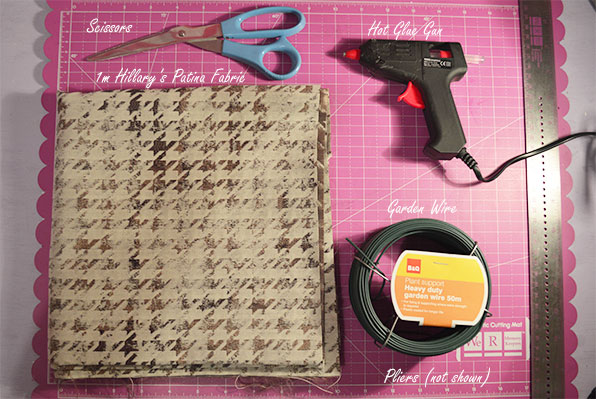
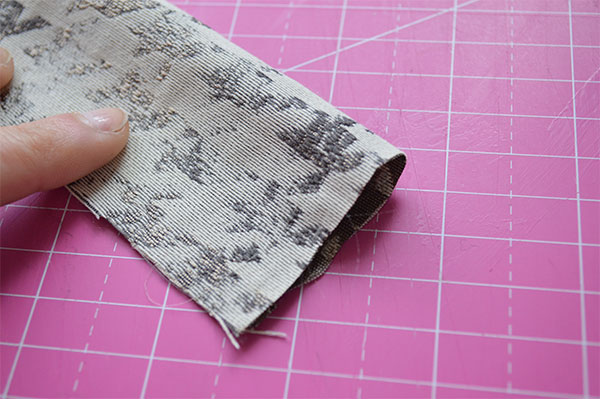
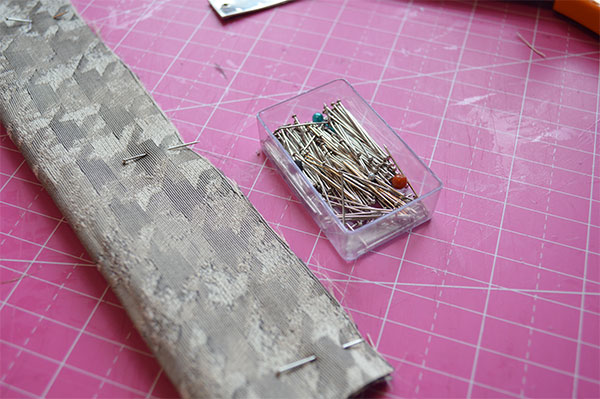
1. Cut 12 10cm x 50cm strips from the fabric. I added some FrayStoppa around the edges to prevent them from unravelling.
2. Get the first strip and fold it in half width ways (now 5cm) with the folded edge at the top.
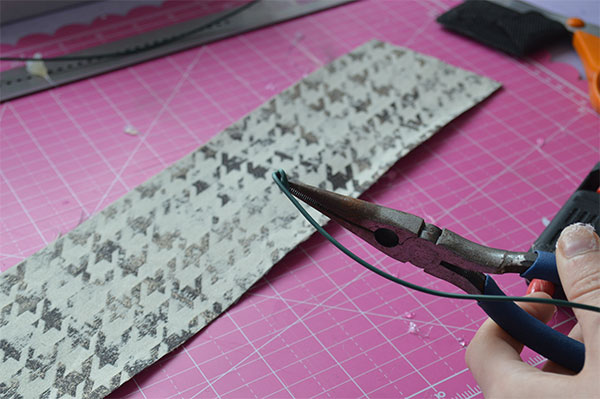
3. Cut a 45cm length of garden wire and using the pliars fold a knot at one end. This will go in the centre of the fabric flower and ensures the wire will stay in place.
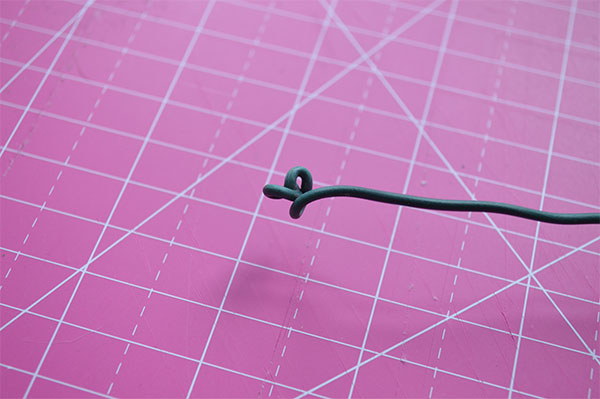
3. Fire up the glue gun and stick the knot of wire about 1cm away from one end of the fabric. Put more glue on the top of the knot and fold down the top corner over it and press down.
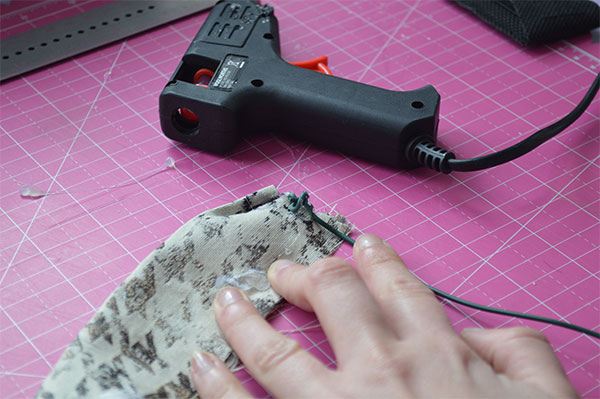
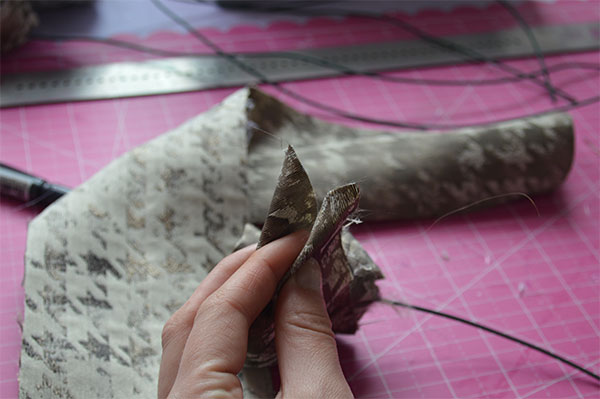
4. Begin add more glue to the stem of the wire and fold 1cm of the fabric over the wire, repeat for another 1cm to form the rose bud at the centre of the flower.
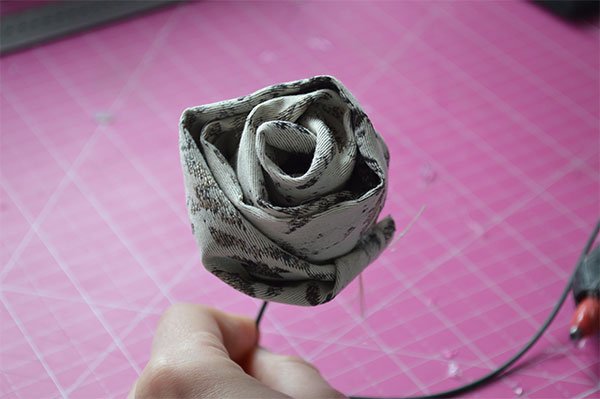
5. Pinching the edges of the fabric together wind slowly around bud pushing the fabric along so that it gathers in places. Add blobs of glue as you go to hold the rose form in place.

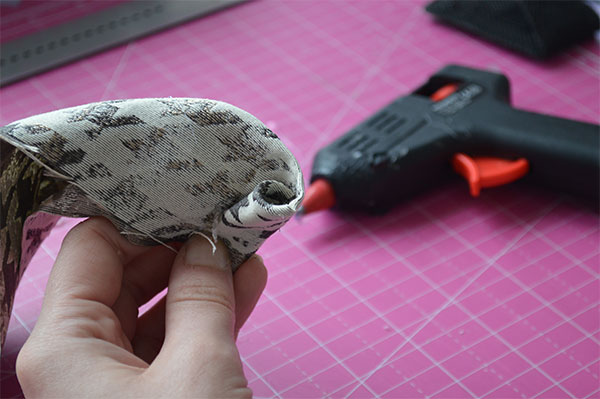
6. There will be excess fabric on the outside of the rose, pinch these in between your fingers, glue one side and fold the flap against the side of the rose to stick it into place. Repeat as you go along.
7. Continue to roll the rose in this way until there’s 10-15cm of fabric left. Glue here. Also place a blob of glue in between the edge of the fabric strip to glue together.
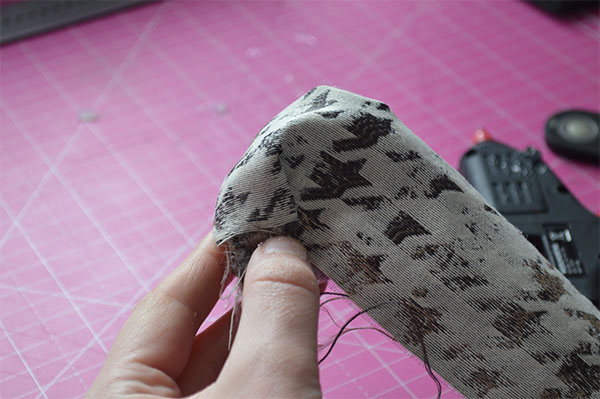
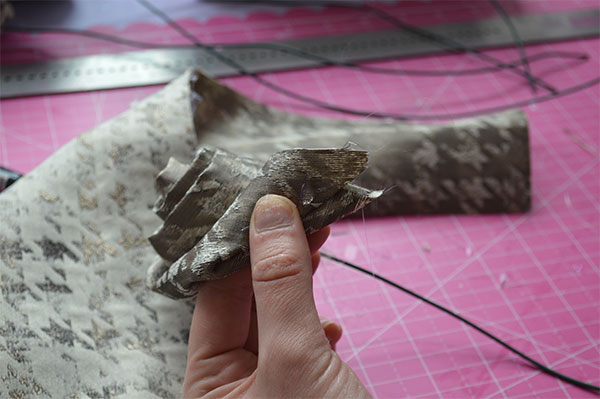
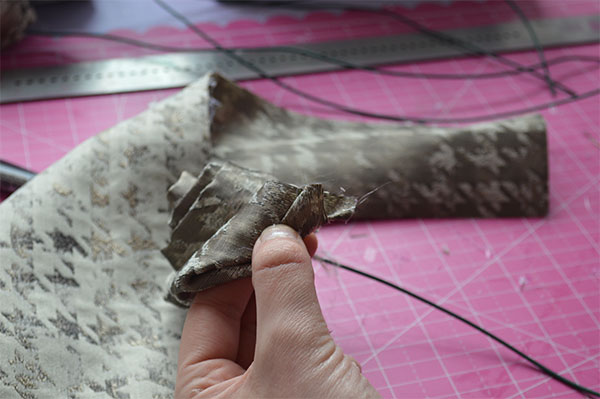
8. At the end of the fabric fold the two corners into points as shown.
9. Slightly seperate the points with the inside one slightly lower than the outside point. place a blob of glue about a centre from the inside point and fold the outside point over the top and hold until it’s stuck. Now contine to roll and glue the end of the strip into place. This gives you a tidy finish and prevents any fraying.
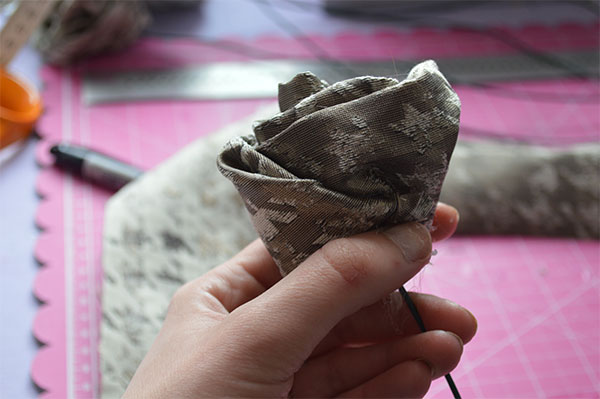
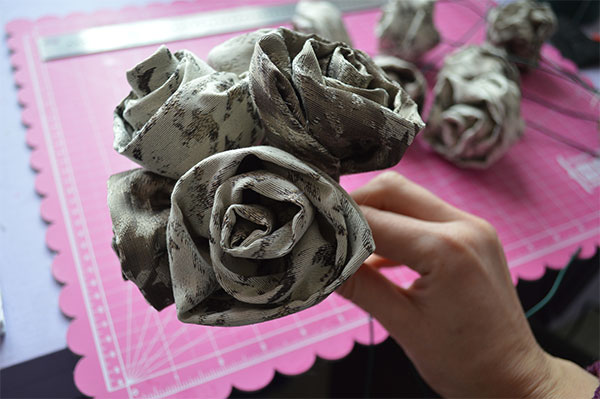
You now have one finished rose!
10. Repeat for the other 11 strips. The great thing about this fabric was that the pattern was reversed on the other side so I made 6 roses from one side and 6 from the other to mix it up a bit.

11. Once you have 12 roses you can wind them together to form the bouquet. Start with two roses, hold them together in a position you’re happy with and twist the wires around one another in a spiral to hold into place. Add roses one by one.
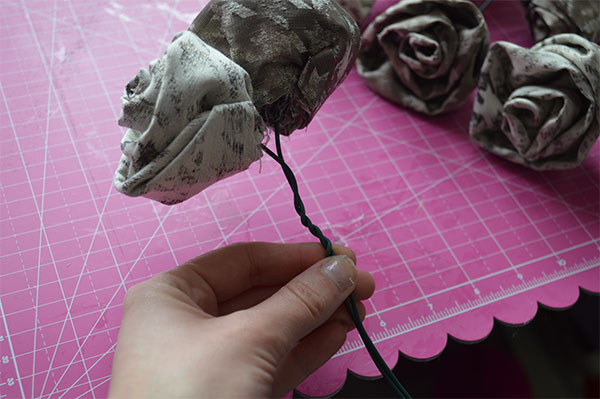
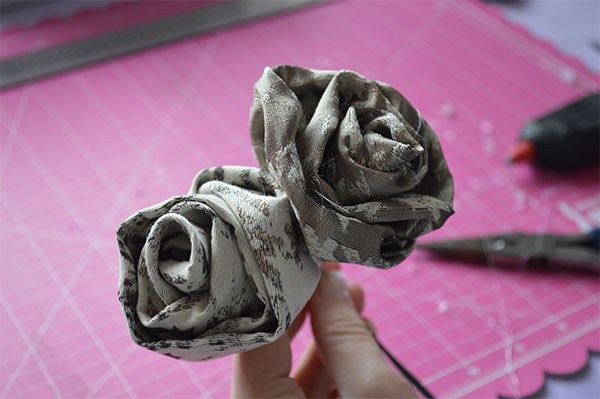
12. It’s worth noting that you can use as many or as few roses as you like for this. 6 roses made a smaller version of the finished bouquet.
13. Once you have all the roses fastened together trim the ends of the wires to the same length.
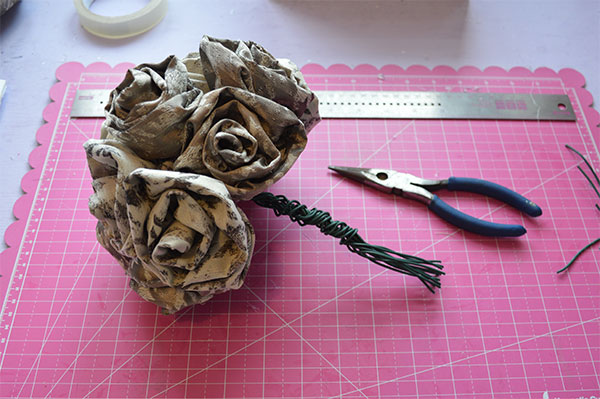
14. Now take a 10cm x 25cm strip of fabric (this will vary depending on the length of the cut wires), fold again with the right sides together and pin.
15. Stitch on the sewing machine (or by hand if you prefer).
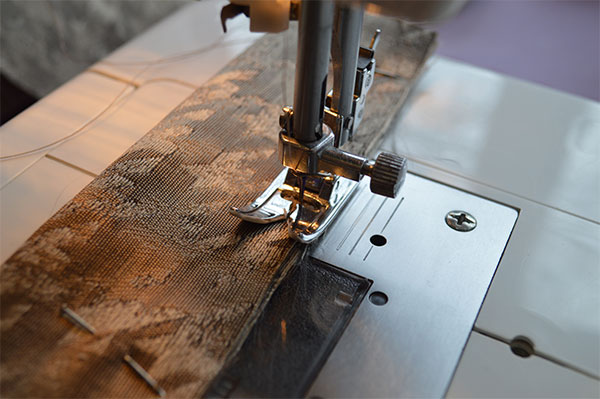
16. Use the spaghetti strap tutorial for step by step on how to do this easily. Turn in one end and stitch.
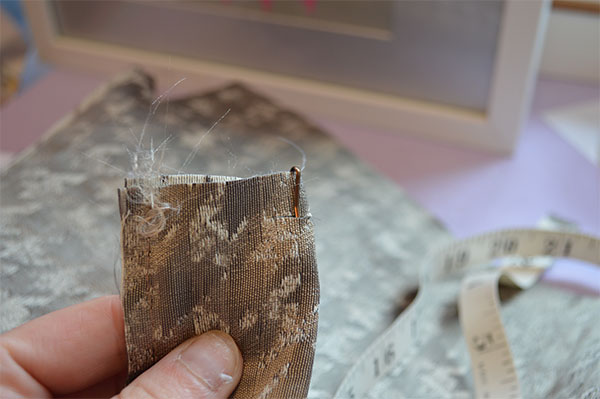
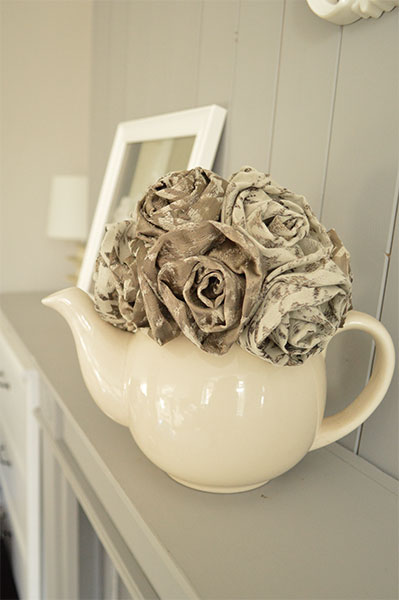
17. Now slide the cover over the wire and glue into place at the top. The bouquet is now finished!

It struck me, once the bouquet was done, that the colour palette lent itself to a bouquet of another sort so I put on my best (only) white dress and took some snaps in a different context! Not only is this great for mum’s to keep but, if you wanted to keep your handmade wedding bouquet (without having to stick it in the freezer or whatever people do with bouquets of real flowers), what better than way than having a fabric one that won’t wither. As I mentioned earlier, you can make smaller bouquets of 6 which would be perfect for bridesmaids and even have individual roses for the buttonholes. All of which you could make out of 2m of fabric which I’m sure is a hell of a lot cheaper than florist’s fees! 😉

If you’re not getting married anytime soon, why not present the flowers with a quirky twist by standing them in a teapot? I love this shabby chic idea and have a number of teapots scattered around my house. If that isn’t for you they look just as good in a vase!


One Comment
Josie
I love this, simple but very, very effective! Good luck with the competition.