DIY Boiler Screen: Covering up the Ugly
I hate how ugly my boiler is. It’s scratched and the plastic flap has yellowed in the sun and it’s just generally unsightly. In my eyes, when on display, it made my kitchen look like a crack den. I’m pleased to say that the idea for the screen was all my own and after being inspired by a pin board tutorial I realised I could make it a practical as well as aesthetically pleasing solution.
PLEASE NOTE: Not all boilers can be covered – please check the manufacturer’s instructions to confirm if your boiler requires ventilation.
Start by measuring your boiler on each side. You will need to add approx 3 inches to the width and height for the wood.
You will need:
3 x Plywood – cut to the sizes mentioned above. I got mine from B&Q.
Wadding – cut to same size as the wood
Fabric – I used upholstery fabric from Dunelm Mill. Add a seam allowance of depth of wood + 1 inch.
Ribbon (John Lewis)
Glue
Staple gun
Upholstery tacks (also Dunelm)
Hammer
Parcel Tape
Hinges and screws (Also B&Q)
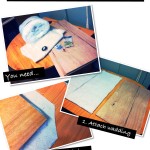
1. Glue wadding to corresponding sized pieces.
2. Lay one piece of fabric out and place one piece of wood in the centre, wadding side down. Snip off corners of fabric leaving allowance for the depth of the wood plus a couple of mm (sorry for mixing metrics!). Starting from one corner, fold the edge of the fabric around the wood and staple into place. Work round each edge pulling the fabric tight.
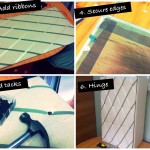
3. Measure and mark out regular intervals to position the ribbon. Cut the ribbon into strips. Staple one end of the ribbon to the reverse of the wood, wrap it round the front in the desired position and secure the end on the opposite reverse edge with a staple. Repeat for all the ribbons on the same diagonal. One complete begin on the opposite side but weave the ribbon alternately under and over the already secured strips. Repeat for all.
4. Using parcel tape secure the raw edges of fabric and ribbon to the board to prevent fraying.
5. Hammer upholstery tacks into each cross section of ribbon. Be careful if the upholstery tacks are longer than the depth of the wood – you may end up with holes in your work surface (I did!). If they do peep through just knock the ends downwards on the inside to avoid sharp edges.
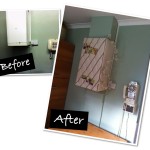
6. Now attach the hinges onto the inside edges. I used three hinges for each edge to ensure it would bear the weight. Now it’s ready to attach to the wall! If for any reason it doesn’t hang flush to the wall you can attach a screw in hook to the edge of the screen and screw an eyelet to the wall to keep it secure.
Now you can fill your noticeboard with photos, shopping lists or whatever else takes your fancy and never have to look at that many old boiler again! Unless you want to adjust the central heating… 🙂
You May Also Like
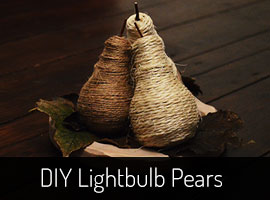
Upcycling Idea: DIY Lightbulb Pears
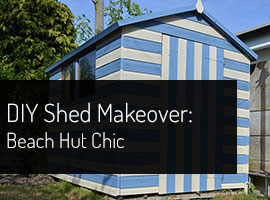
DIY Shed Makeover – Beach Hut Chic