DIY Camera Strap Tutorial from Riley Blake Chevron Fabric
Before I made the leap onto WordPress I had a Tumblr account where I posted my recent crafty projects, since then and even after porting it over to a new platform, one of my most popular posts has been this DIY camera strap tutorial made from a pair of old jeans. A year (and lots of use later) and I decided to make a new camera strap – a change is as good as a rest after all!
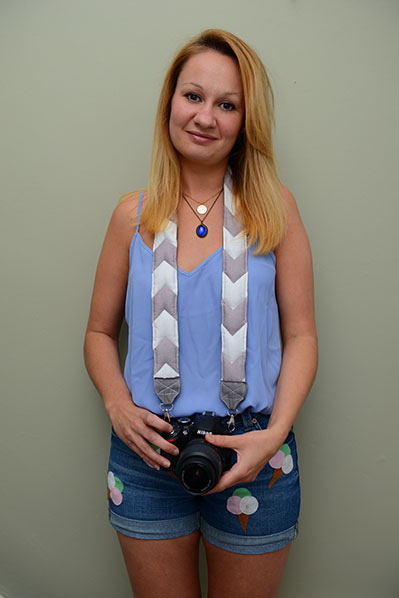
I bought a remnant of this Riley Blake chevron fabric ages ago and haven’t been able to make up my mind what to do with it until now.
To make the camera strap you will need:
2 strips of fabric 107cm x 7cm
1 strip of cotton wadding 1o7cm x 5cm
Extra fabric (approx
Sewing machine
Pins
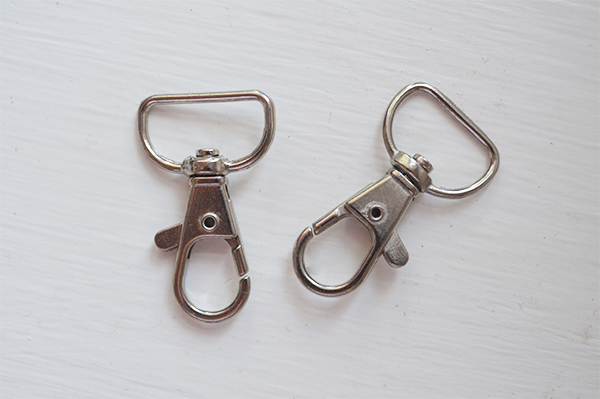
Lobster Clips
1. You can lengthen of shorten the strap to your body size, try it out with a tape measure before cutting the strips. I cut the chevrons so that the points ran down the centre of the strap, you can adjust the strap to the pattern of your fabric accordingly.
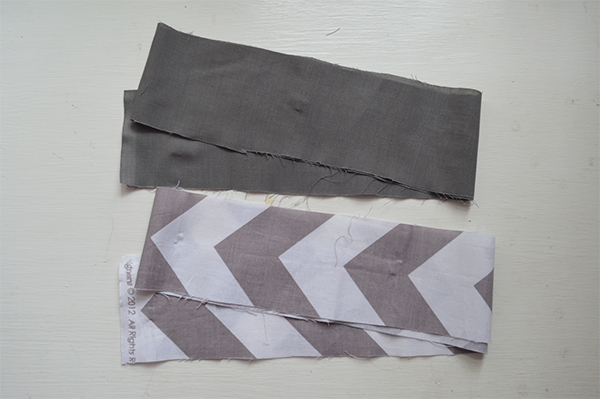
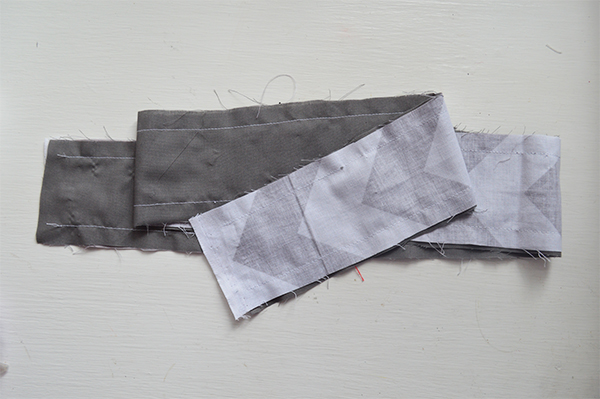
2. With right sides facing sew the two pieces of the strap together leaving a 1cm seam allowance on each side.
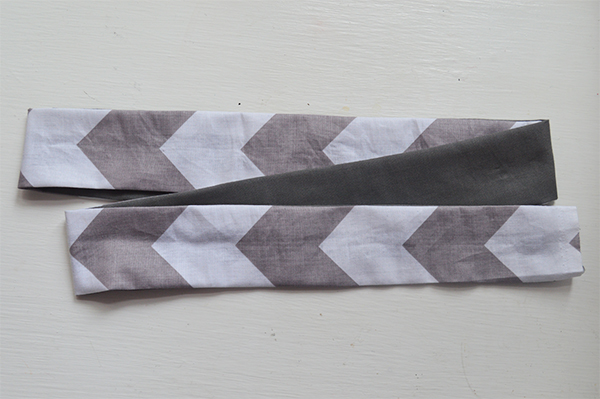
3. Turn the strap right side out.
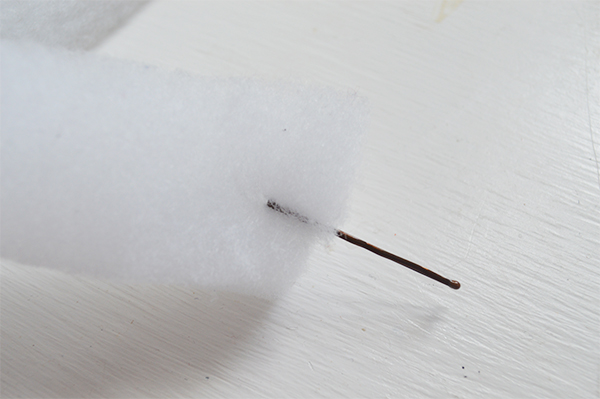
4. Pierce the end of the wadding with a hair grip and use the grip to thread the wadding through the centre of the strap.
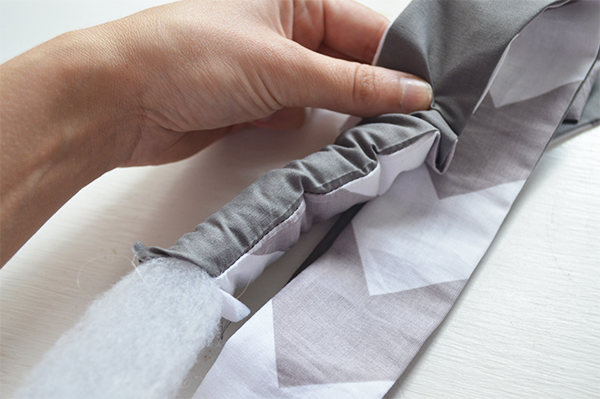
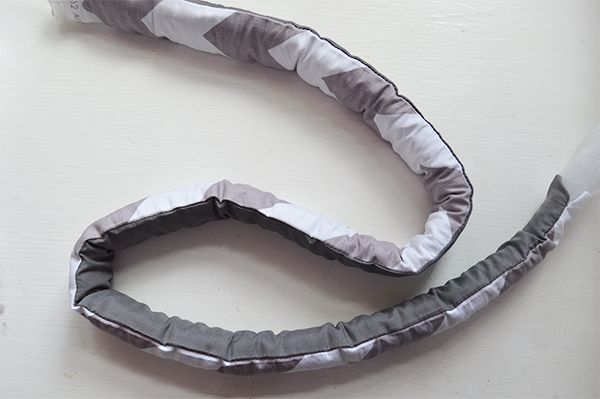
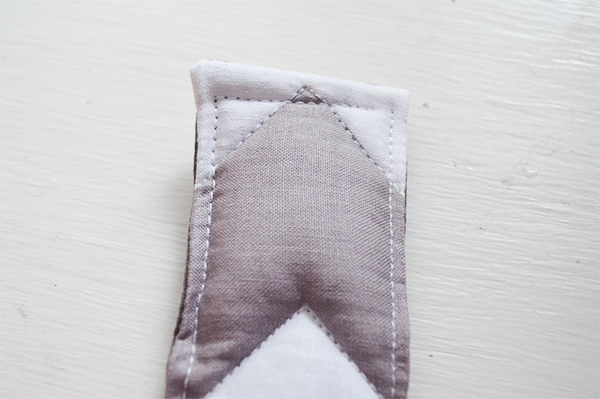
5. Stitch along the line of each chevron making sure to pull the fabric in between one line and the next so that there are no creases.
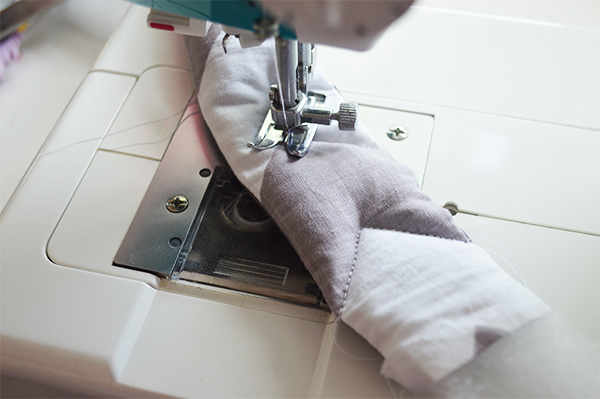
6. Stitch 0.5cm from each edge of the strap along the length, leaving 1cm at each end unstitched.
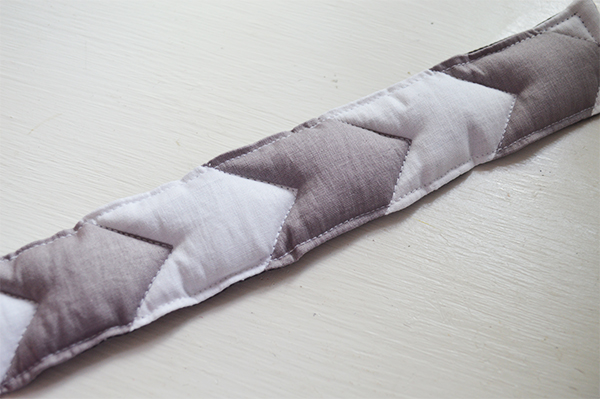
7. Fold in the unsewn ends and stitch closed.
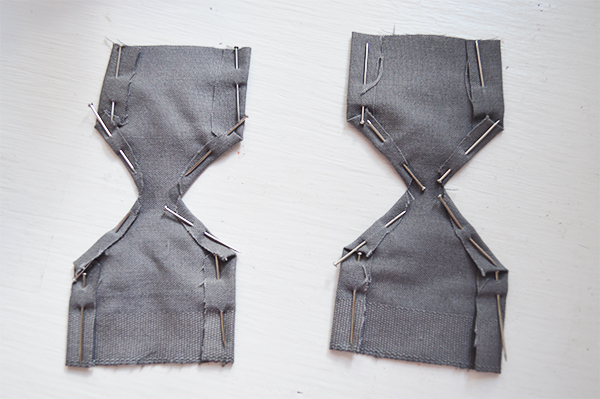
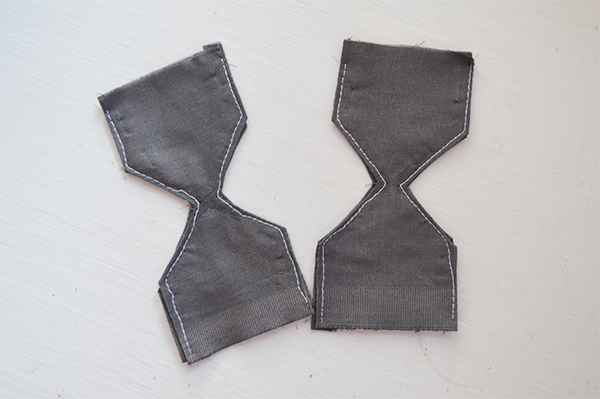
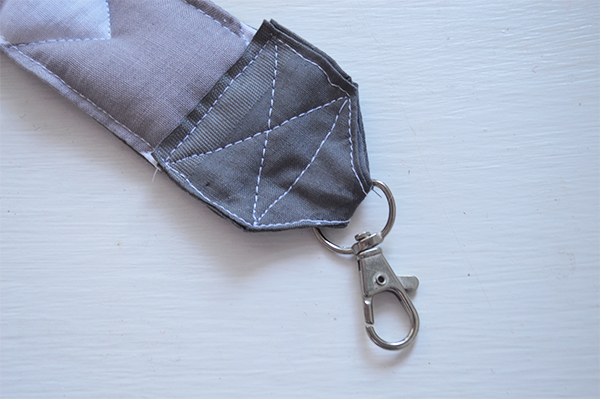
8. Cut the end pieces from your chosen fabric – I chose to make this trickier than it probably needed to be by cutting 2 pieces for each end and sewing together to conceal the edges – you can do this with leatherette fabric or oilcloth that doesn’t fray to remove the need for this part.
I folded in the edges of each piece, pinned, pressed and then paired wrong sides together and topstitched into place.
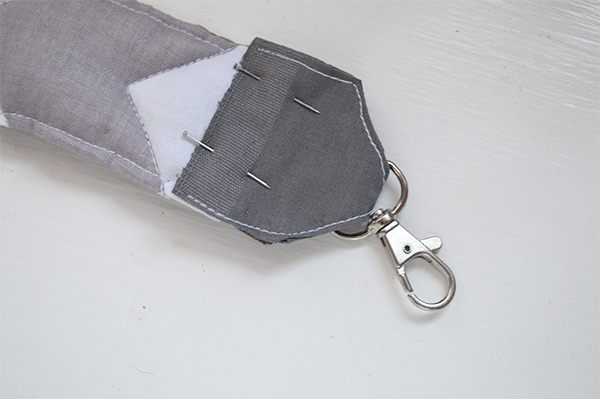
9. Sew the underside edge to the strap overlapping about 1cm from the end. I stitched and backstitched to keep the strap secure.
10. Thread the lobster clip onto the flap of fabric and then fold the fabric in half and stitch to the strap. Stitch a square with interlocking diagonals for extra strength in the strap – remember it needs to bear the weight of the camera. Repeat for the other end.
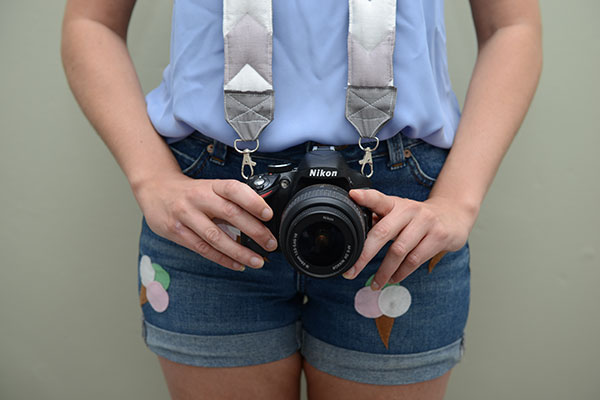
Your strap is now all finished and ready for all sorts of adventures! I find it’s important to have a strap with some padding to keep your neck from aching – the canvas ones that come with the cameras just don’t cut it!
Whilst the chevron fabric made the quilting pattern a no brainer, if you wanted to make this with other fabric you could easily do straight or wavy lines instead. You could also use plain fabric and get extra fancy by quilting a heart, triangle or star motif running down the strap.
Hope you like the tutorial, leave me a comment and let me know !


You May Also Like
Fabric Crush: Chevrons

Back to Basics: Free Baseball Top Sewing Pattern