
Ikea Hack | Ikea Latt Table Makeover | DIY Chalkboard Table
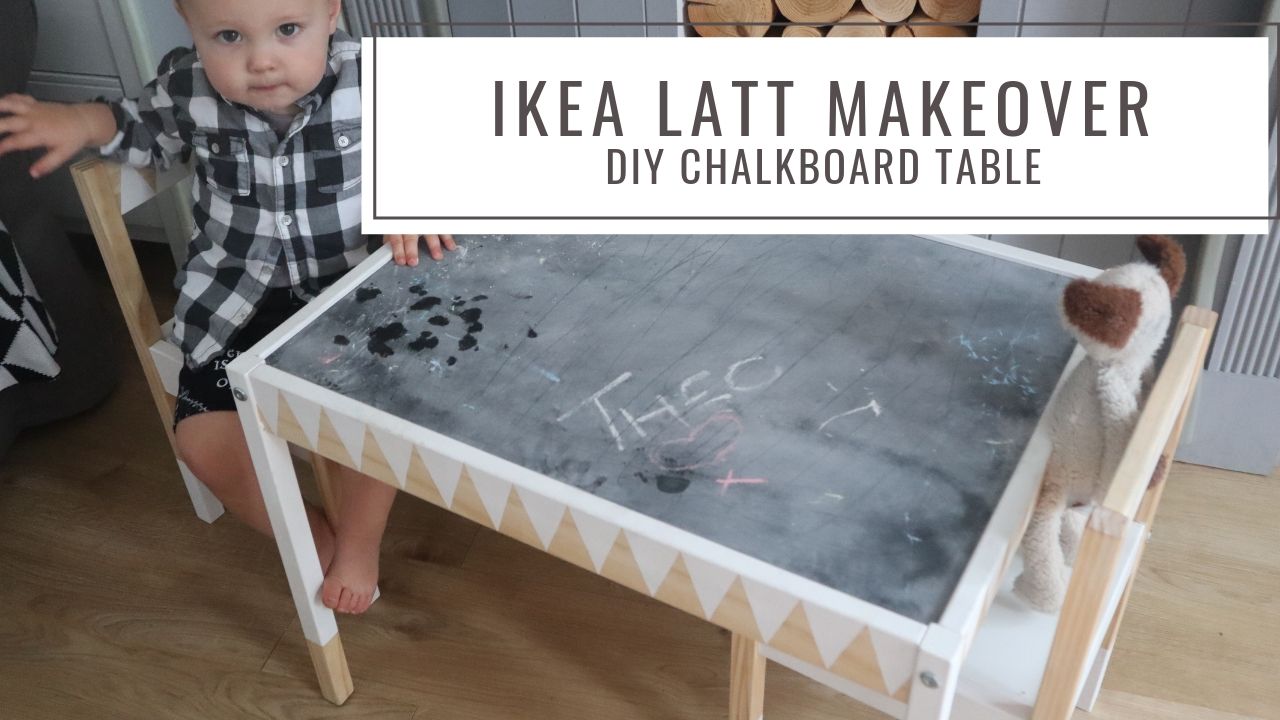
Ikea hacks are my favourite thing to do, I’m a big Ikea fan and I just love upcycling something that’s cheap and cheerful into a one off, unique piece. In this tutorial I’m going to show you how I did a makeover on the Ikea Latt Table and turned it into a DIY chalkboard table.
The Ikea Latt table and chairs is a great little set for a toddler and it’s a real bargain at just £20. But let’s be real, it’s basic right? It can also look pretty shabby pretty quickly once it’s had a few grubby little fingers on it! By pimping it up a little it gives it more longevity and it’s easy to make it fit in with the decor in your house rather than looking like something you’ve stolen from a doctor’s waiting room!
Read on for the tutorial or you can watch a video tutorial here:
Materials
For my Ikea Latt Table Makeover I used:
- Ikea Latt Table & Chairs (obvs)
- Paint (I used Deco Chalk Paint £5 from Aldi)
- Masking Tape
- Paint Brushes
- Chalkboard Paint (I used Rustoleum Spray Chalkboard Paint)
- Furniture Sealant (I used Rustoleum Furniture Lacquer in Matte)
- Roller
- Fabric
- Glue
Method
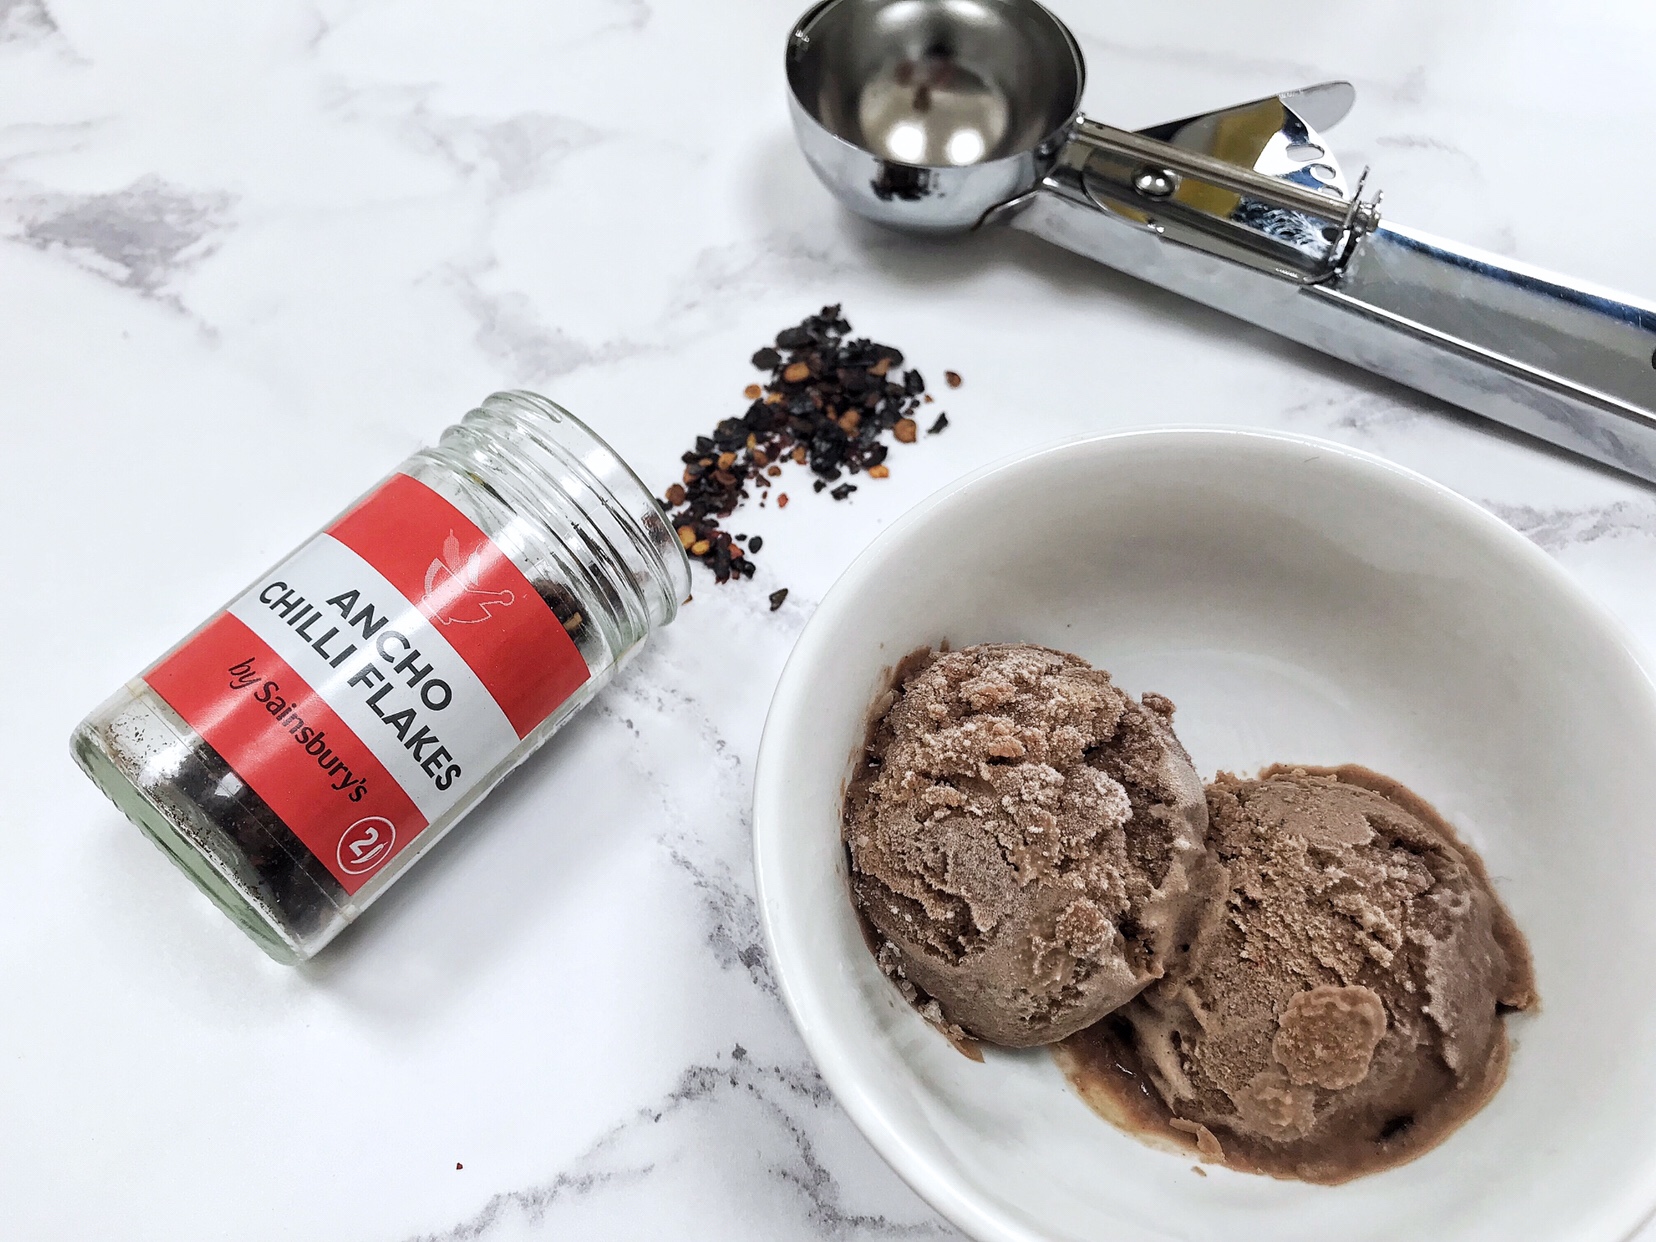
First I started with the chalkboard. I took the table top and sprayed the chalk paint on the reverse side. This gives you the option to flip the table top if you want to use it as a normal table. You don’t need to use spray paint for this, I was lazy and it was all they had in B&Q. I’ve heard that Wilkinsons offer a cheaper version in a pot for around a fiver.
After applying the paint in light coats about 30 seconds apart I left it to dry. Once fully dry the next step is to rub the side of a piece of chalk all over the surface of the paint and then wipe it off. Now it can be set aside for later.
Masking
Next came the masking for the design. This was the time consuming bit because I chose quite a complicated design to mask off, if you were just painting the entire table or picked an easier design like stripes then this wouldn’t take any time at all.
First I measured the back of the chair and divided it into 5, this gave me a width of 4.7cm for each triangle. I then used tailor’s chalk to mark off the top and bottom points of each triangle. Chalk is great for this because if you used a pencil it would stain on the untreated wood but chalk rubs straight off. Axe head chalk or chalk pencils allow you to be really precise with this.
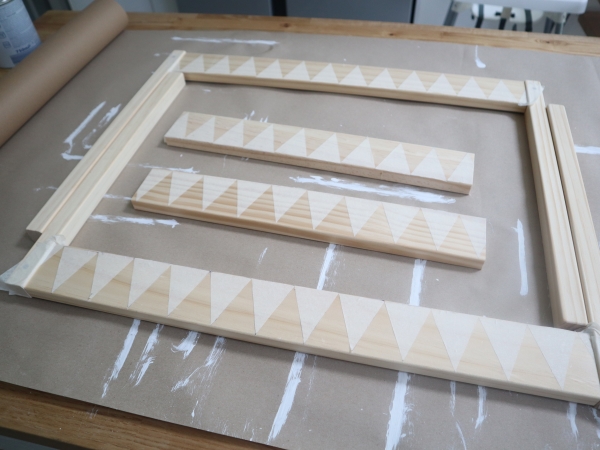
Next I measured the height of the strut – I did find that the height slightly varied from one end of the chair to the other so I ended up with a few triangle templates. I cut the templates out of paper and then used this to cut the masking tape into the individual triangles. I obviously used the wide masking tape for this – it’d be really hard to do this with the thin stuff! If you want to recreate the same design here be prepared for a lot of cutting and sticking! It’s quite satisfying though in a weird way.
Painting
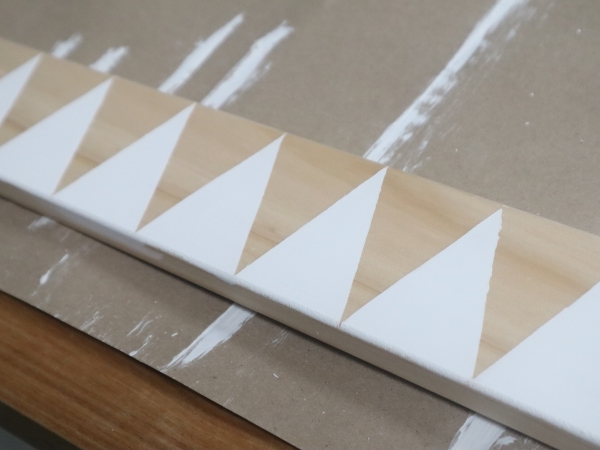
For the Latt chairs I wanted to leave the majority of the wood exposed so apart from the upward triangles I only paint the struts around the seat and 10cm at the bottom of the chair legs. For the Latt table I reversed the design. I did this because I think that the table is more likely to get dirty and I think the painted surface will wipe better and will generally look better than the natural wood. I painted the downward triangles for the table and the only other area left as natural wood was 10cm at the bottom of the table legs.
Make sure you remember to paint the inside lip of the table top and chair seats because it will be visible once all fitted together.
When I painted the backs of the chairs I used a narrow painter’s paint brush and it applied the paint too heavily so the masking tape was soggy and the lines weren’t crisp. To combat this I used sand paper to lightly sand away the wibbly bits. For the table, I switched to an artist’s flat paint brush which meant I could apply a much thinner and more controlled layer of paint. This led to much sharper edges when I pulled the masking tape off so I’d definitely recommend this approach. I did apply three layers of the chalk paint here to make sure that there was full coverage but each coat dried much quicker so it didn’t take any extra time.
Finishing
Once all the paint was dry I gave it all a couple of coats of the Rustoleum Furniture Lacquer. I used a small oil based gloss roller to apply it so it didn’t leave brush strokes and there were no drips. This is a really important step because you’re painting the table and chairs for little ones who are, undoubtedly, going to make a dirty, great mess at every opportunity! The coats of lacquer mean that the table won’t stain as easily and can be wiped clean – essential! You’ll also have lacquer left over for any ikea hacks that you want to do in the future!
Upholstery
I saw a lot of photos on pinterest from people who had managed to upholster the chair seat with a cushion. I tried to do this and let me tell you, it was practically impossible without sanding away 50% of the seat depth! In the set that I got at least, the table top and seat sections fit very snugly in the grooves, so snugly in fact that even one layer of fabric required the seat panels to be sanded!
Before resorting to the sanding I did put the chairs together after my failed attempt at upholstery but it just looked a bit plain so I took them apart again and added the fabric. I used a mouse sander on the edges of the seat panel to make enough room for the fabric. I drew round the panel on the fabric, cut it out and the glued the material down with Gorilla glue. Once dry, I slid it into place in the seat and was careful to make sure that all the edges of the fabric were tucked in.
I did also treat the fabric with fabric protector that I bought from Dunelm just for that extra bit of protection against stains.
Building
When it came to putting the Ikea Latt table and chairs together it was actually really easy. To build the set you only need an allen key (supplied), the instructions were easy to follow and it took less than 15 minutes to get it all made up.
First Impressions
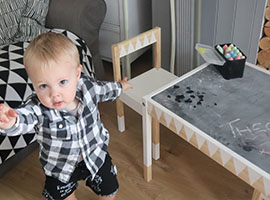
Theo absolutely loves the chalkboard table top but his favourite part is the chairs. He’s a little spider monkey and loves to climb up and down onto them and put Bobo, his favourite soft toy, on the seat.
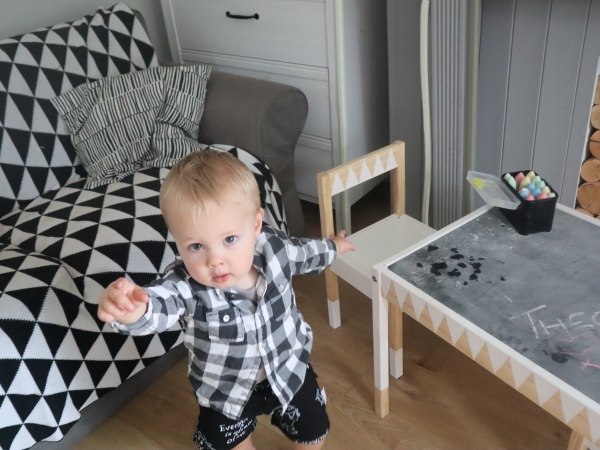
I love having the set in the lounge because it looks so cute and really matches our home decor. I probably spent less than £30 on the materials and the Ikea Latt table and chairs set was only £20 so I’m really pleased to have been able to create such unique toddler furniture for £50!
More recently, I’ve spent an additional £20 and ordered some acrylic from an online store. It has been cut to size to lay over the chalkboard so it can be used as a properly functional table. You don’t have to do this but things can get a bit dirty on the chalkboard table top so it is worth the investment. I got panels to cover to the chair seats too for a bit of extra protection for the fabric. They haven’t arrived yet though so will update this when I’ve tried it out!
I hope you’ve enjoyed this tutorial and it has inspired you to create your own Ikea hack with the Latt table and chairs! Let me know what you think of mine in the comments below.


One Comment
june
Hi, i love your makeover! I plan to do the same too! anyway do you still have the measurement for the acrylic? I find it pretty hard to measure the perfect size to fit the table due to the corner. Thanks!