Ikea Duktig Makeover | DIY Play Kitchen
I’m not the first to do an Ikea Duktig makeover but everyone has their own style and this version of the play kitchen is 100% my vibe!
At the bottom of our kitchen we had the perfect space for a play kitchen for Theo. I designed our kitchen from scratch and there was no way I was going to put something in it that didn’t fit in completely! When I saw how easy it was to makeover the Duktig kitchen I just knew I had to get one and make it look just like ours! And guess what? It was pretty easy!
You can watch my Ikea Duktig makeover tutorial vlog below or keep reading for the step by step instructions!
For the Ikea Duktig makeover I used:
- An Ikea Duktig kitchen (obvs! but you could follow this tutorial in a more general way for another brand’s play kitchen)
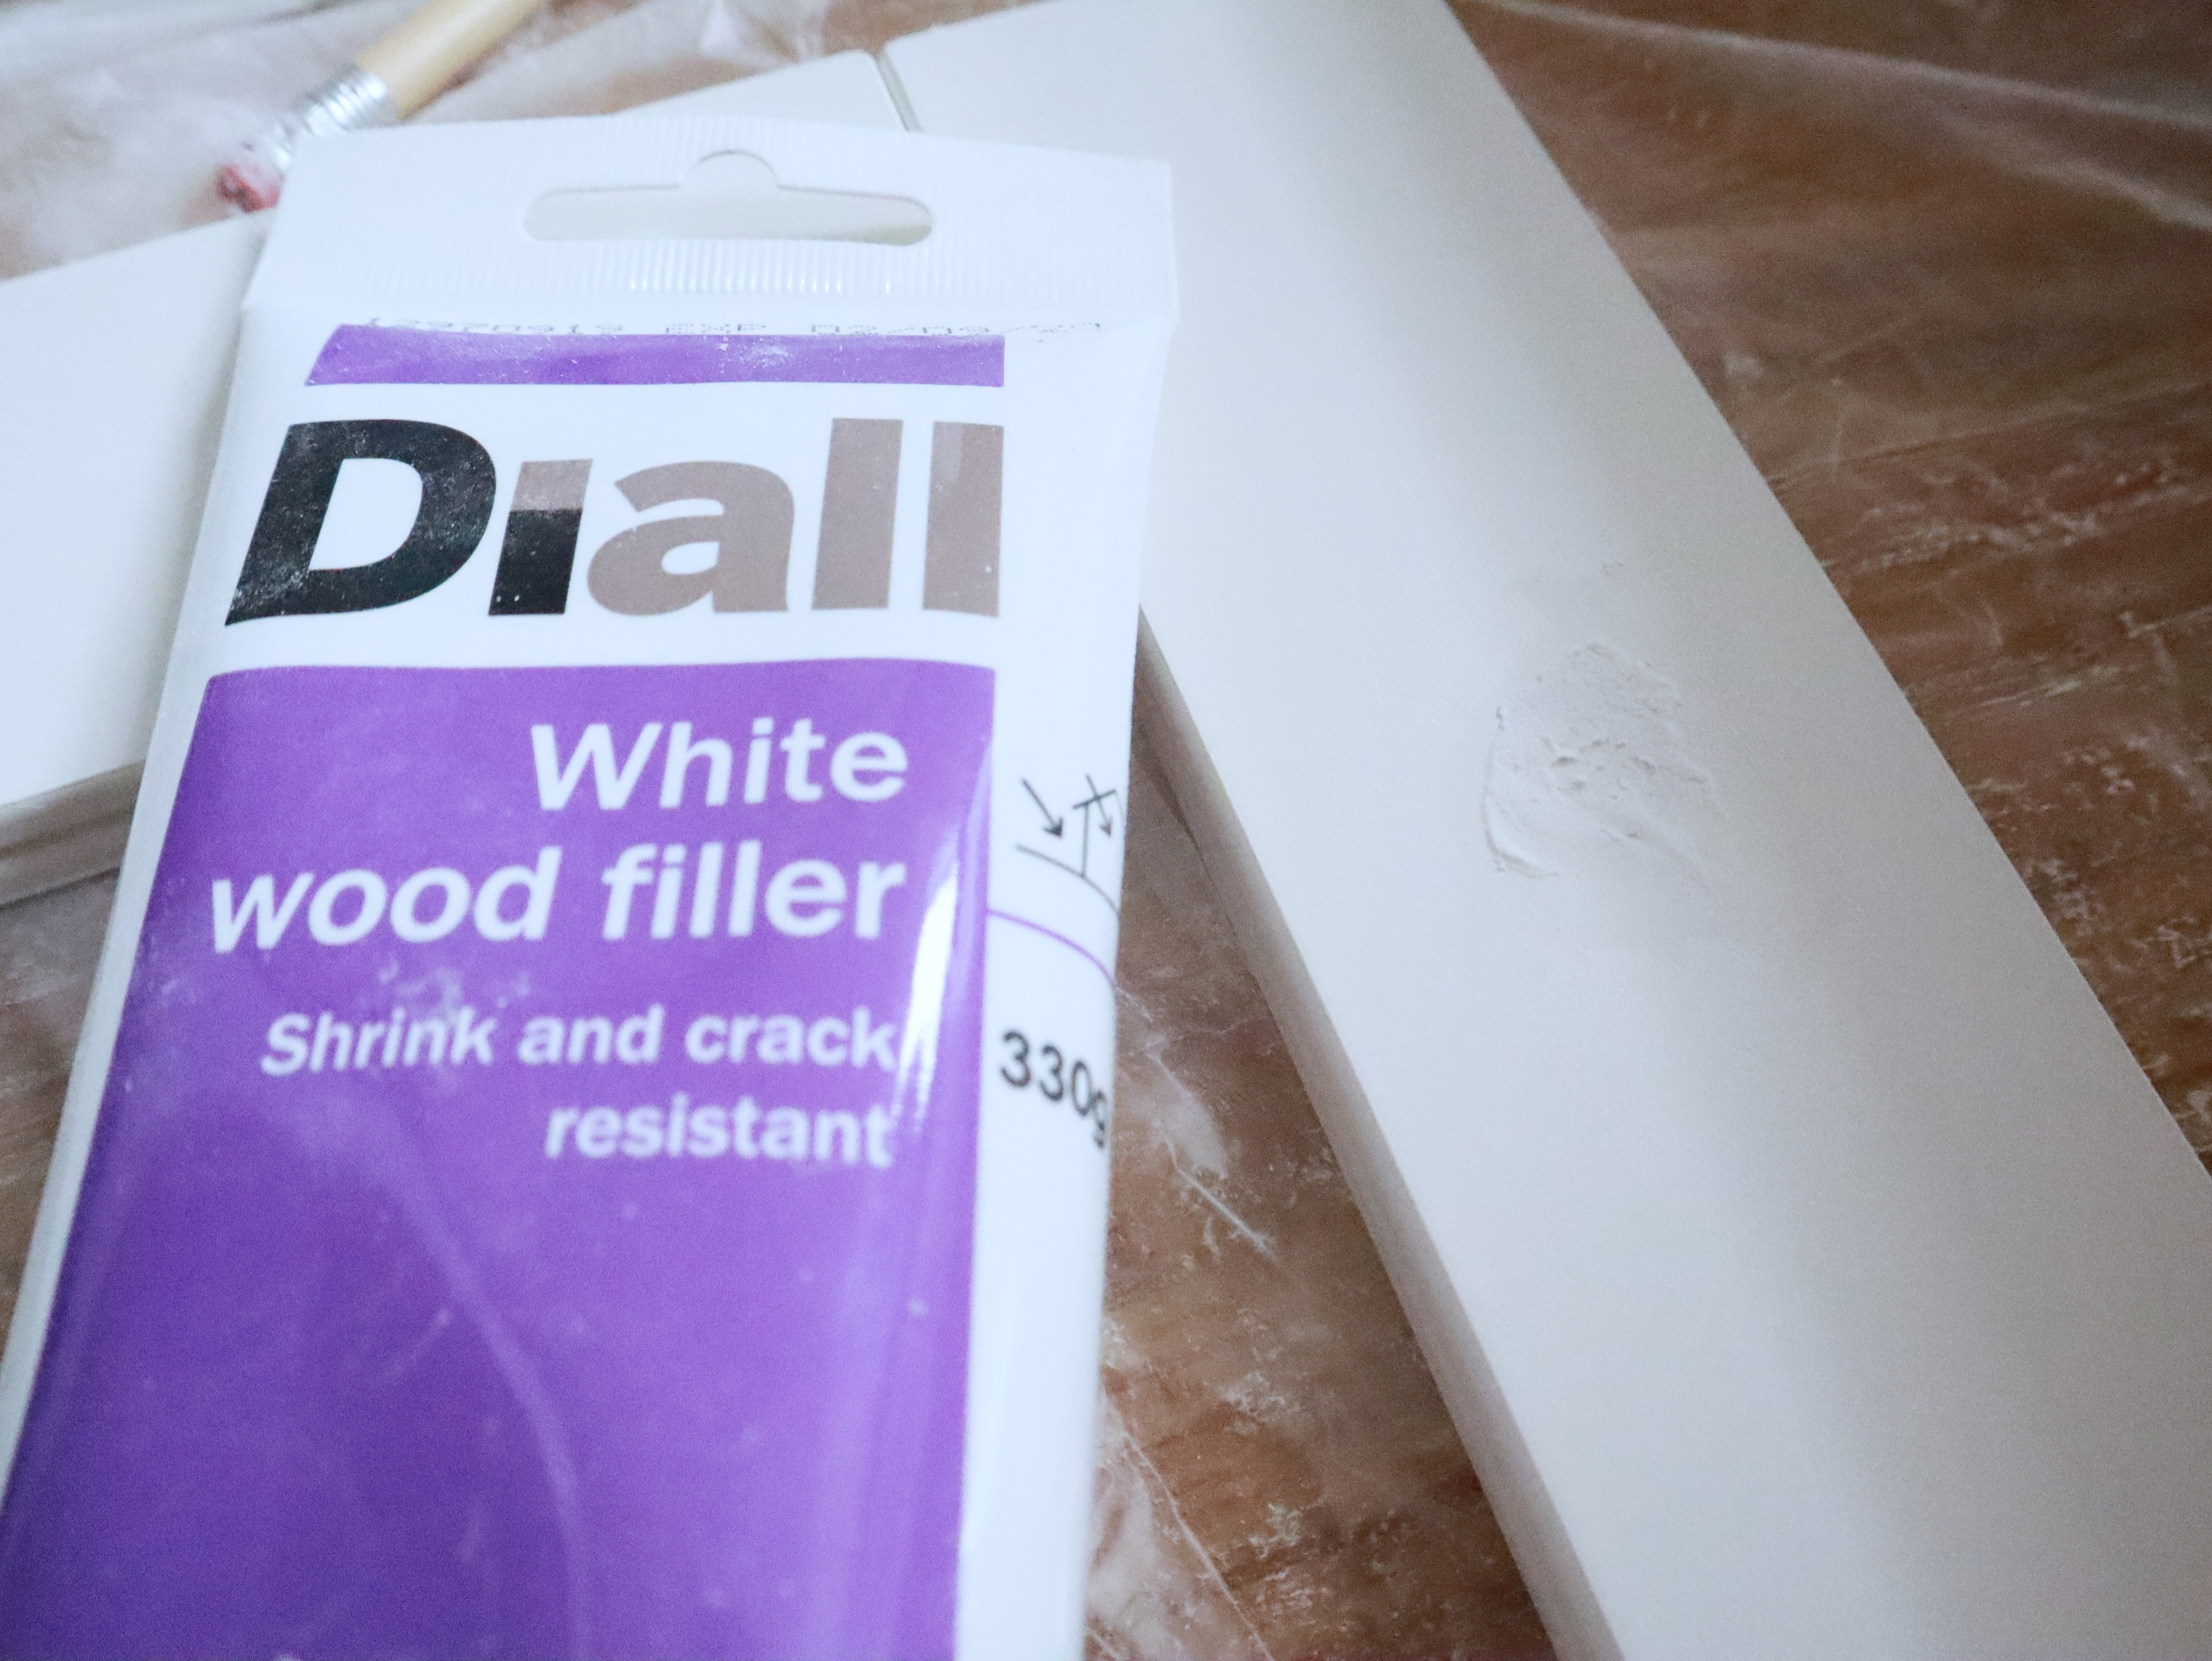
- Woodfiller
- Sand Paper (with Mouse Sander)
- Masking Tape
- Spray Primer (Rustoleum)
- White Kitchen Paint
- Small Paint Rollers & Tray
- Rustoleum Bright Gold Spray Paint
- Rustoleum White Spray Paint – Matte Finish
- Polished Brass Cup Handles (I bought additional screws that were 16mm long as the ones that came with the handles were too long)
- Polished Brass Cupboard Knobs
- Drill with 3mm drill bit
- Rustoleum Spray Sealant – Matte Finish
- A1 Foam Board
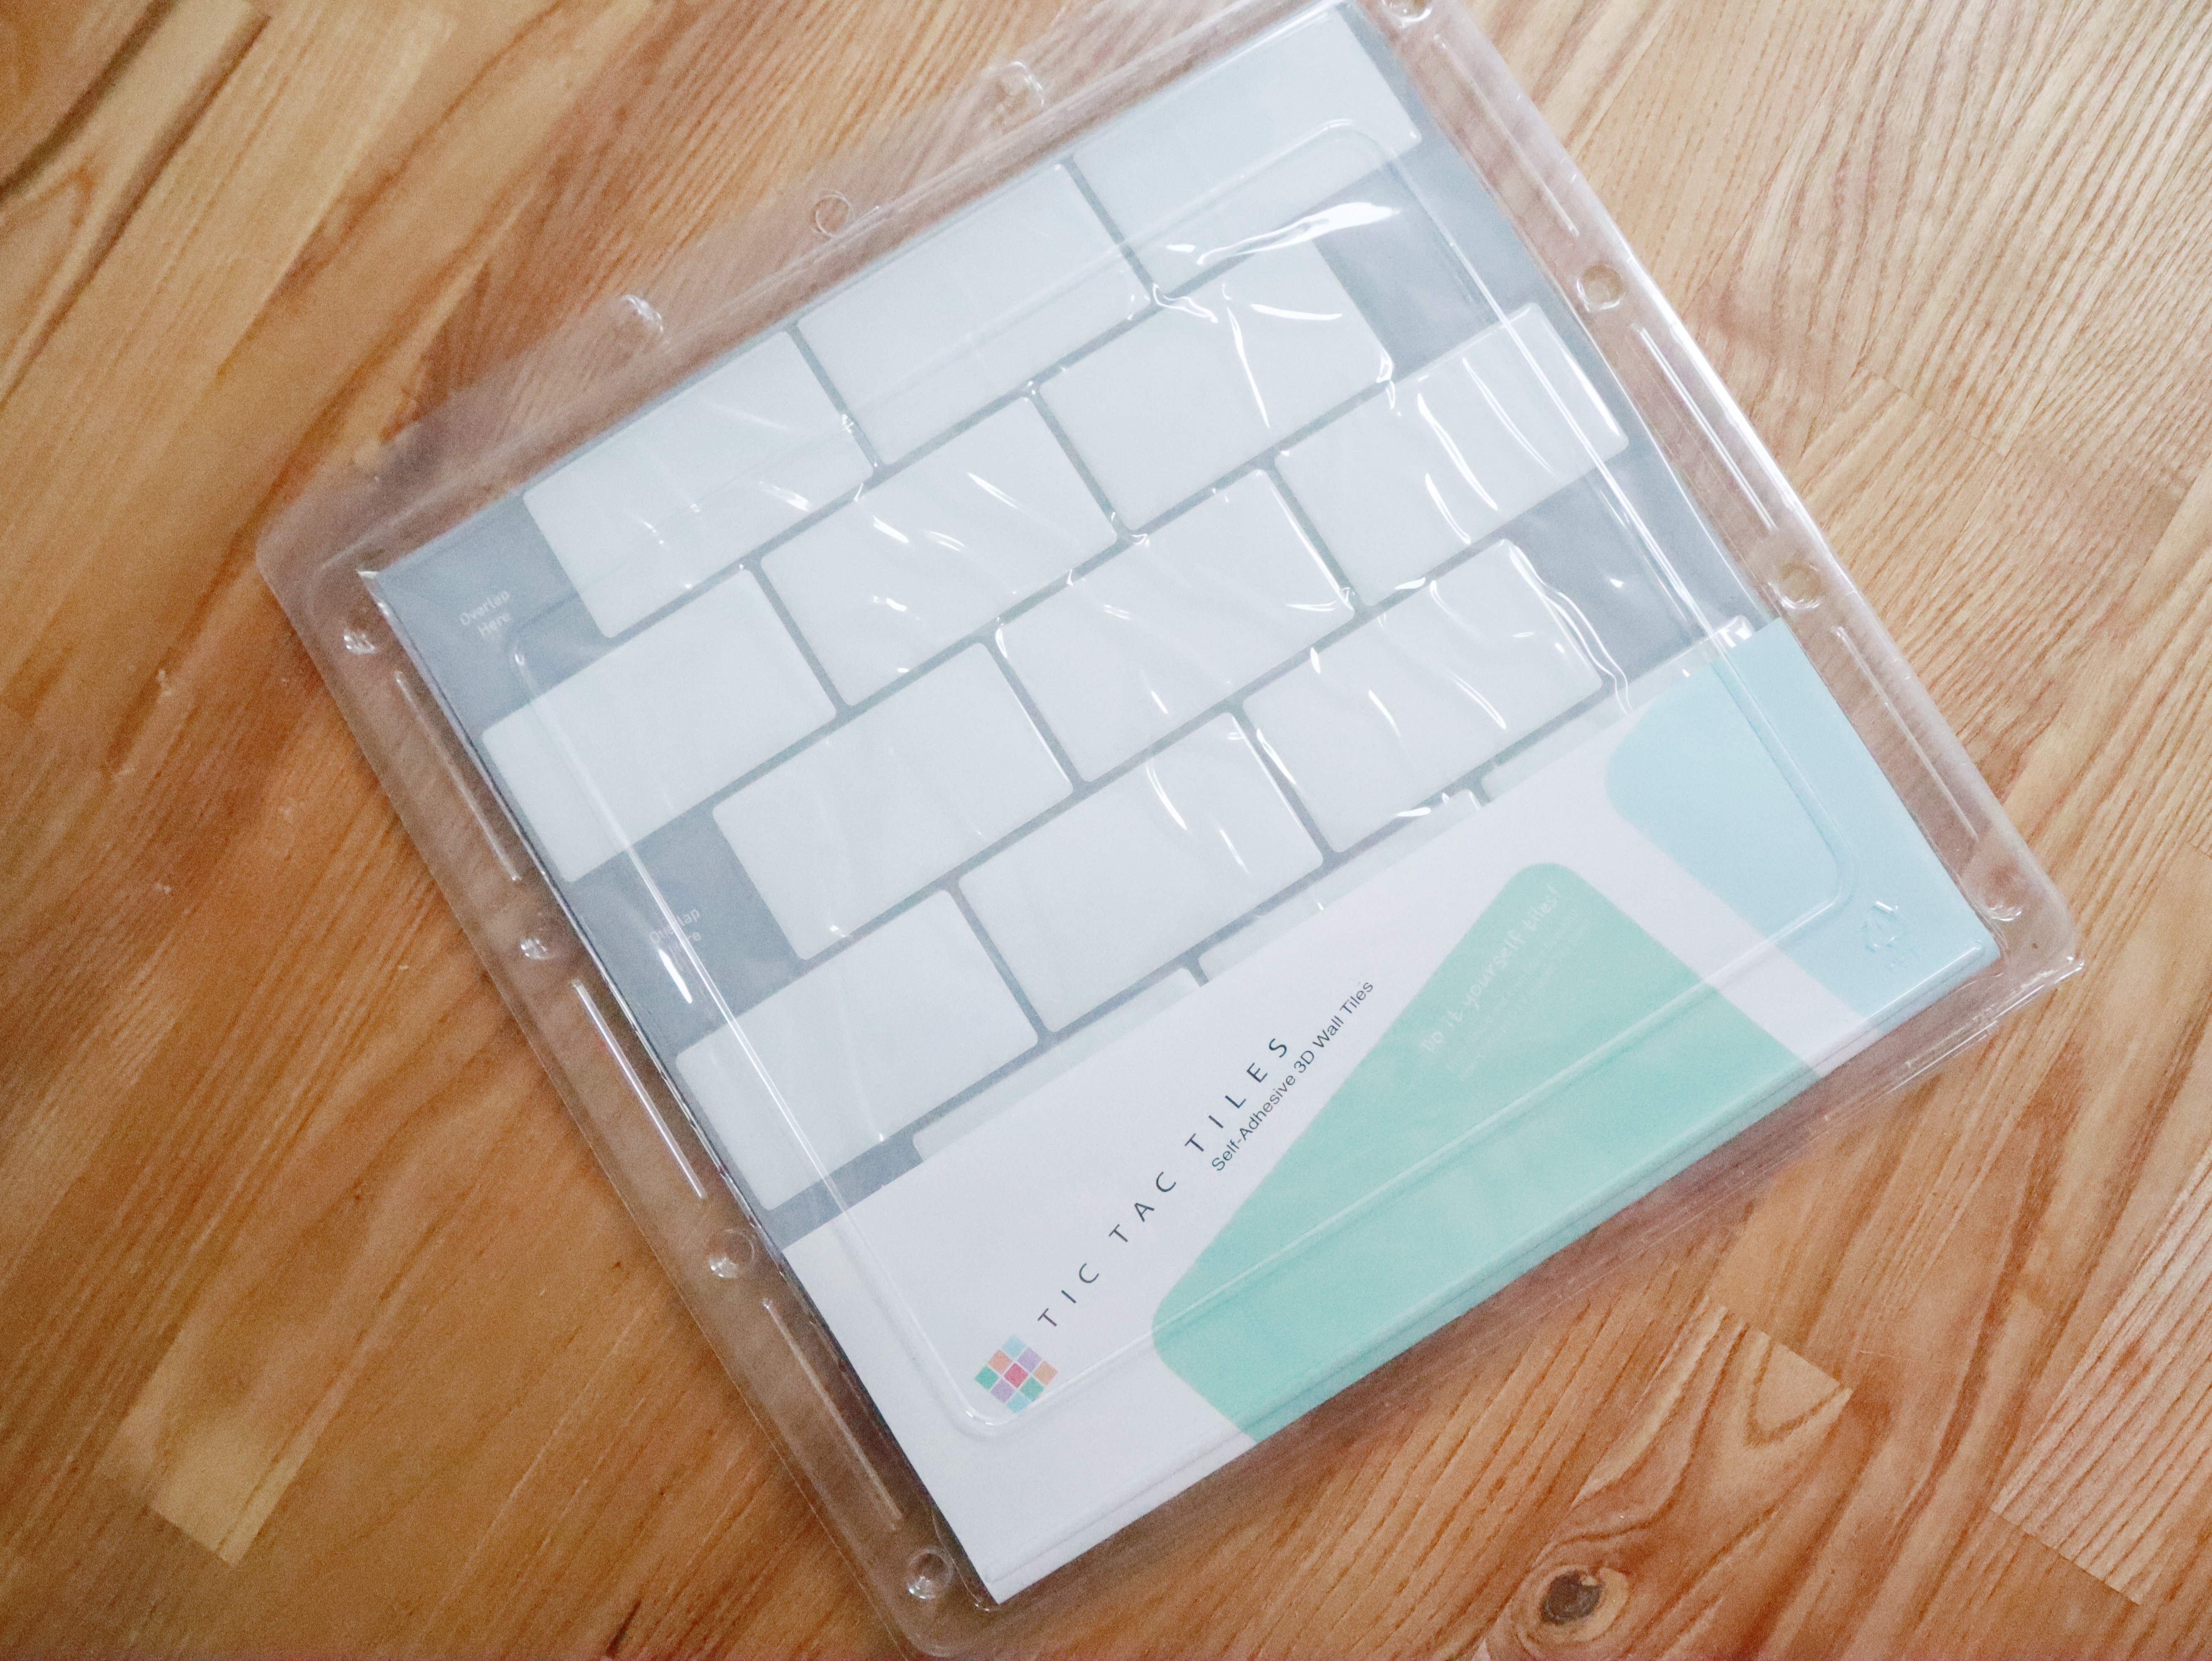
- Adhesive Subway Tiles
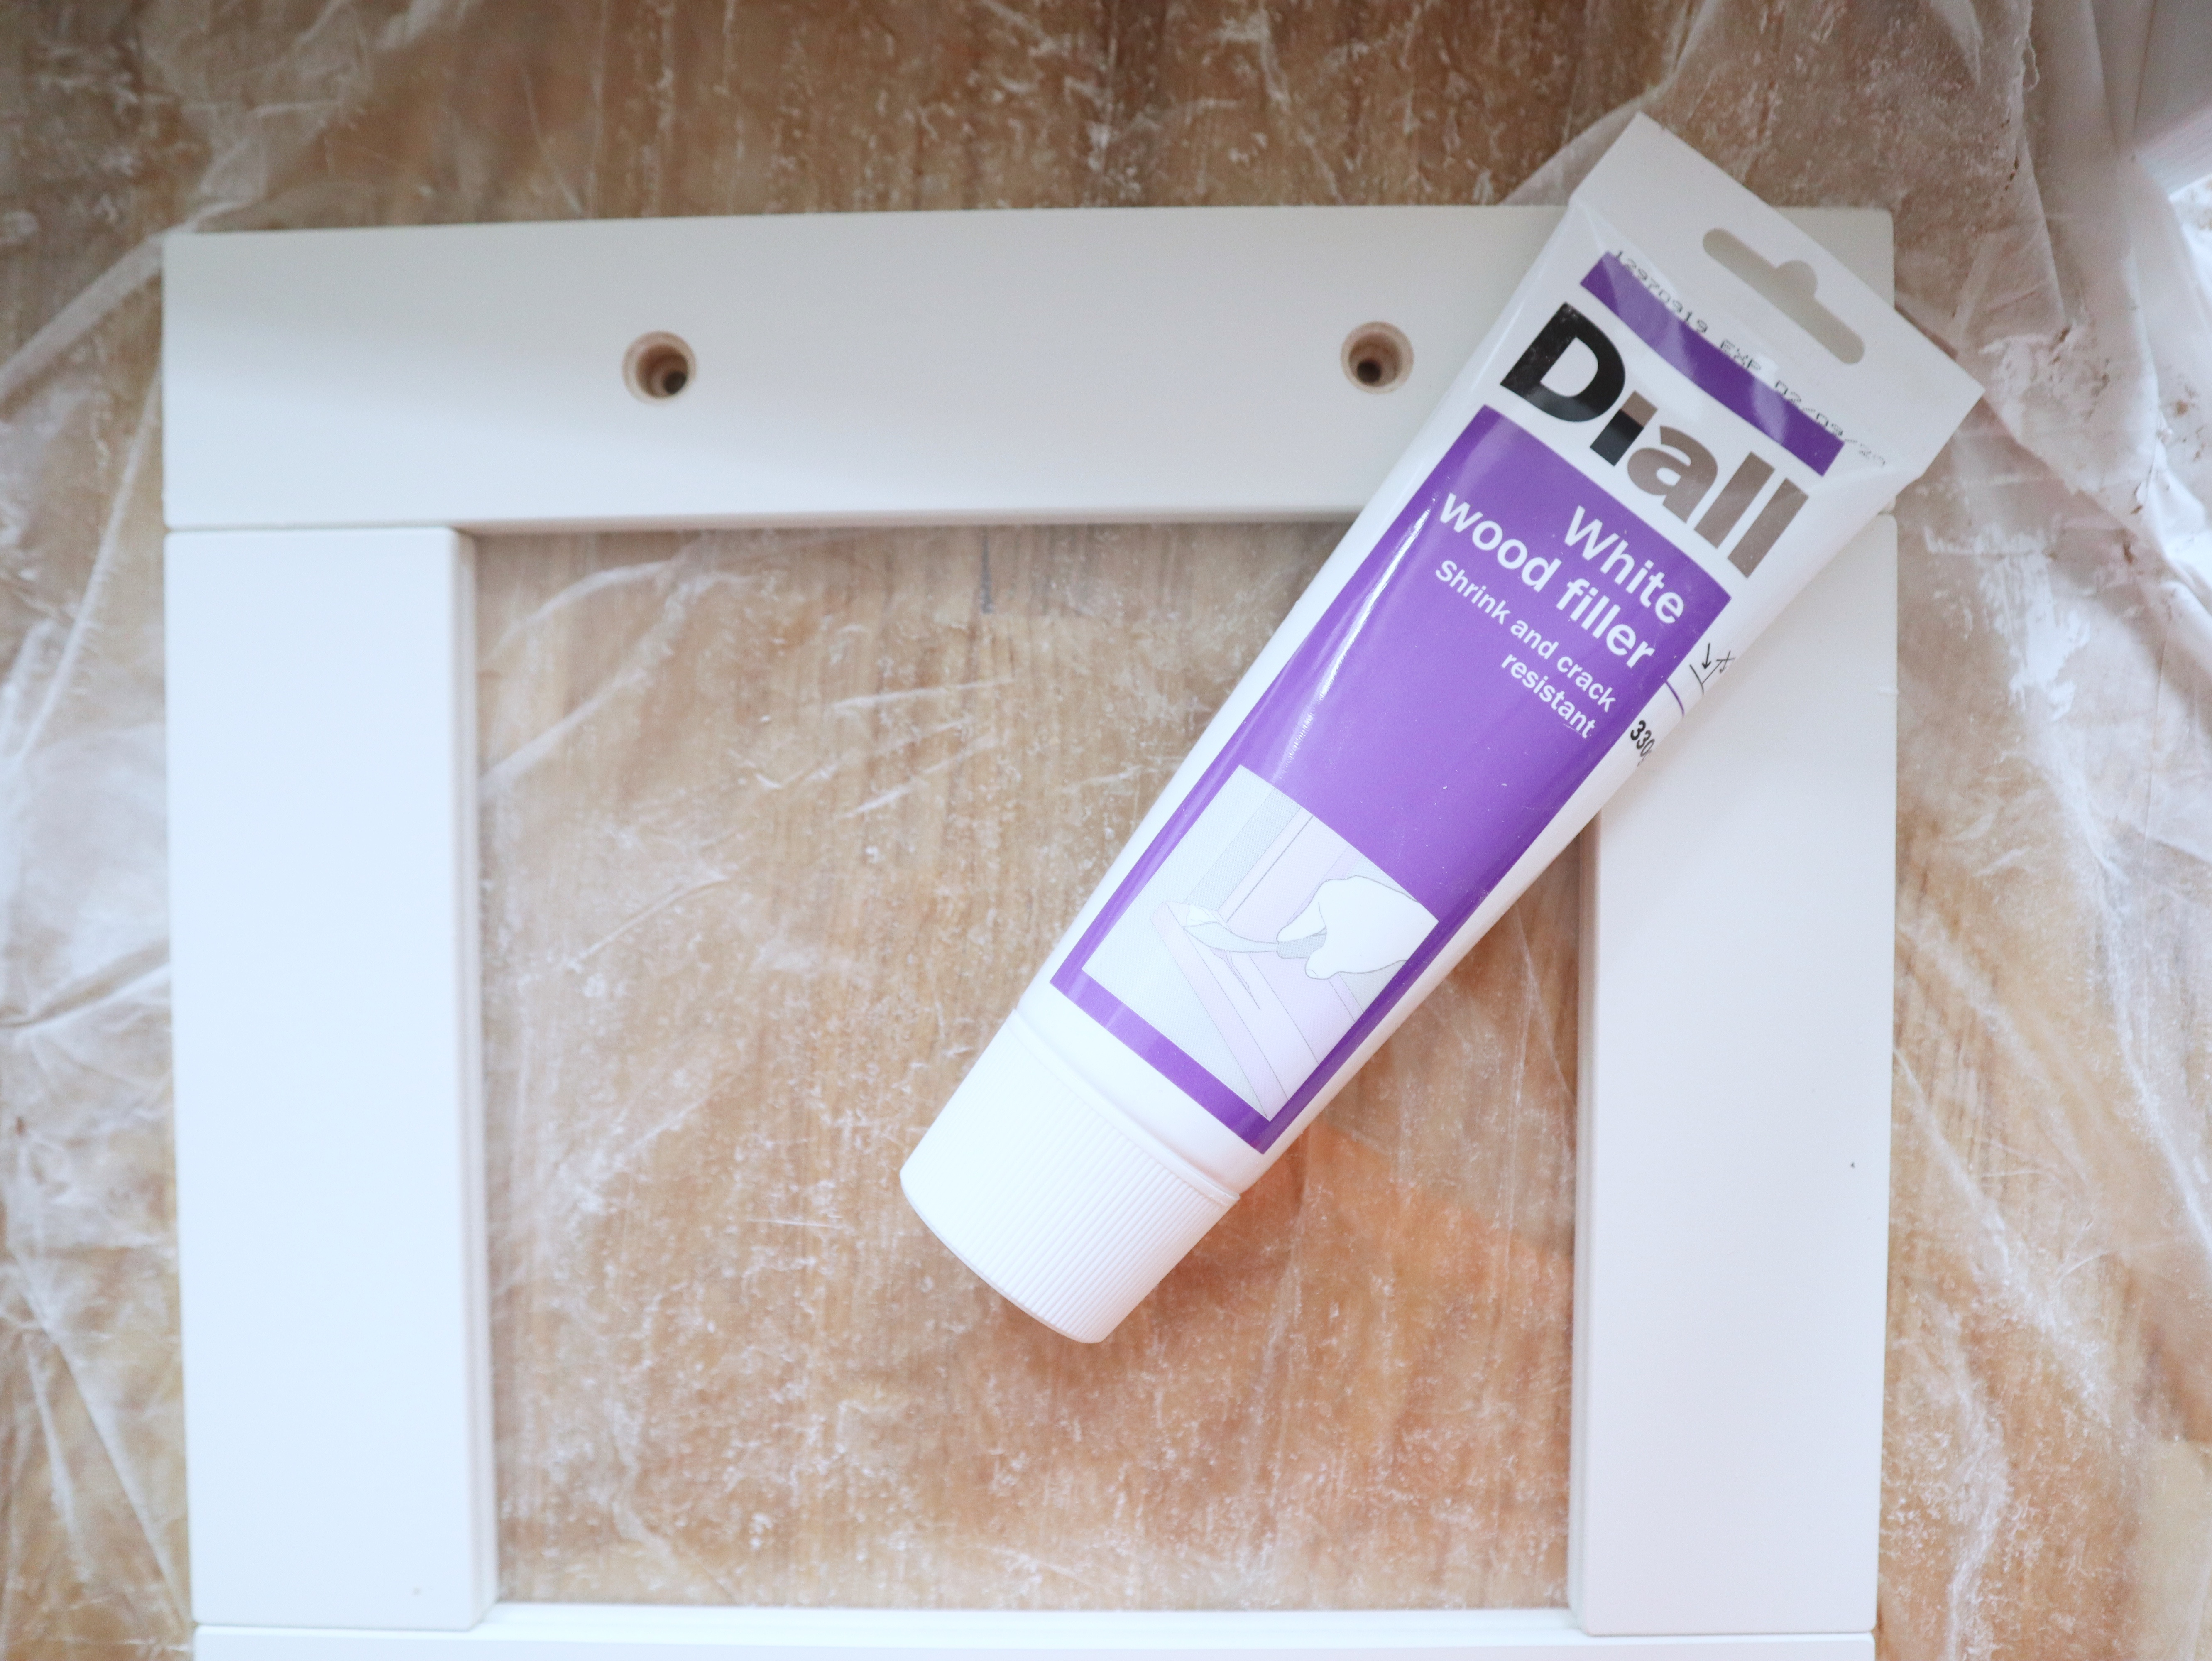
I started off by filling in the holes in the door panels where the original handles were meant to go. You’re meant to build the wood filler up in layers but to be honest it was too hard to get it to stay in the hole with only a small amount so I just filled the entire hole and levelled it off. I set this aside to dry and because it was thick it took a bit longer which is why it’s important that this step is done first.
Next I assembled the base and the frame of the top section, it’s a lot easier to paint like this rather than paint each individual piece of the play kitchen separately.
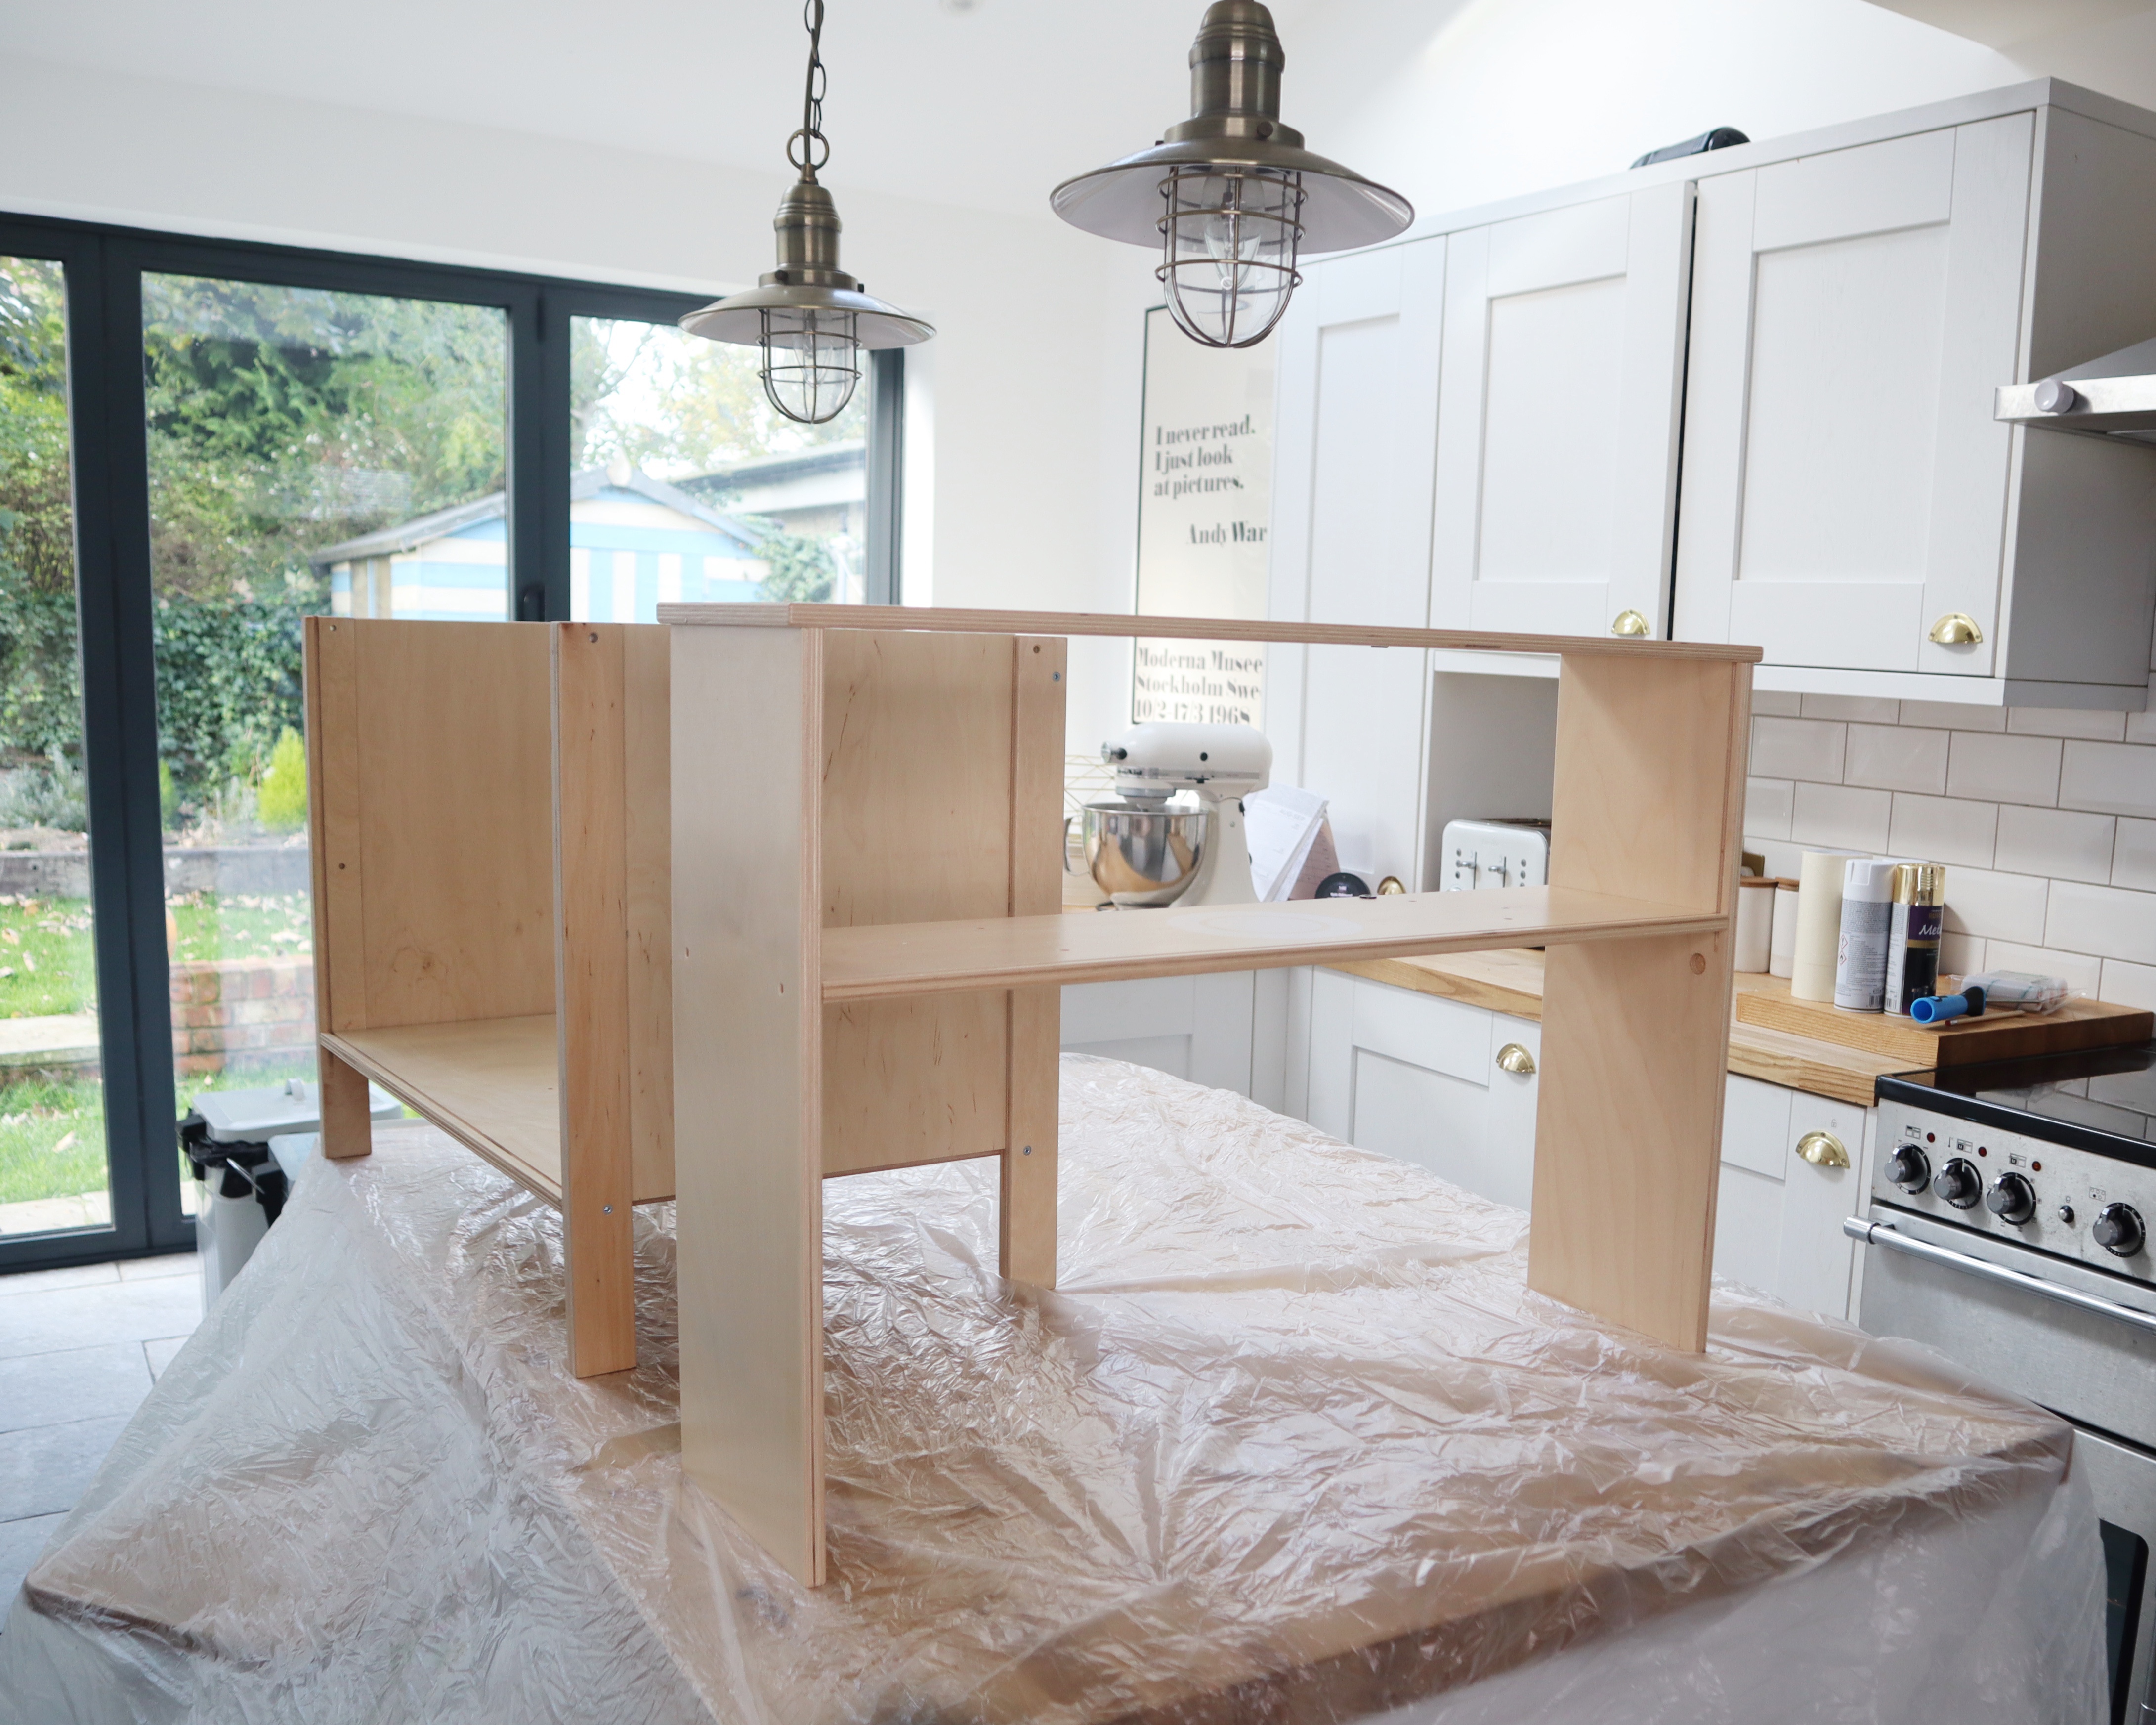
I lightly sanded all of the surfaces and then used the spray primer in a few light coats. Primer is strong stuff, use it outside if possible. I didn’t and I got a killer headache the next day from it!
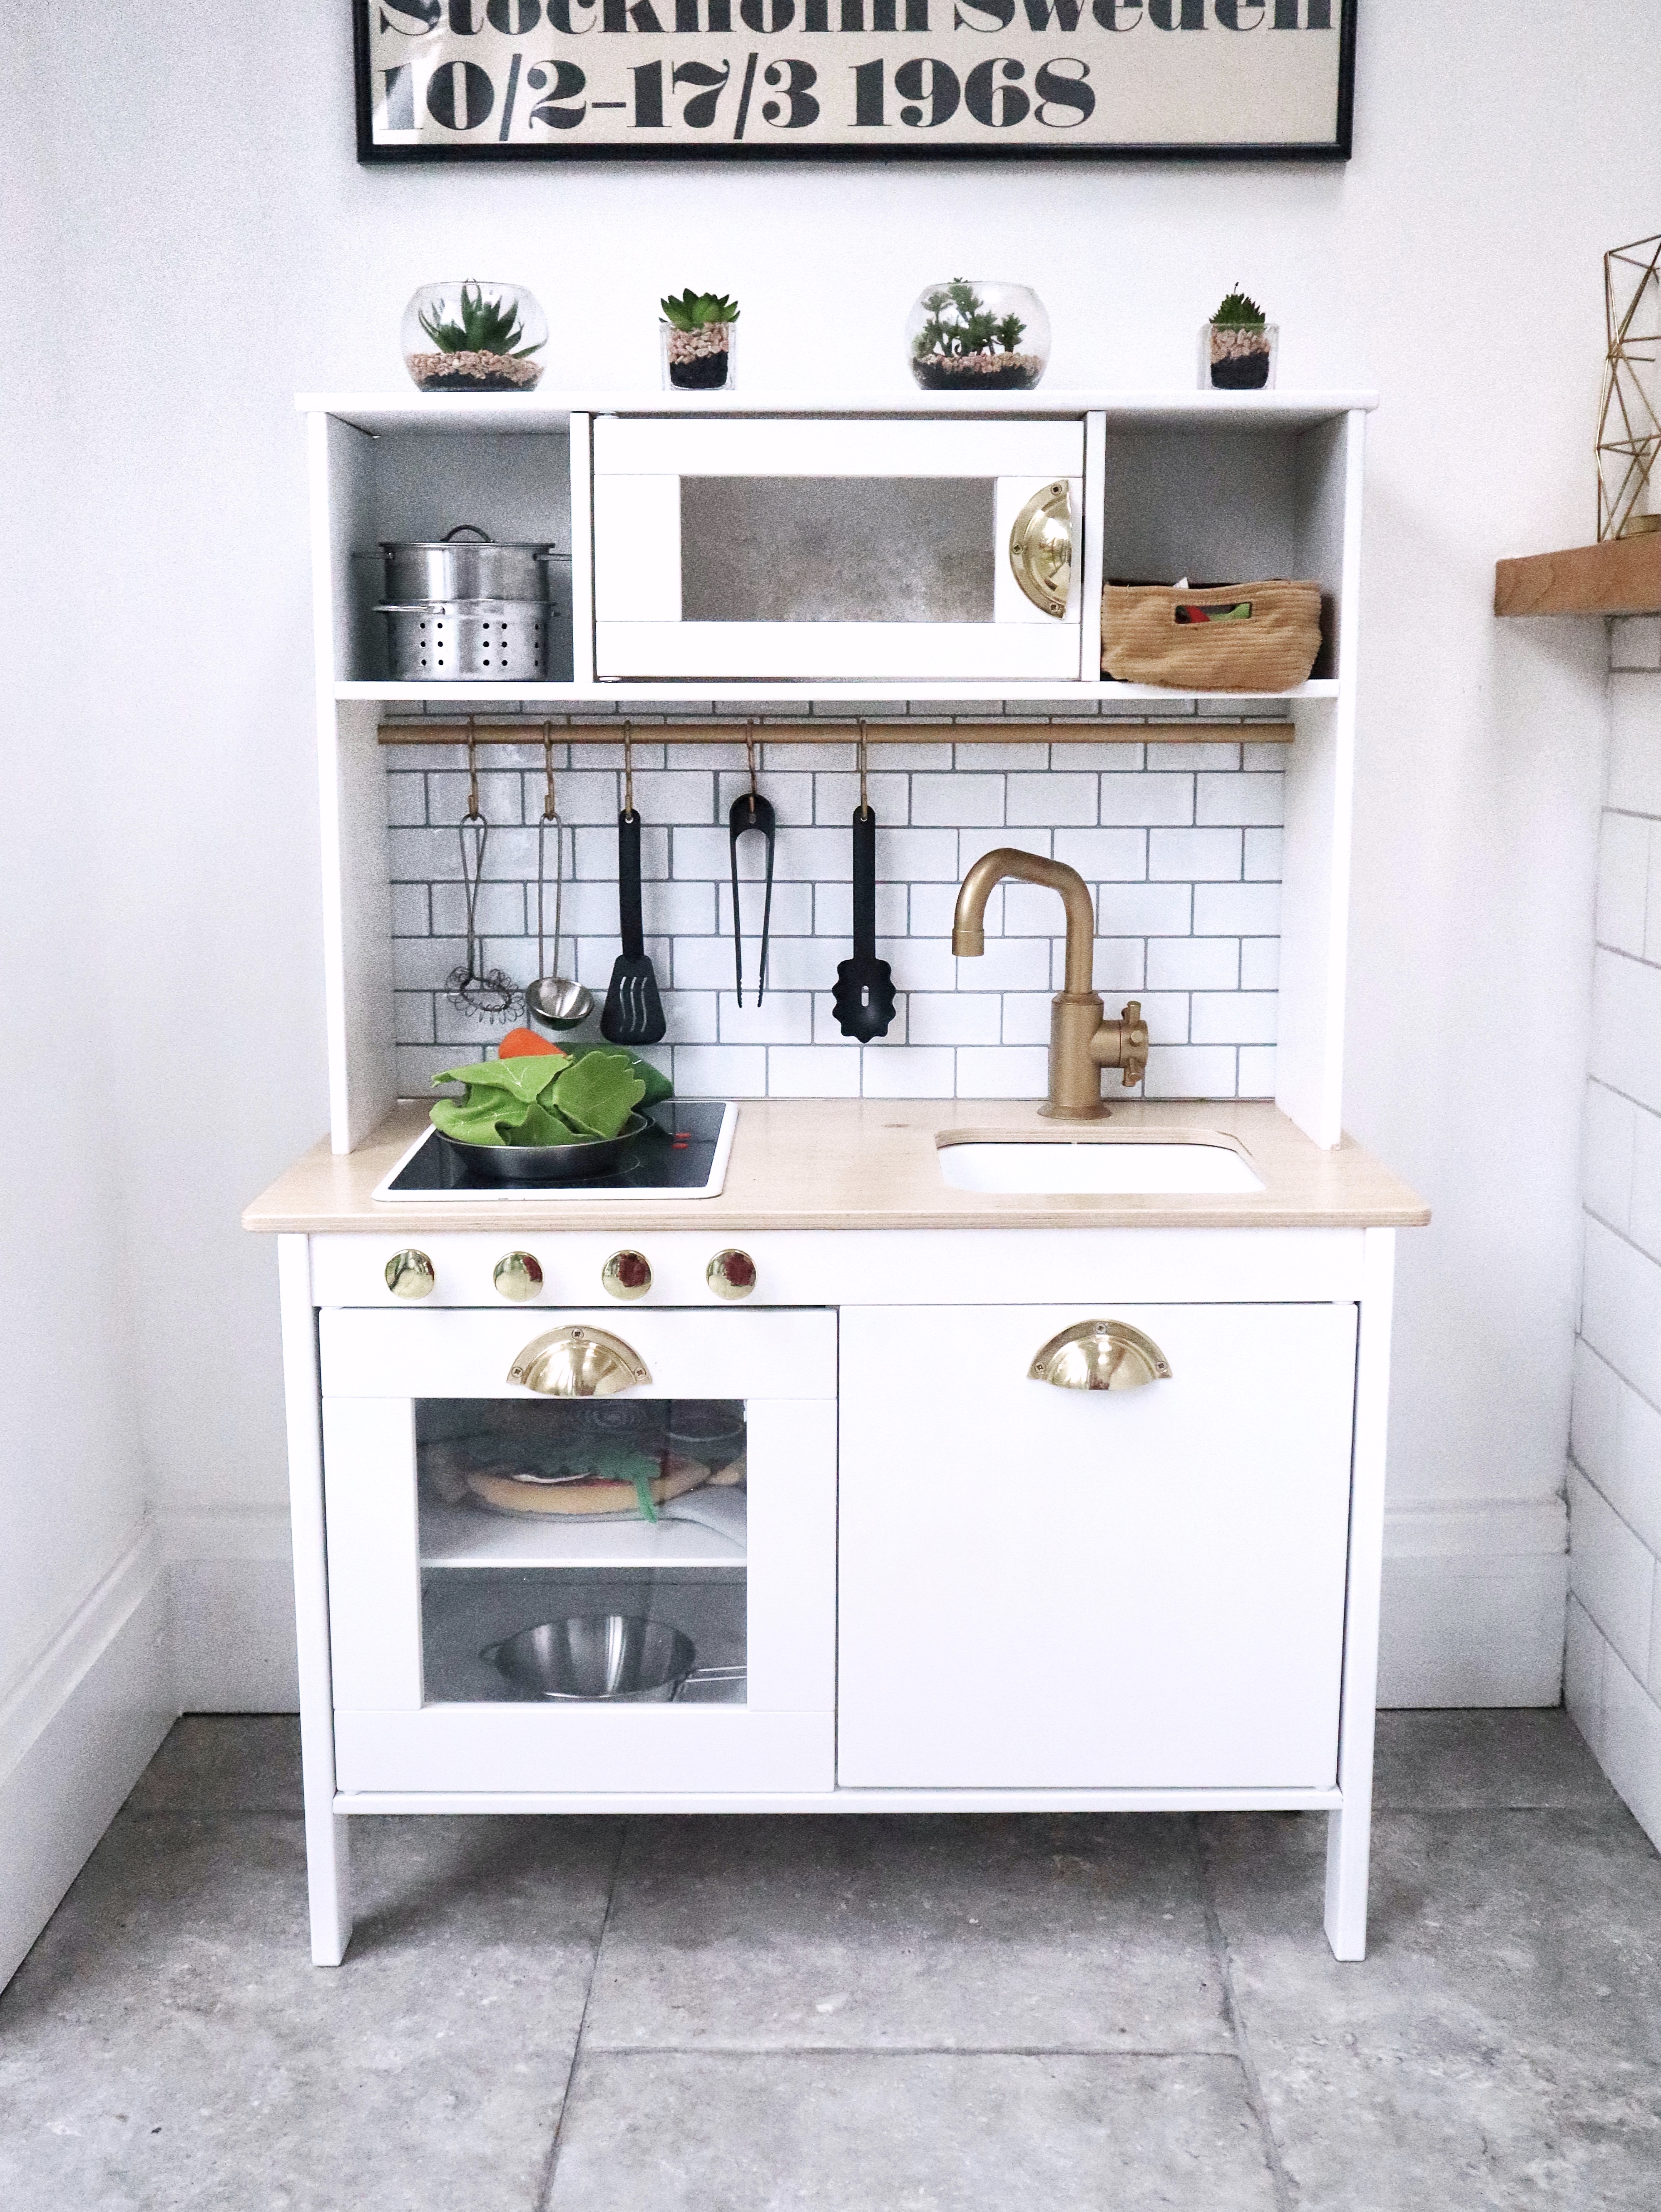
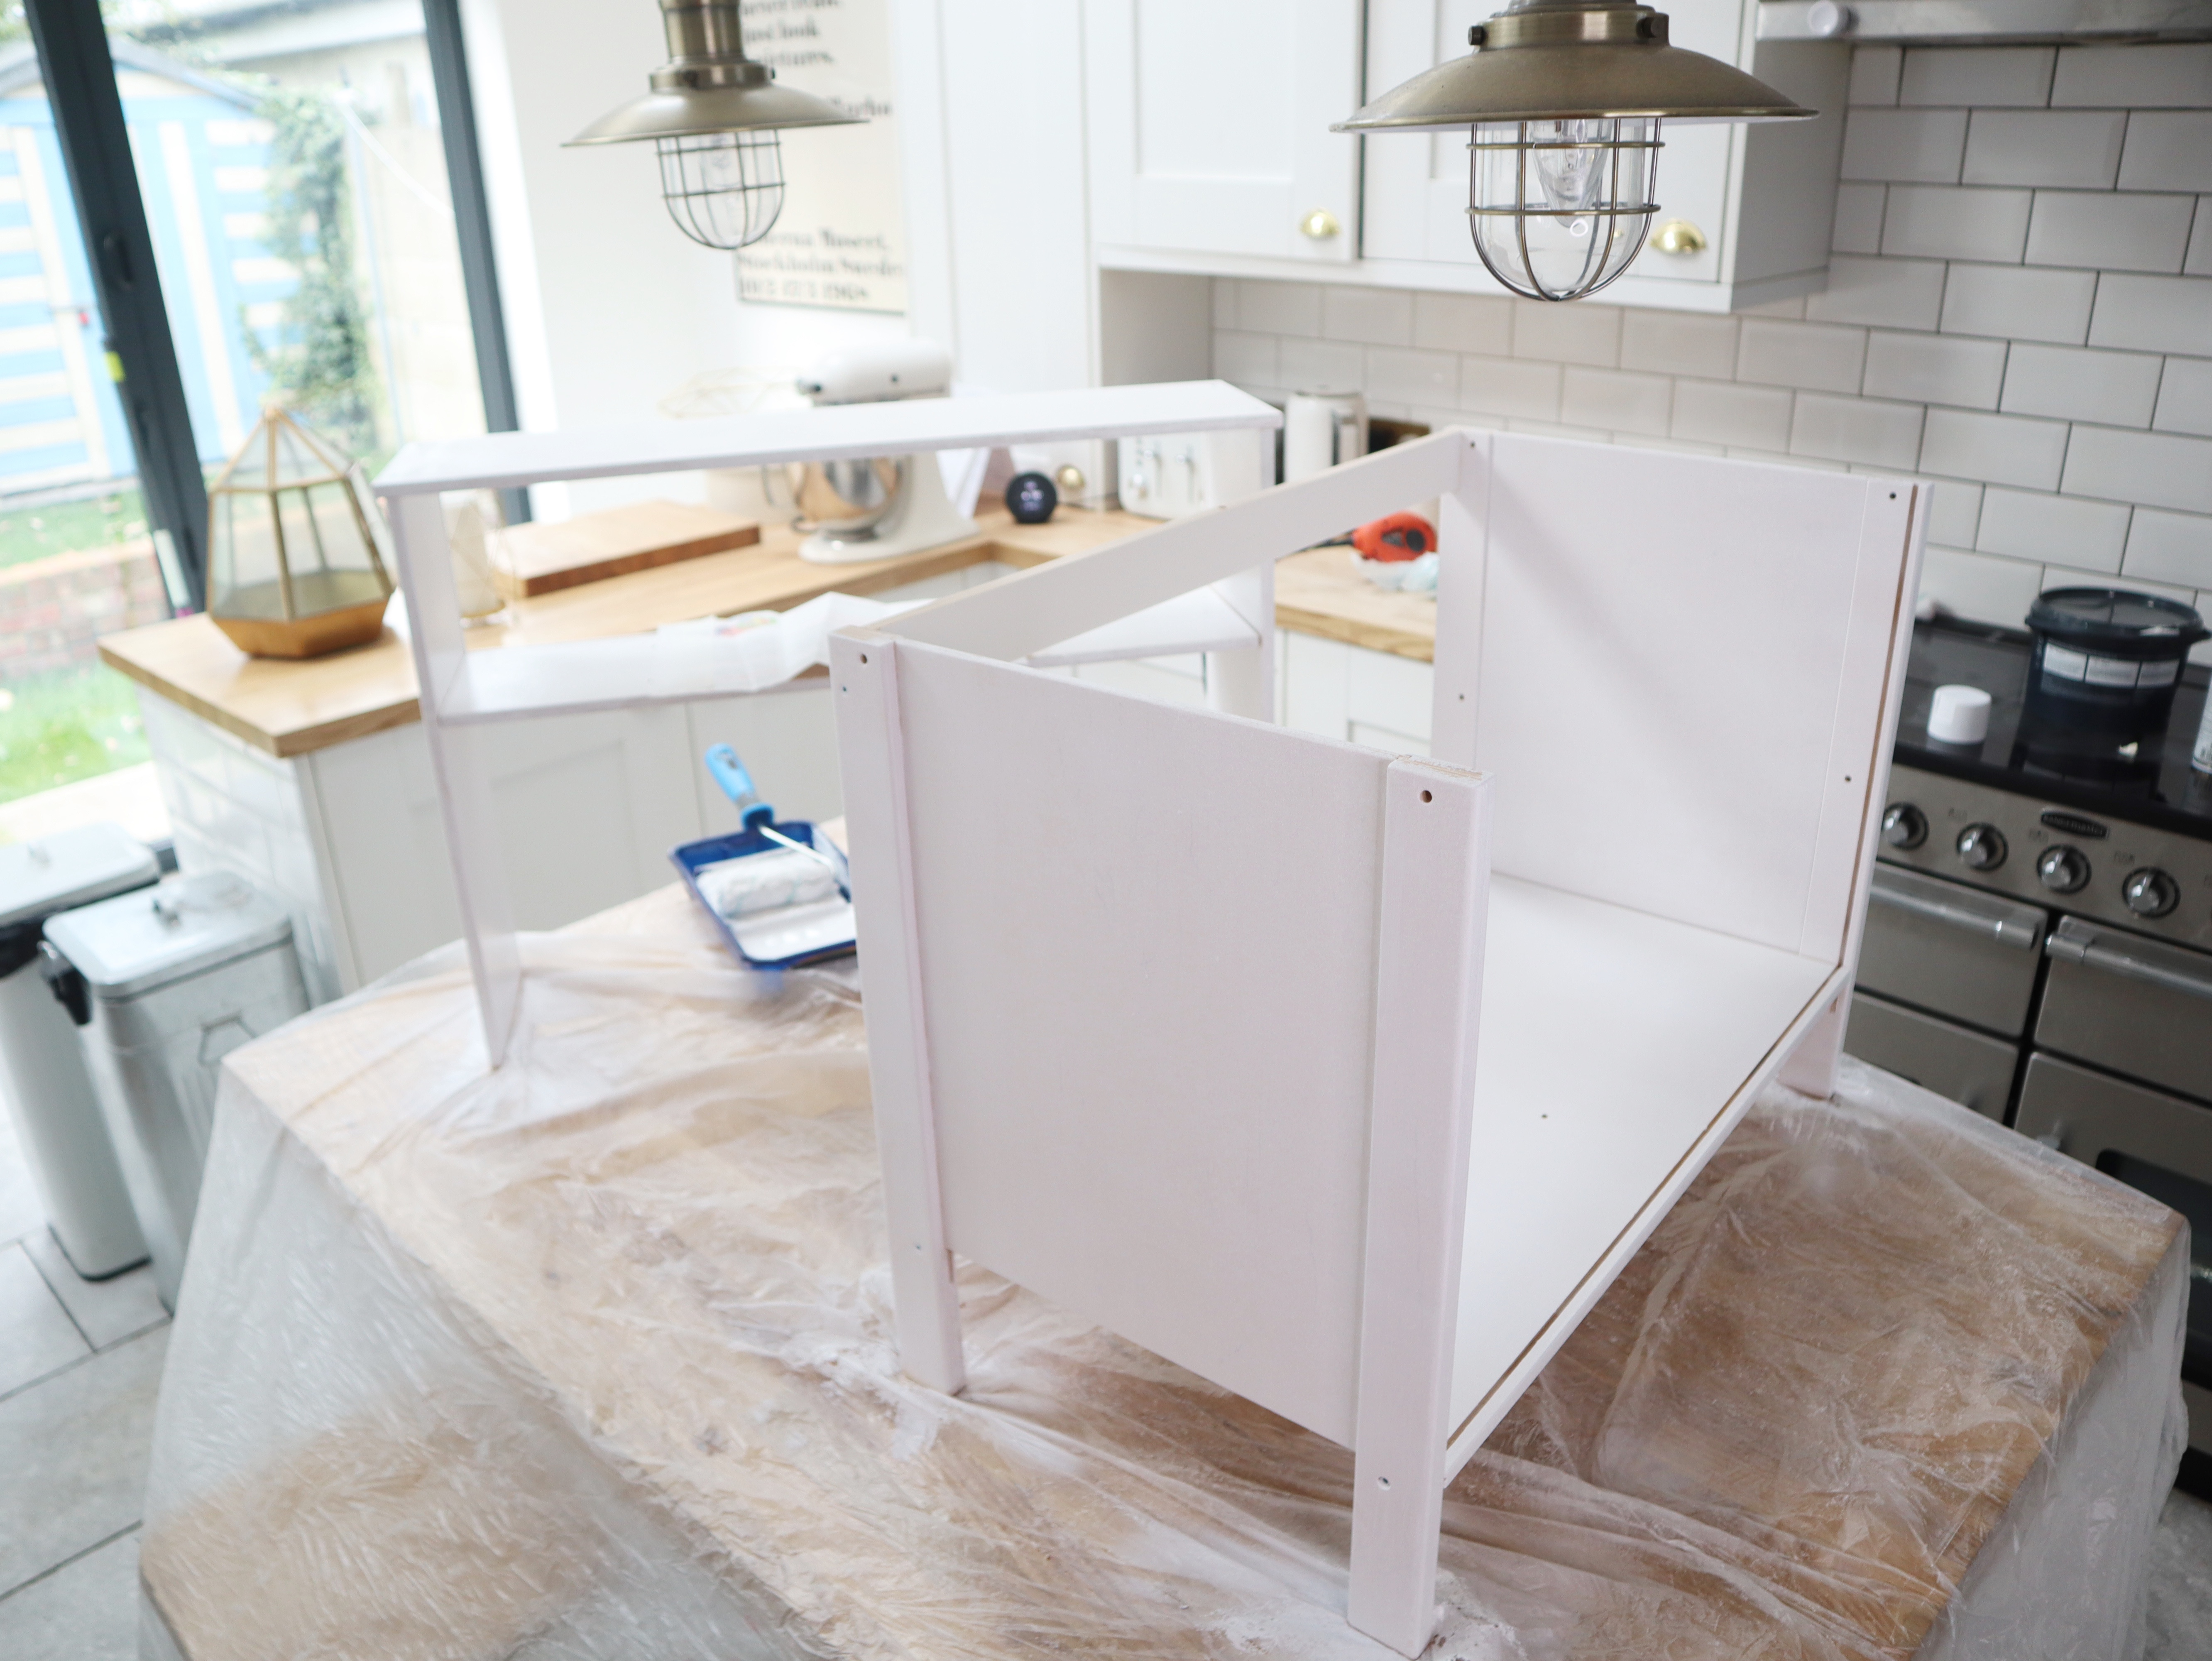
For the main paint, I chose to use kitchen emulsion. It stains less easily and is wipe clean which I figured were both pretty valuable in this situation! I used a smallish roller with a fine finish head on it to apply the paint in two coats. I masked off the centre section of the top shelf as I really like the little painted circle for the microwave so I left that section bare.
Once the wood filler was dry I sanded it down with my mouse sander (best. purchase. ever.) and then did exactly the same as the above for the various doors. I’m super happy with the way this came out, I was a bit worried it would be super obvious that there will filled in holes but it really isn’t!
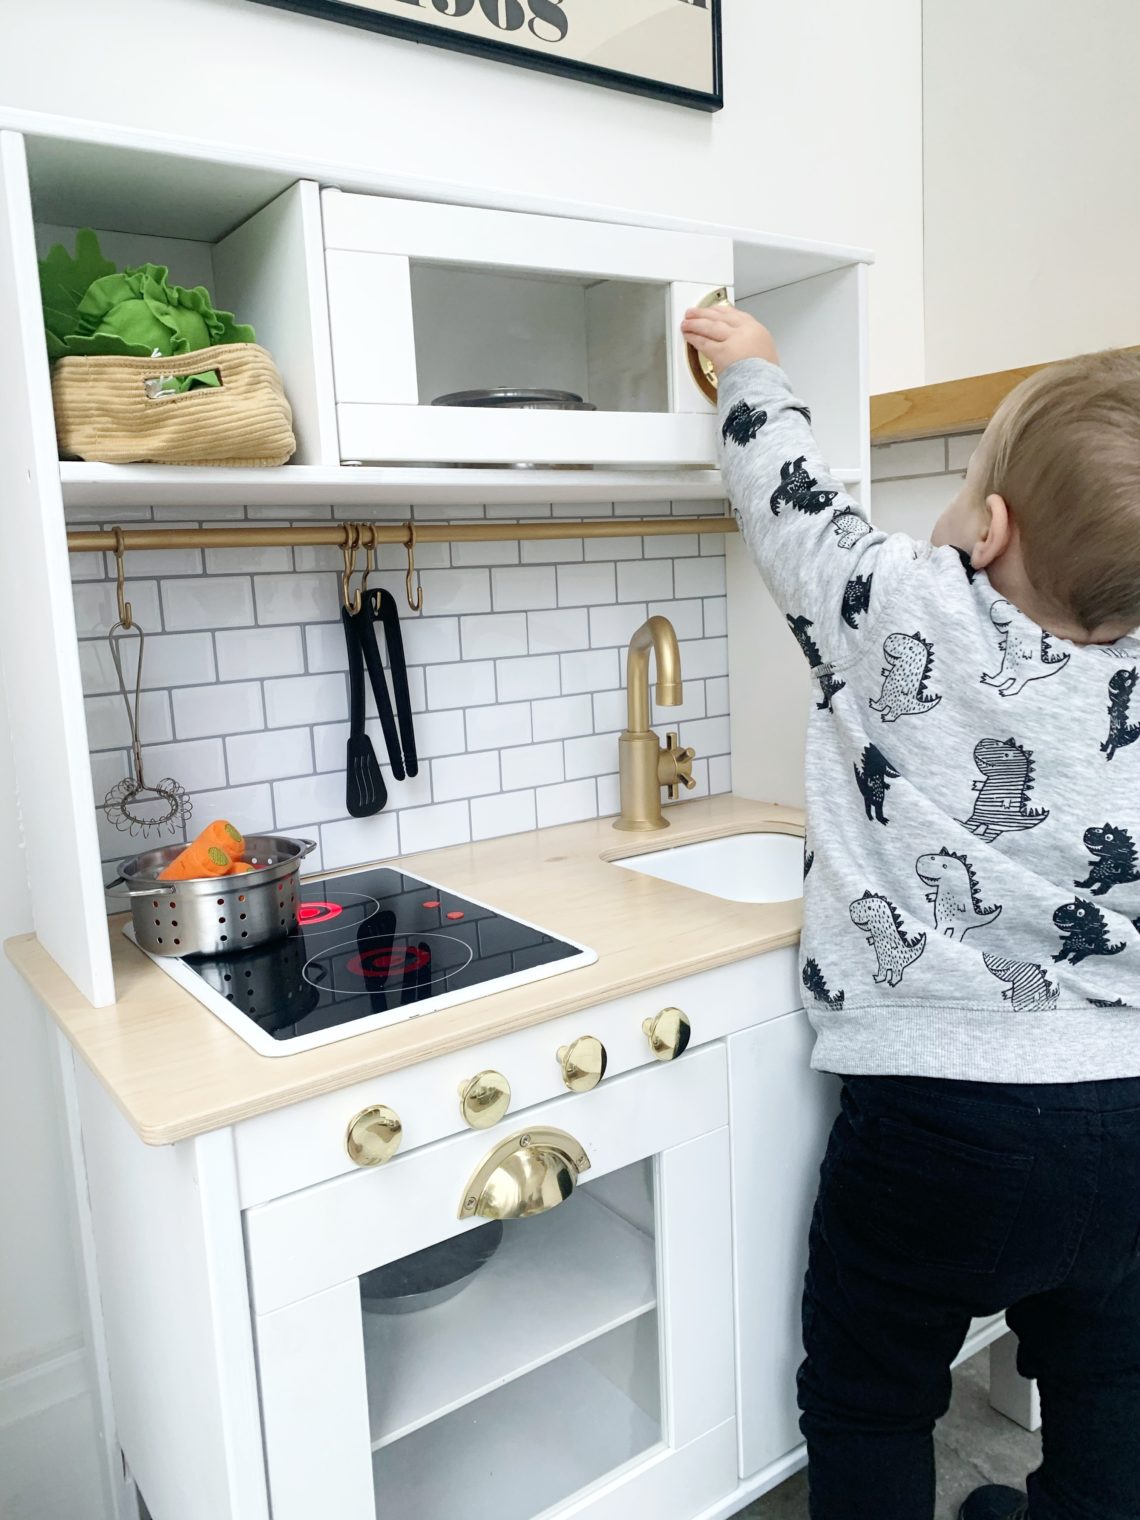
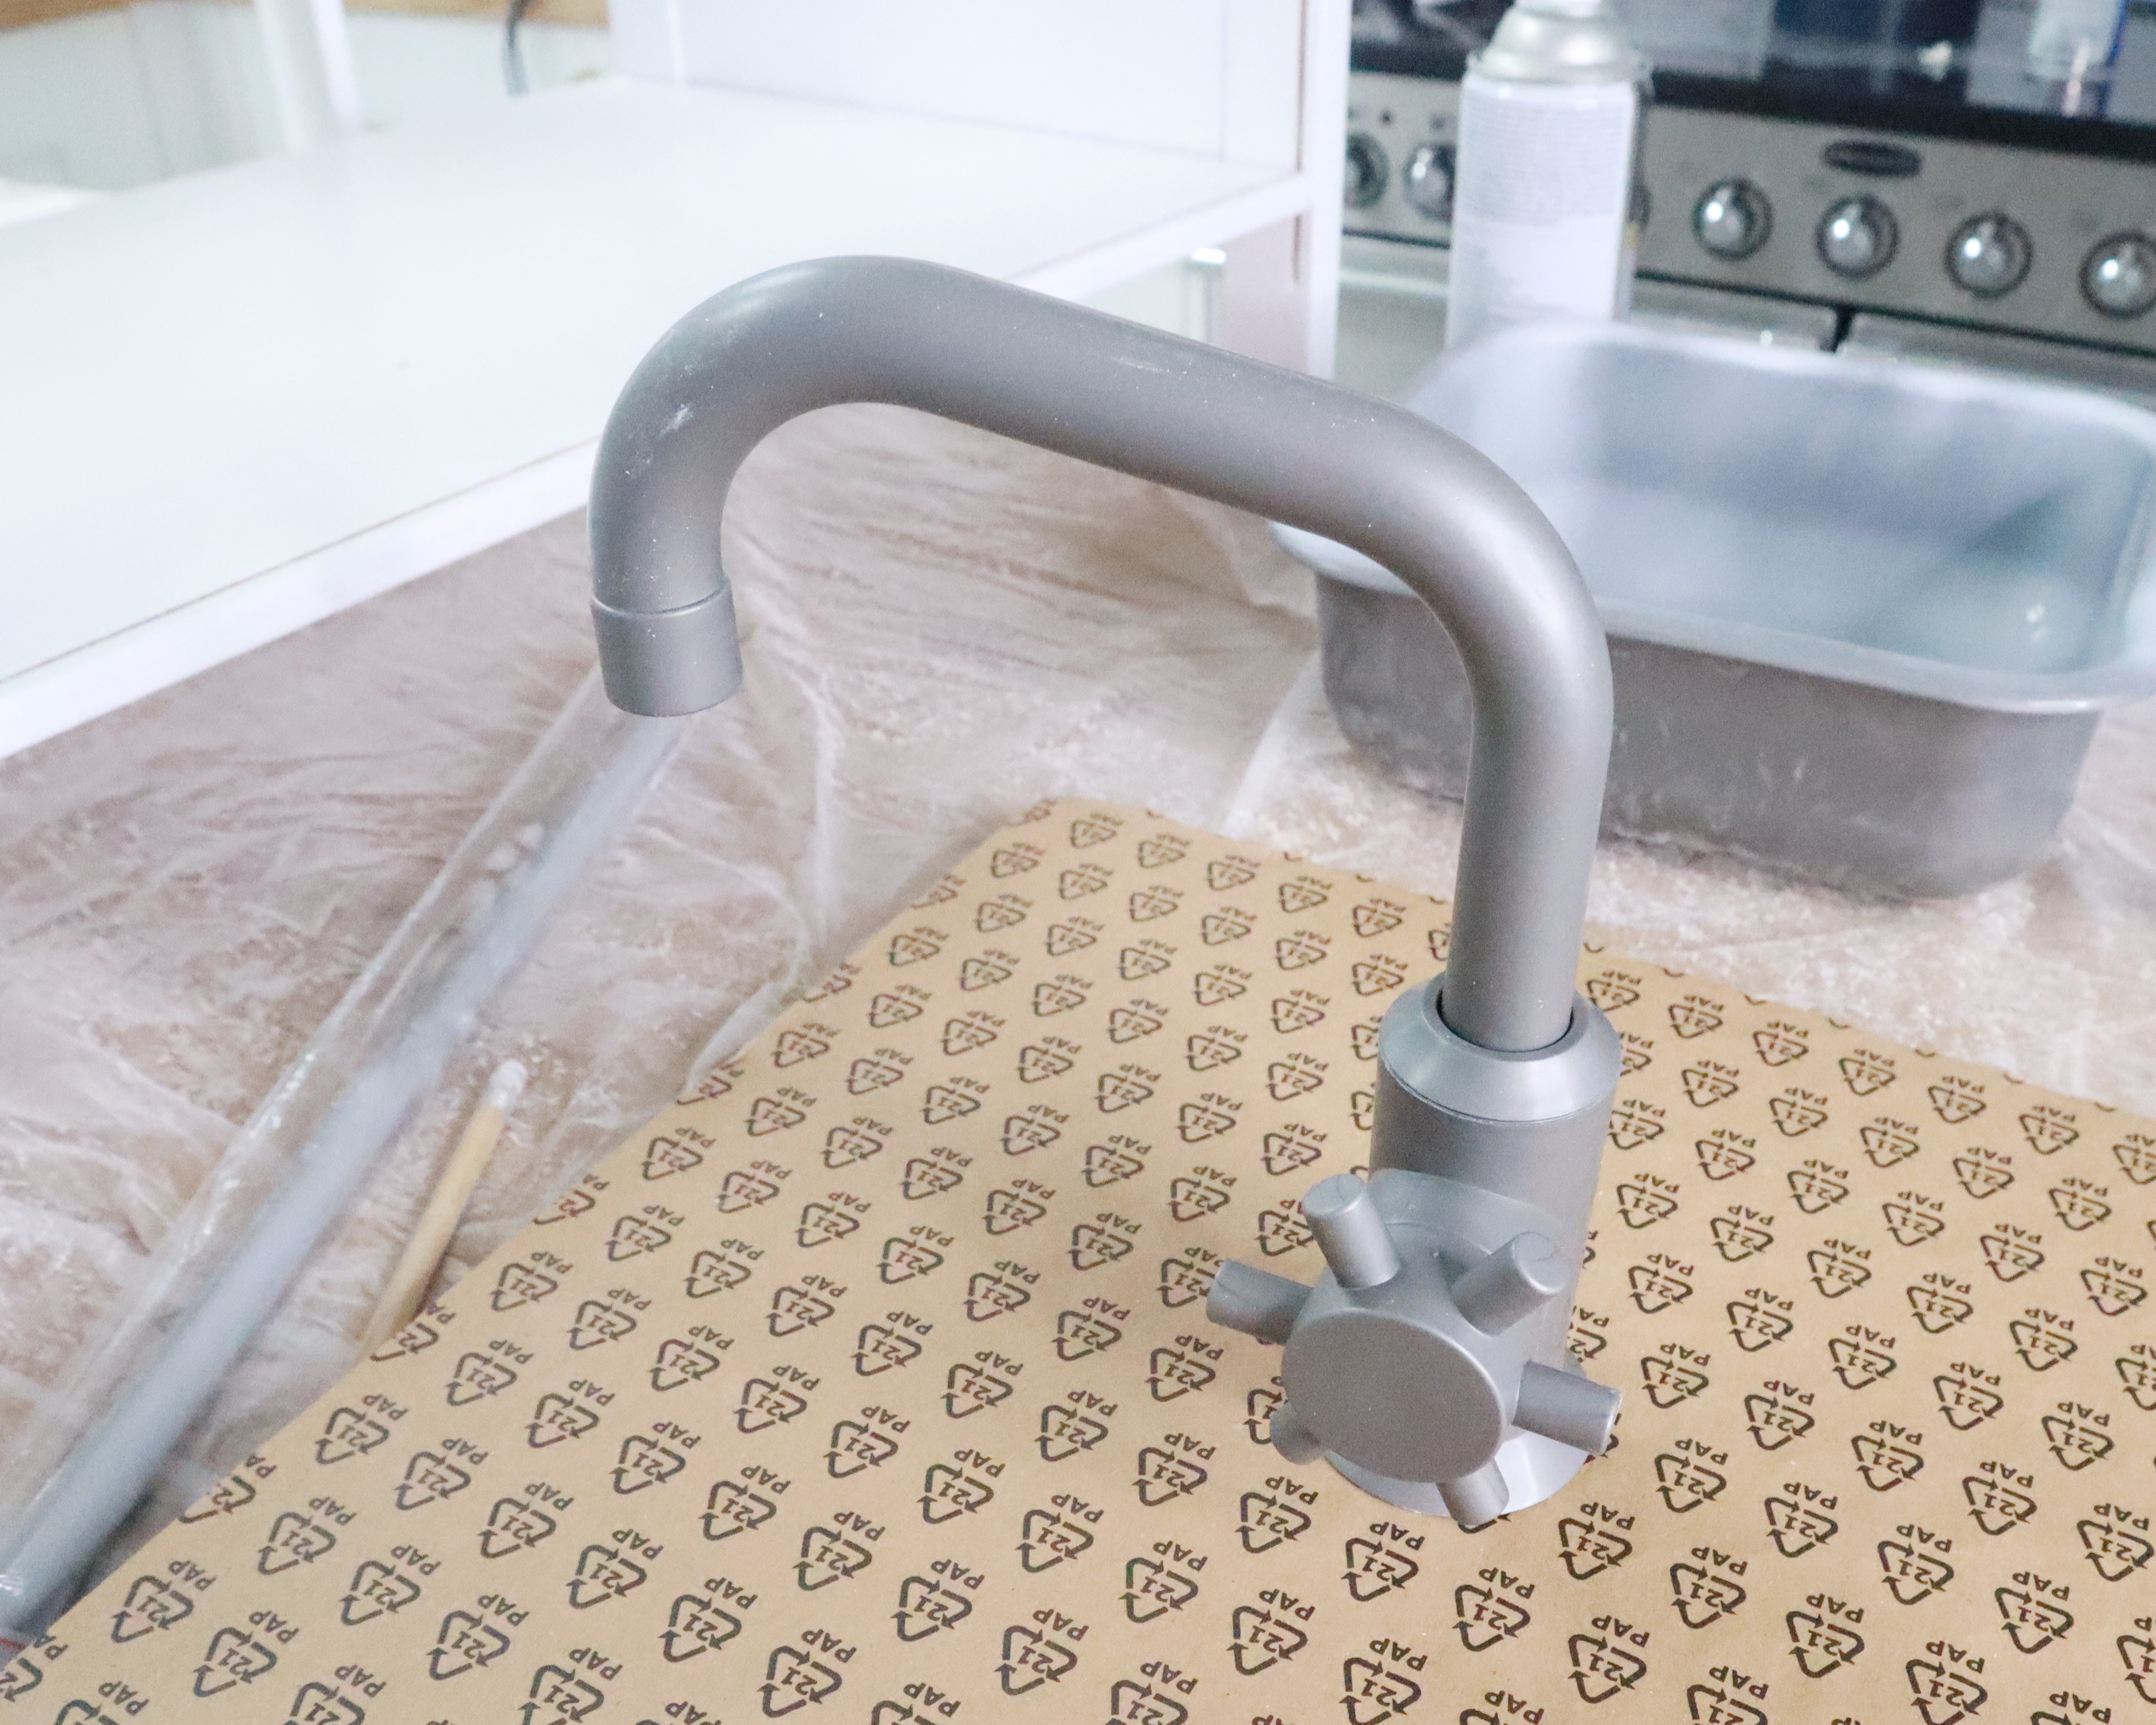
Next in the Ikea Duktig makeover I spray painted the tap, hooks and pole with the gold paint. Our main kitchen tap is brass hence the gold here! I used a piece of the cardboard packaging and some masking tape folded up under the base to keep the tap upright to spray it.
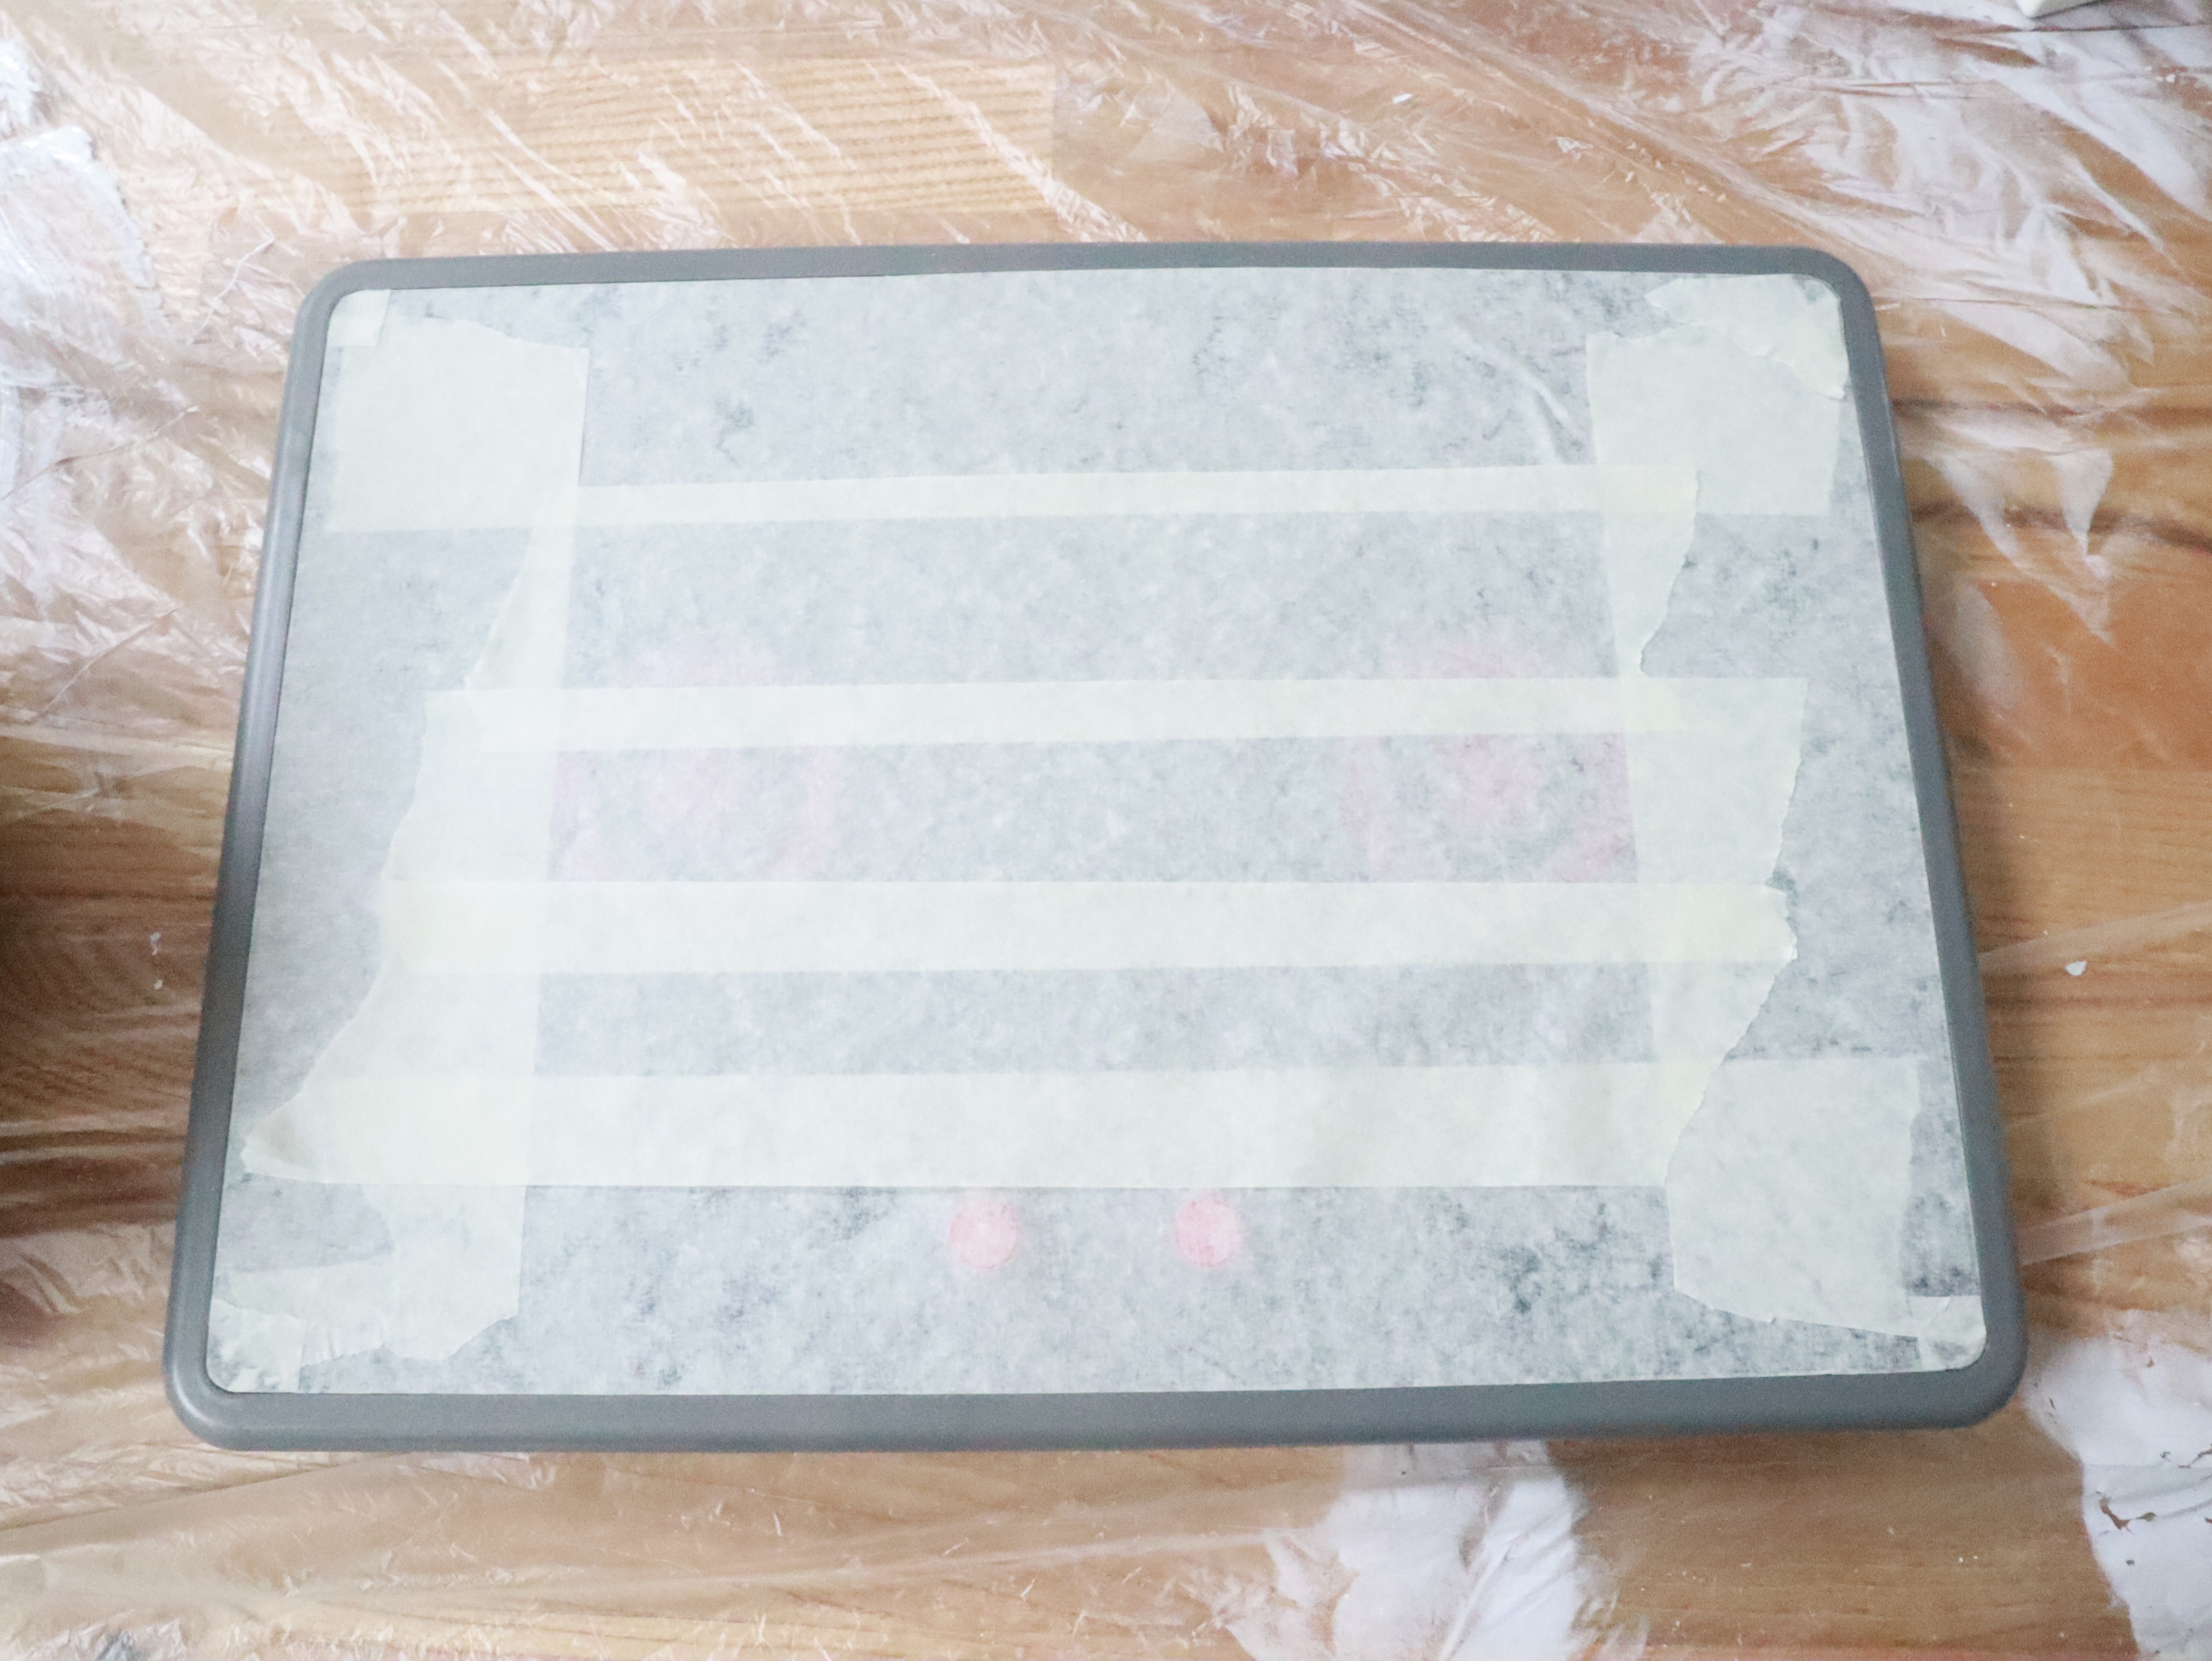
The surround of the stove top is grey plastic. I masked off the hob section (including tracing the rounded edges on the tape and cutting it out so it was perfect) and then primed and spray painted the edging white. I didn’t want any of the original grey plastic to be visible. I sprayed the washing up bowl white to match (just like ours).
Once everything was painted I used the spray sealant in a few coats to protect everything. Theo’s a little bulldozer so the play kitchen is going to take a battering! The sealant is really important so that the paintwork can stand the toddler test and wipes clean from dirty little finger prints!
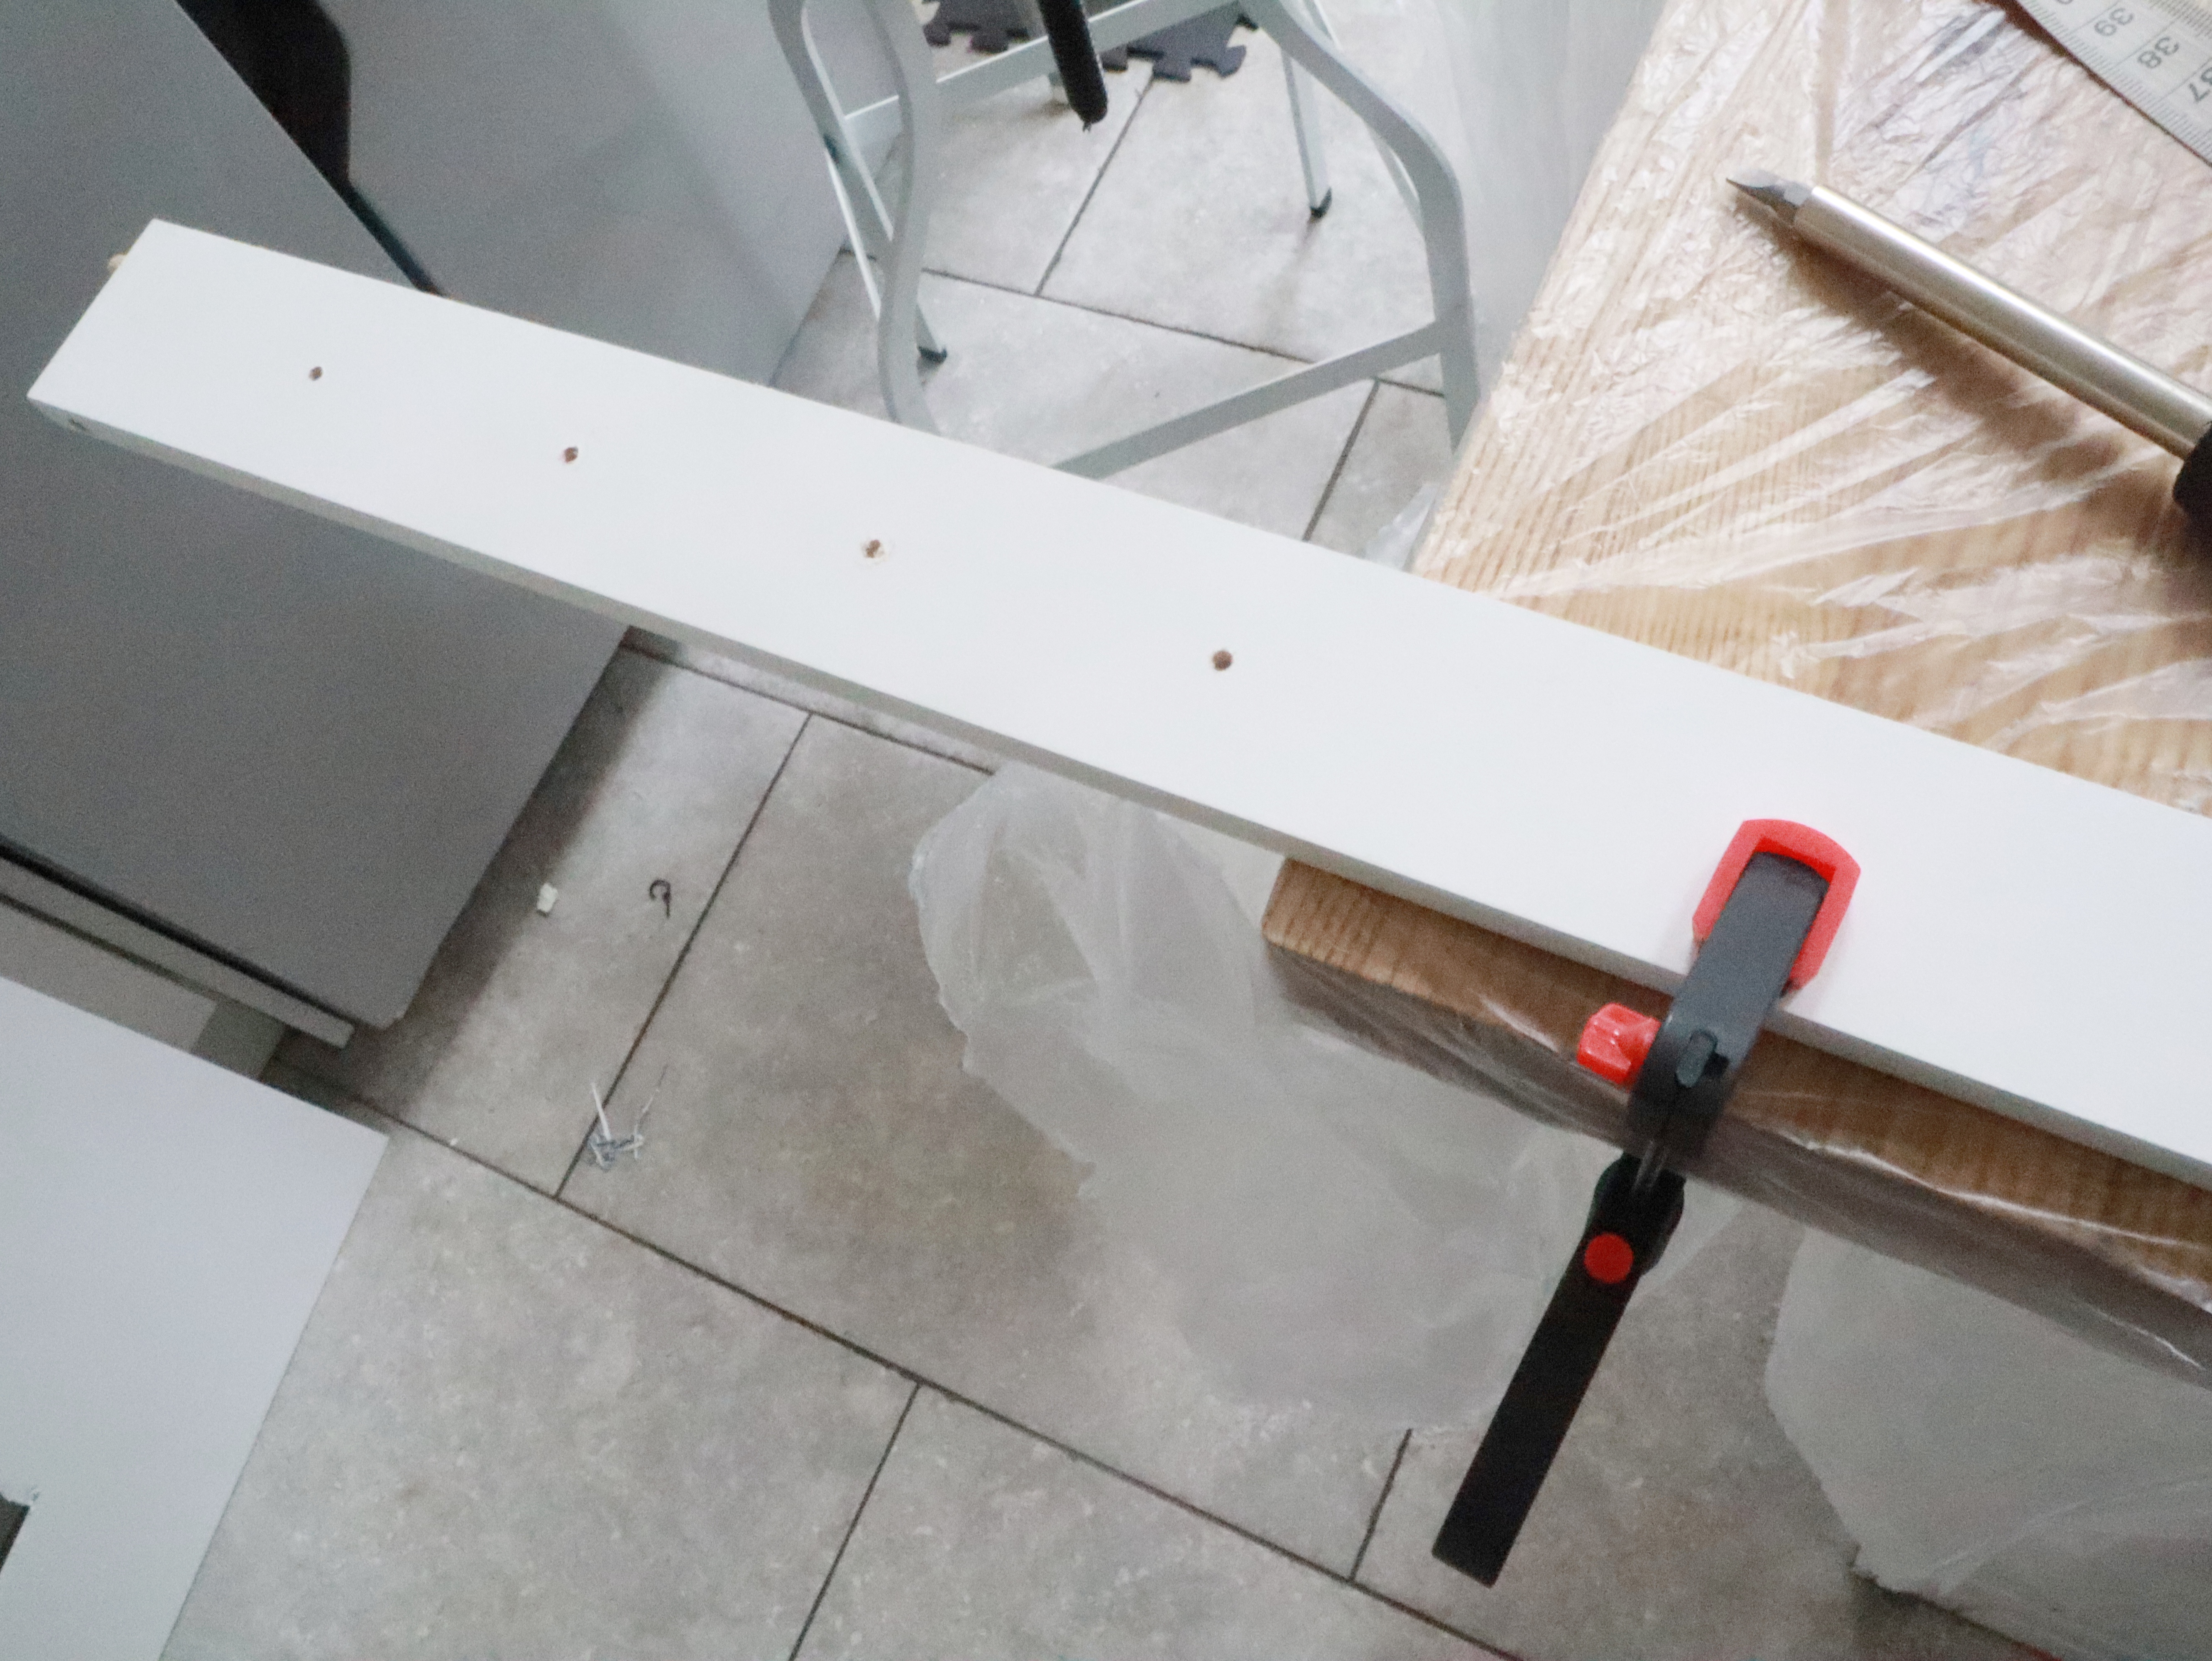
Once everything had dried I added the cupboard door knobs to look like dials for the oven. I measured half of the unit and then used a pencil to make four evenly spaced marks. I dismantled the frame so I could remove the relevant bit and then clamped it to the work top so I could drill the holes using a 3mm drill bit. Once done I screwed them into place.
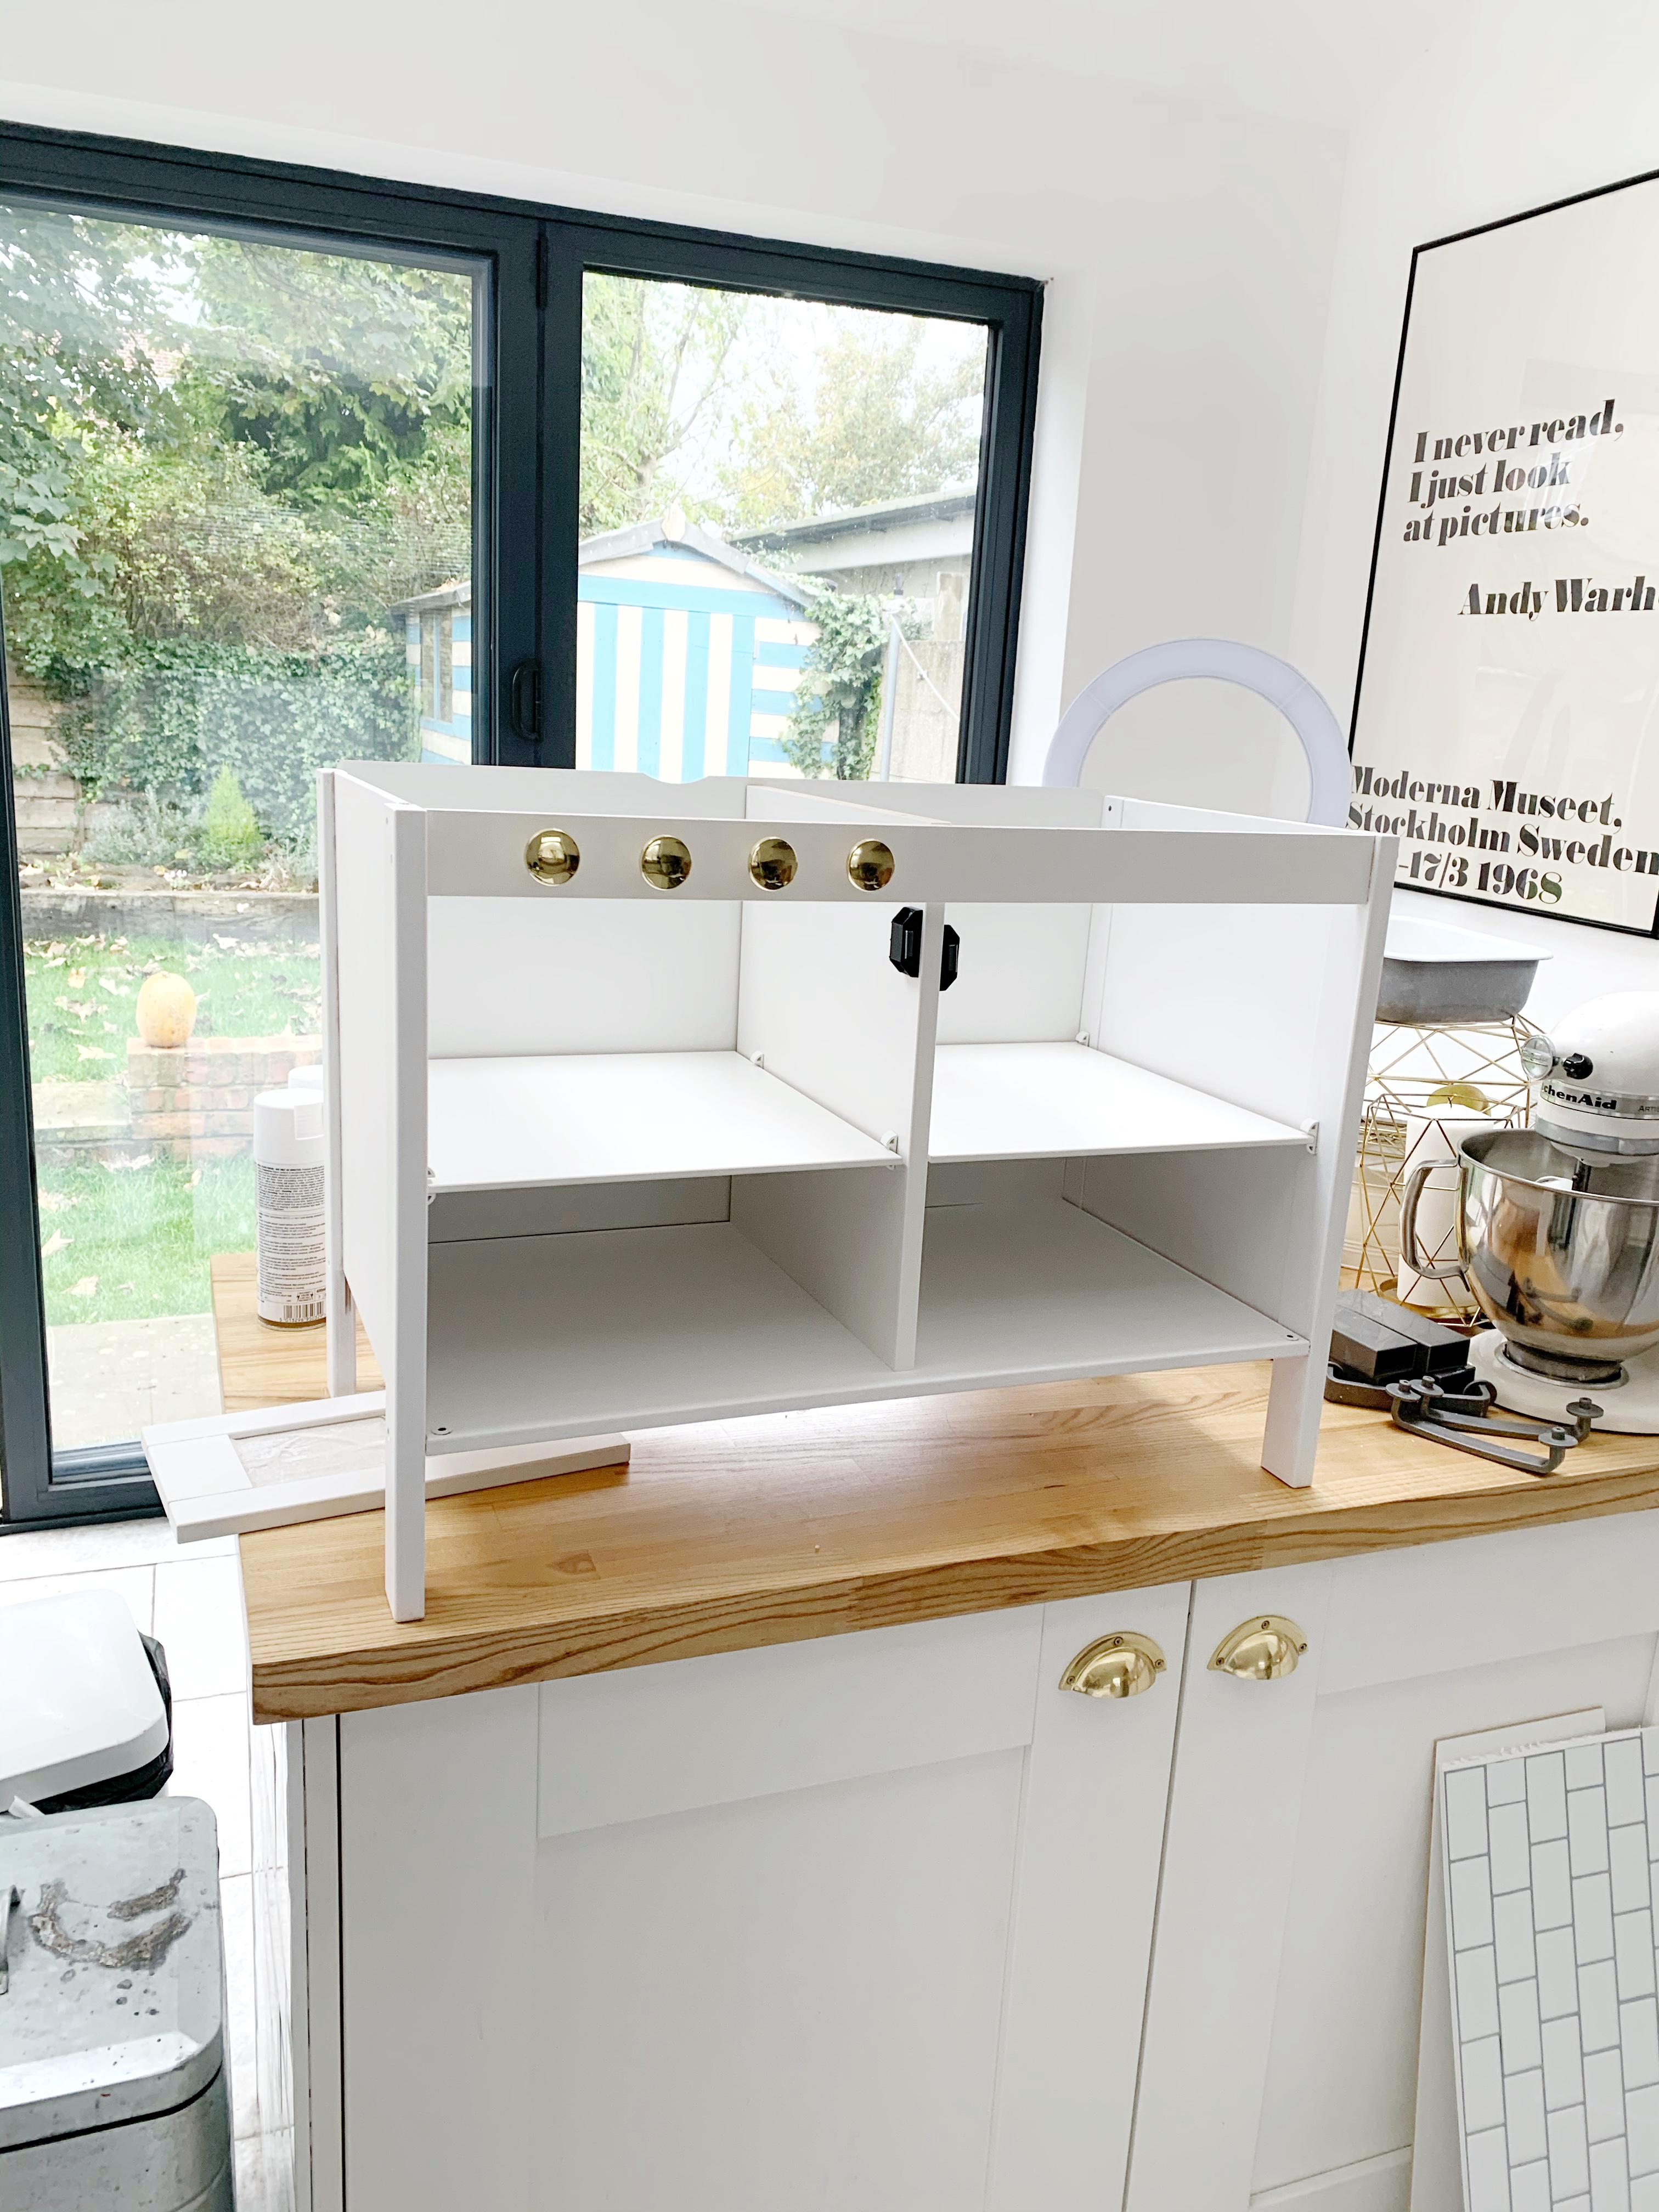
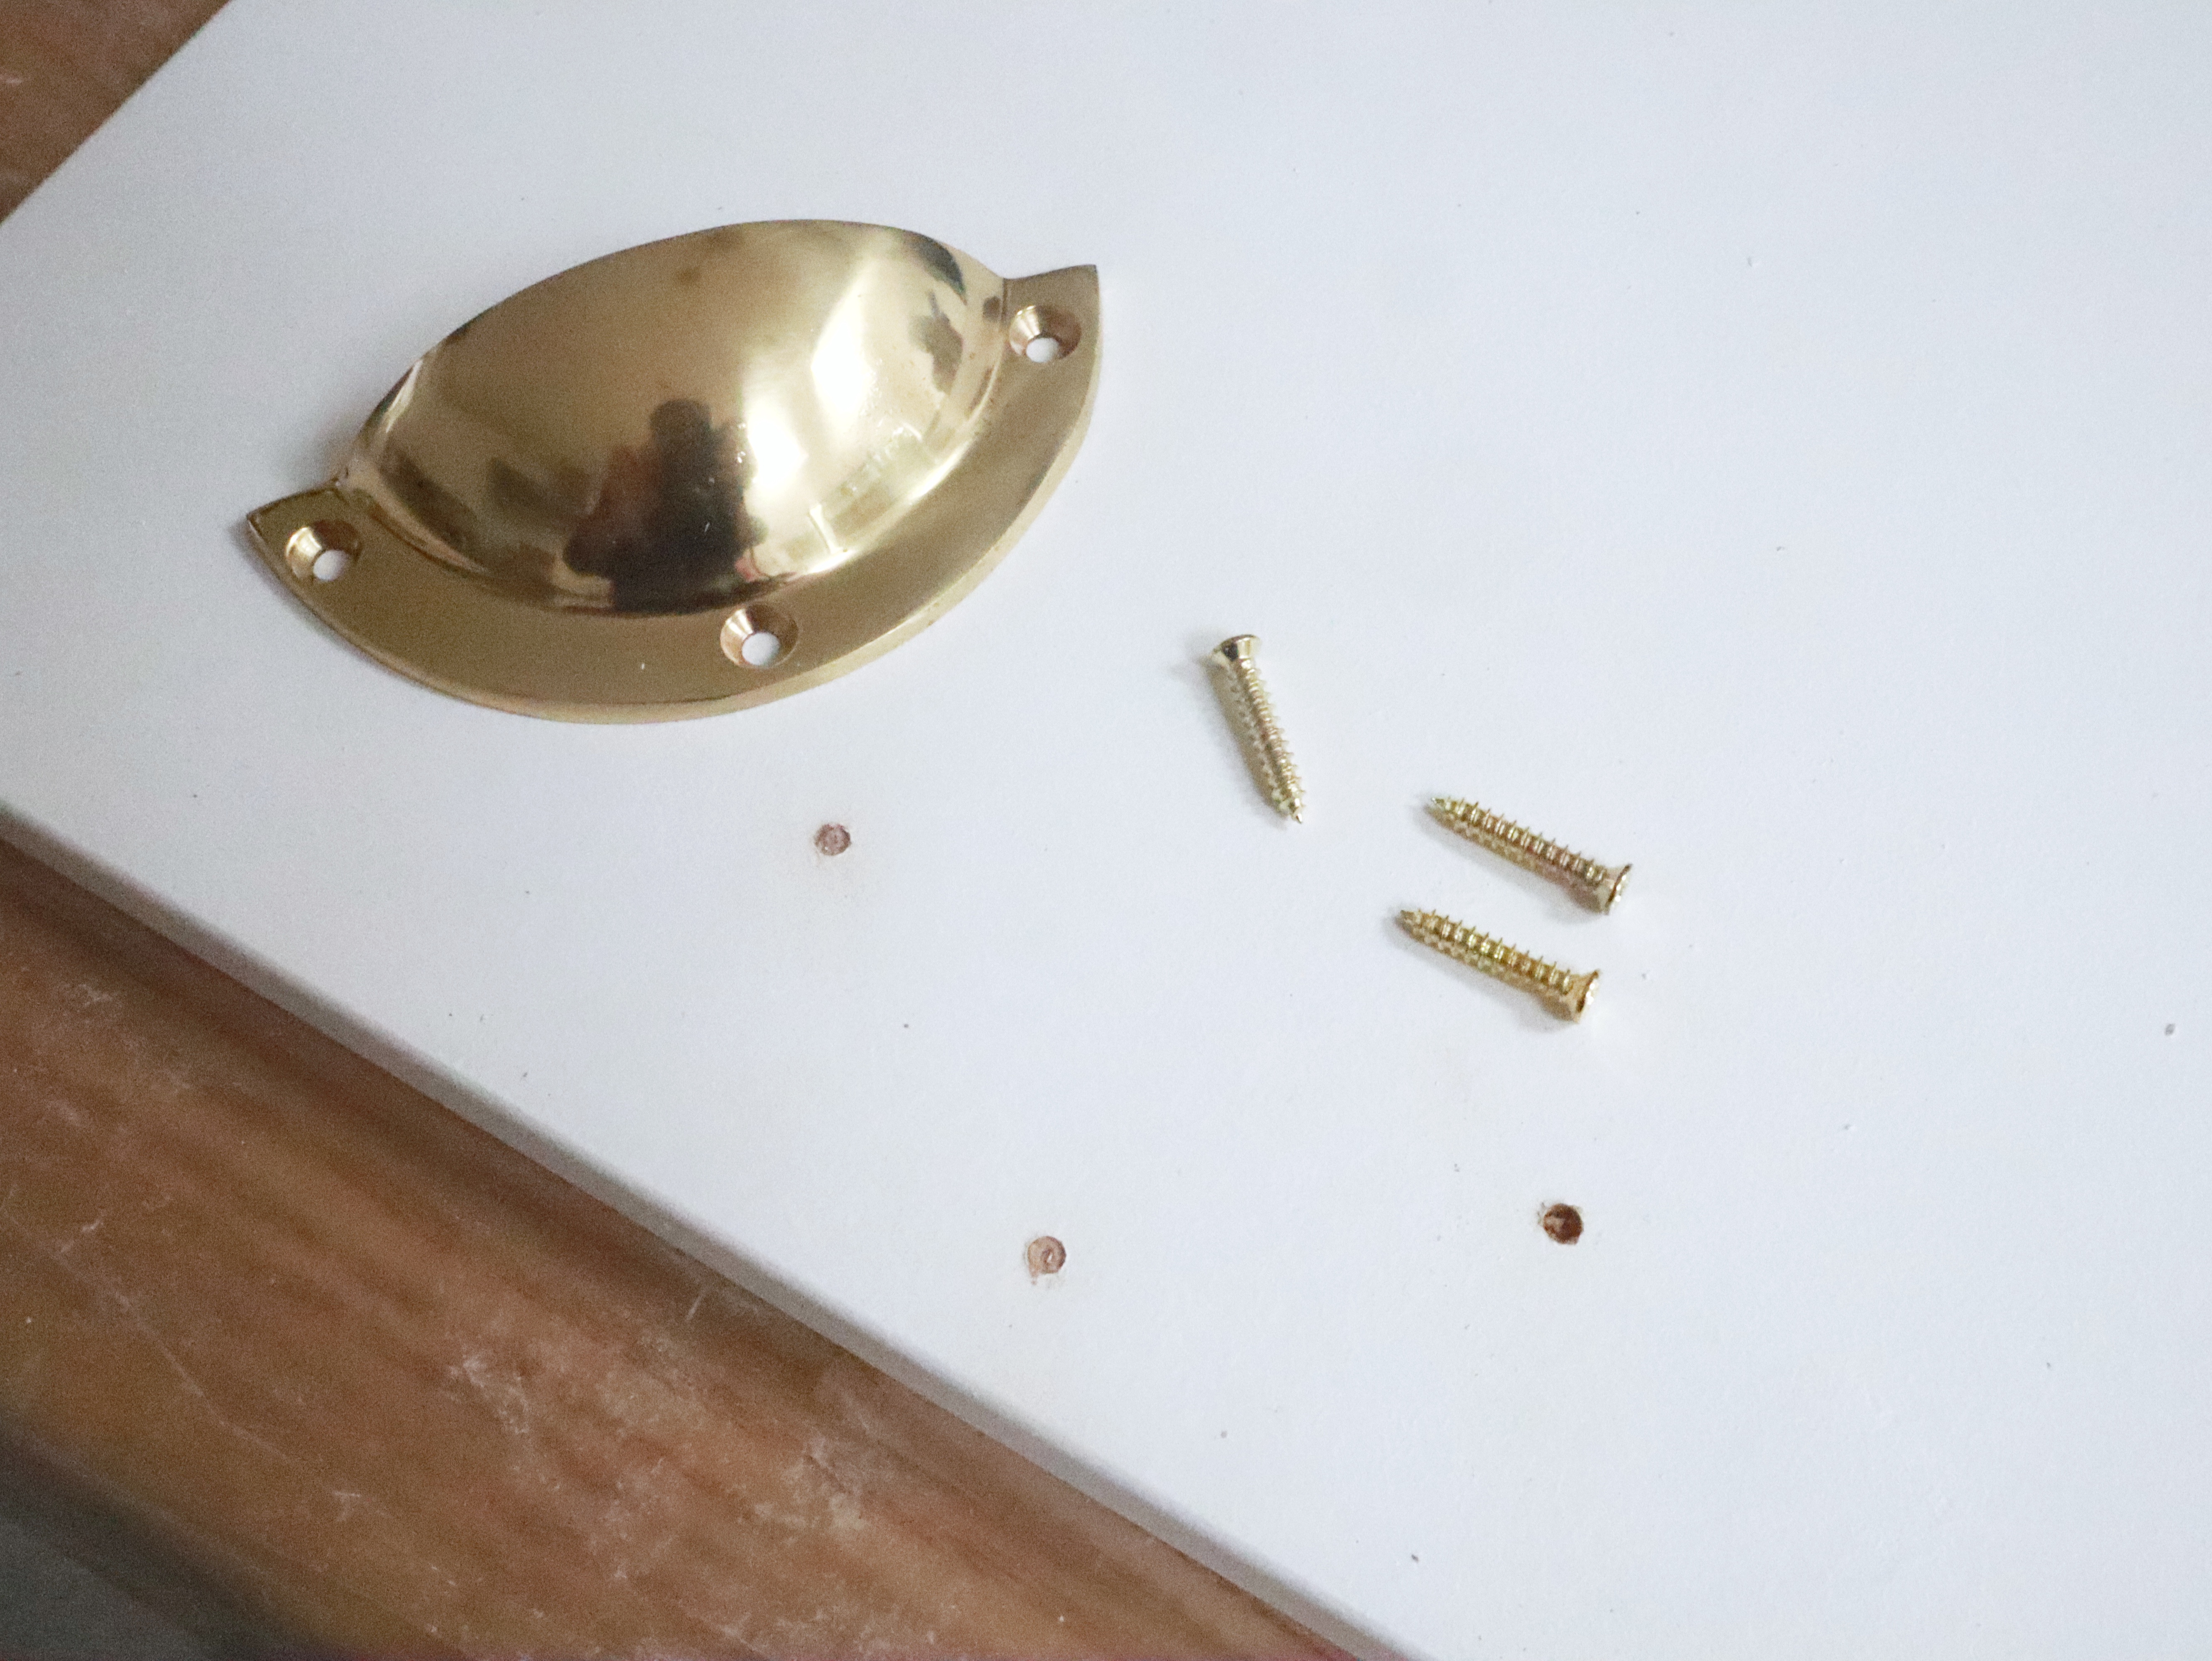
Next I added the cup handles to the cupboard doors. I centred the handles and marked off where the screws went. I took the handles away and drilled pilot holes before attaching them with the replacement screws that I bought. I think the handles are my favourite bit of the kitchen because they’re the exact same ones as our cabinets and it really brings it together so well.
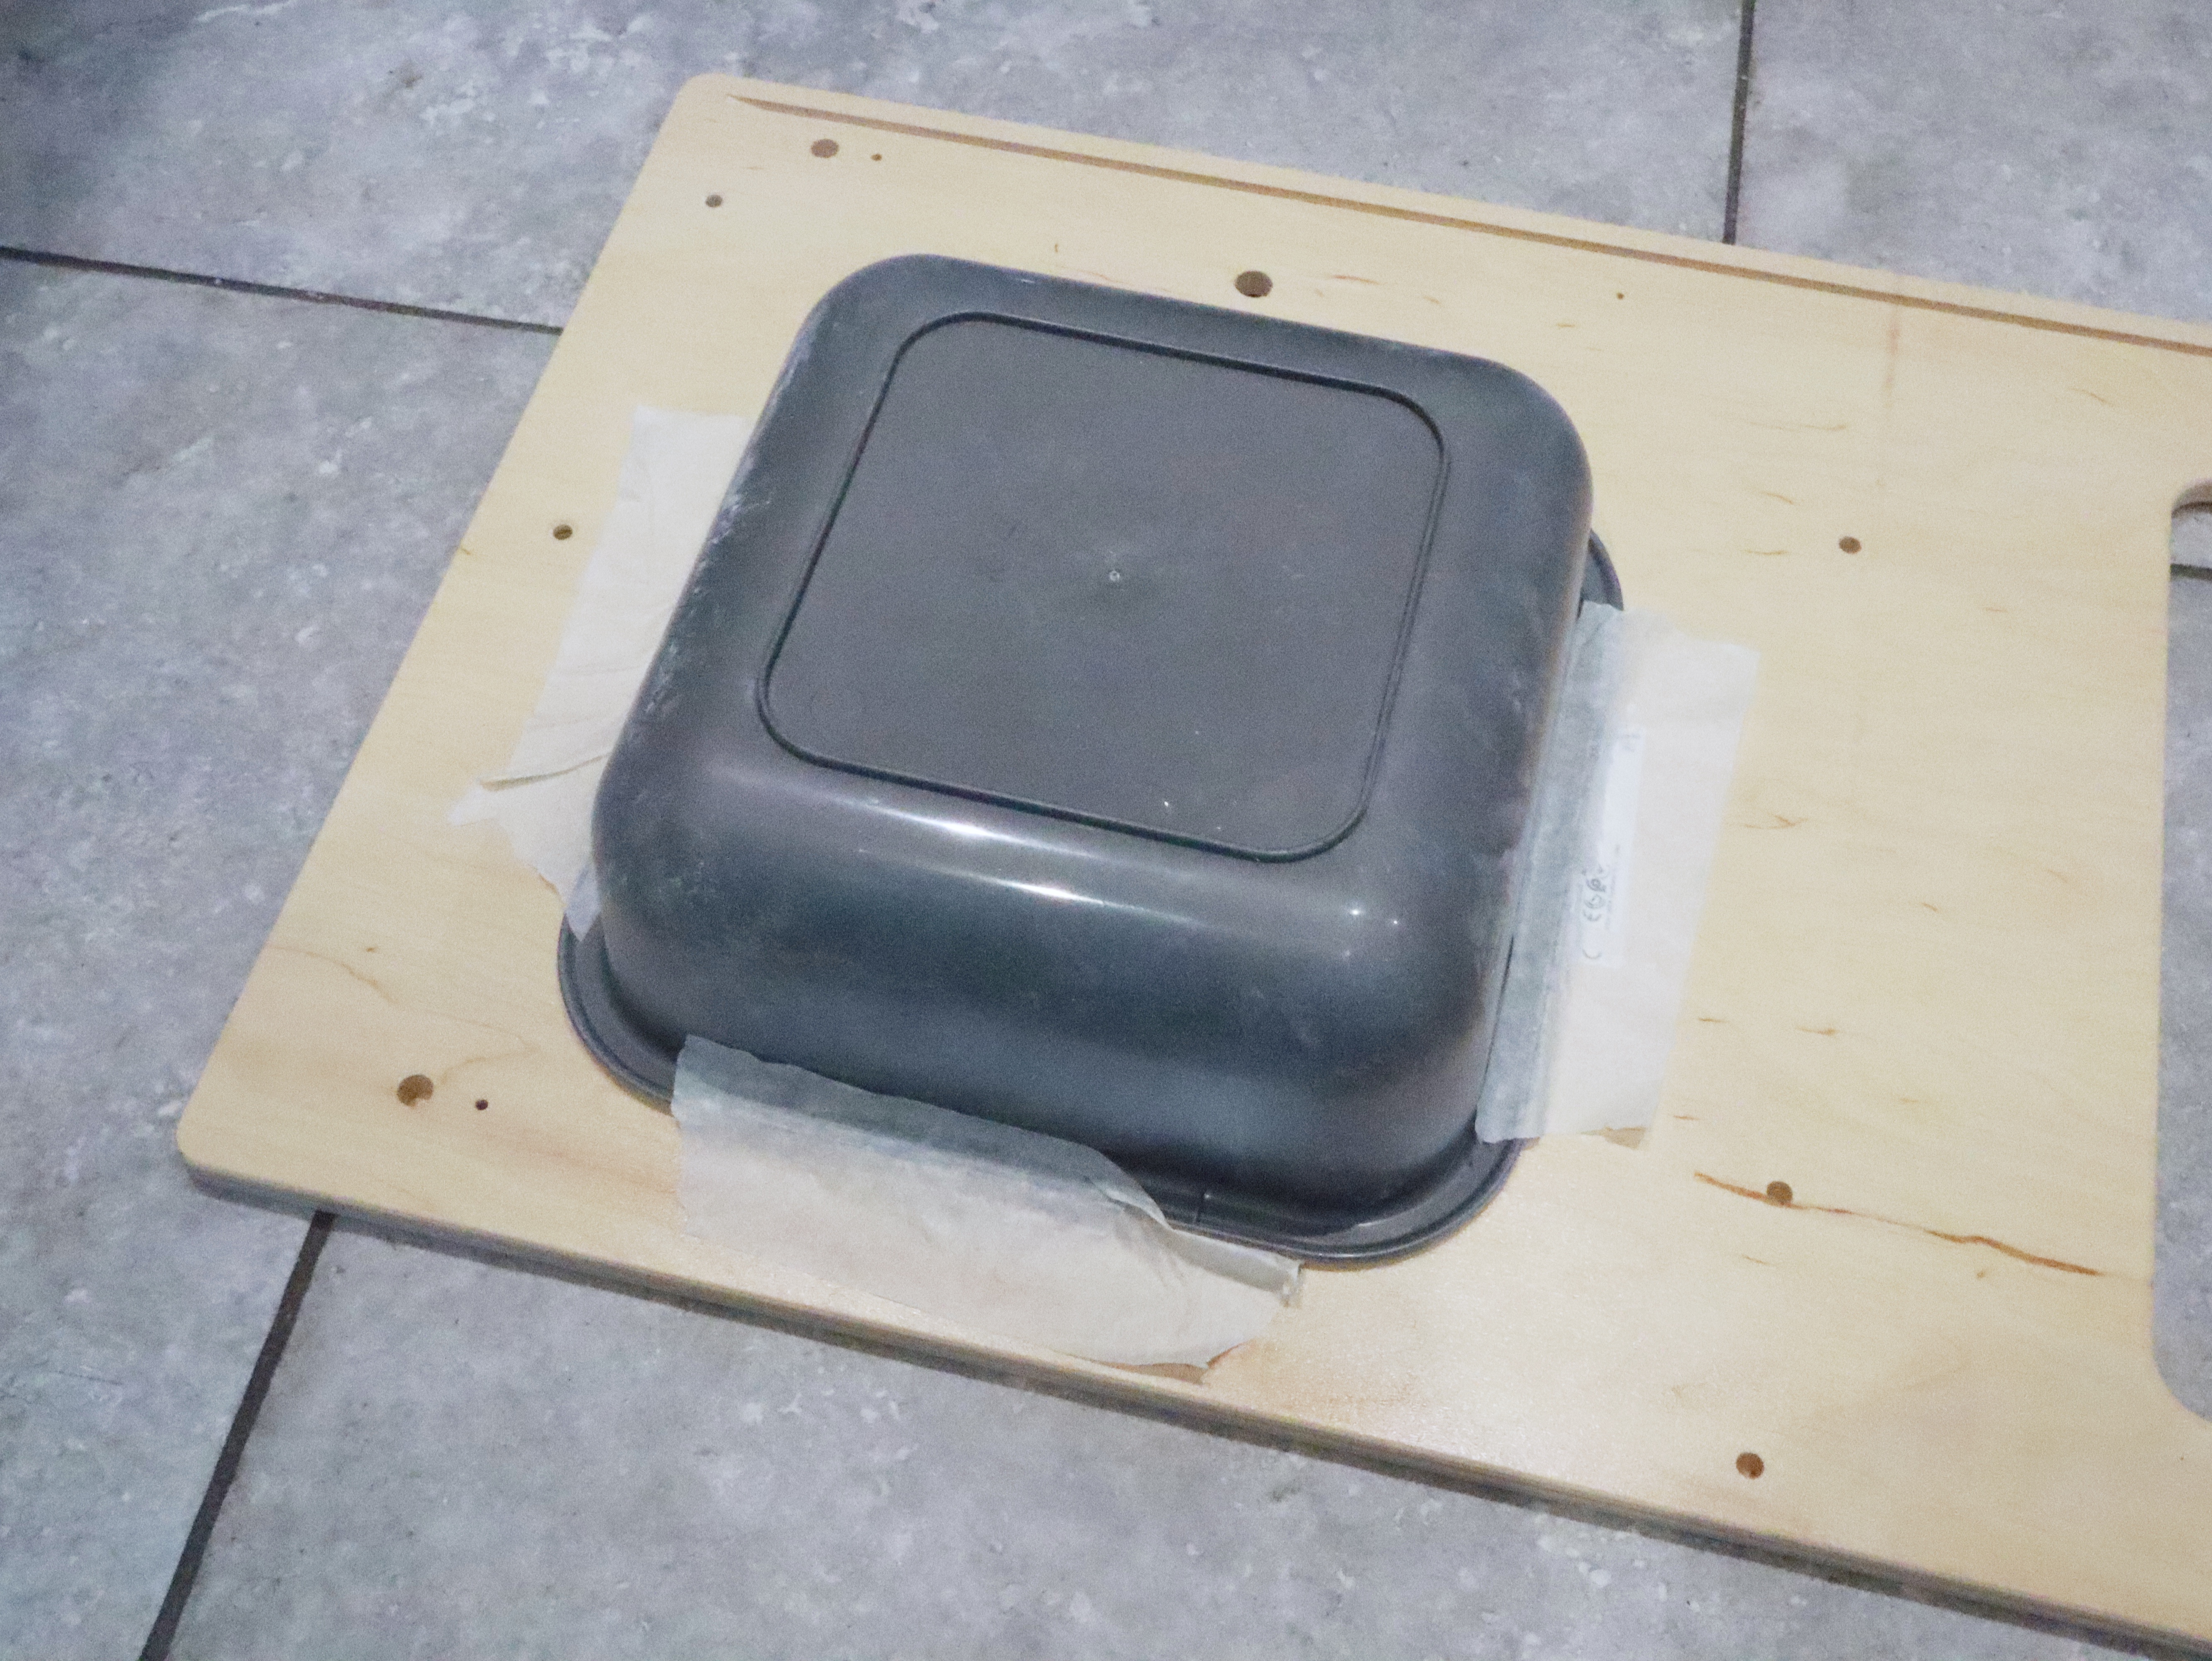
I decided to countersink the washing up bowl because it looks a little nicer. This does obviously mean that the bowl isn’t (easily) removable but I’m ok with that. I turned the countertop upside down and used masking tape to secure the bowl and then flipped it over to make sure that it was centred (it took a couple of adjustments!) and then I used four short screws to attach it to the counter.
I then put the kitchen together as per the instruction manual. I did have to undo the top section to add in the additional panels but that wasn’t a big deal.
The Ikea Duktig play kitchen doesn’t come with a back board for the centre section. Our kitchen has white subway tiles so I wanted to match this without using real tiling if I could get away with it! I found the stick on subway tiles on Amazon and they were perfect, they even had the effect of grey grout just like ours! I cut the foamboard to size and then followed the instructions on the packet to lay the tiles. BEWARE! They are super sticky and tear off the surface of the foam board if you try and remove them so you only get one chance, be careful! You only need one packet to do the whole board.
Once it was fully covered in the subway tile stickers I carefully used panel pins to attach the board to the back of the kitchen unit.
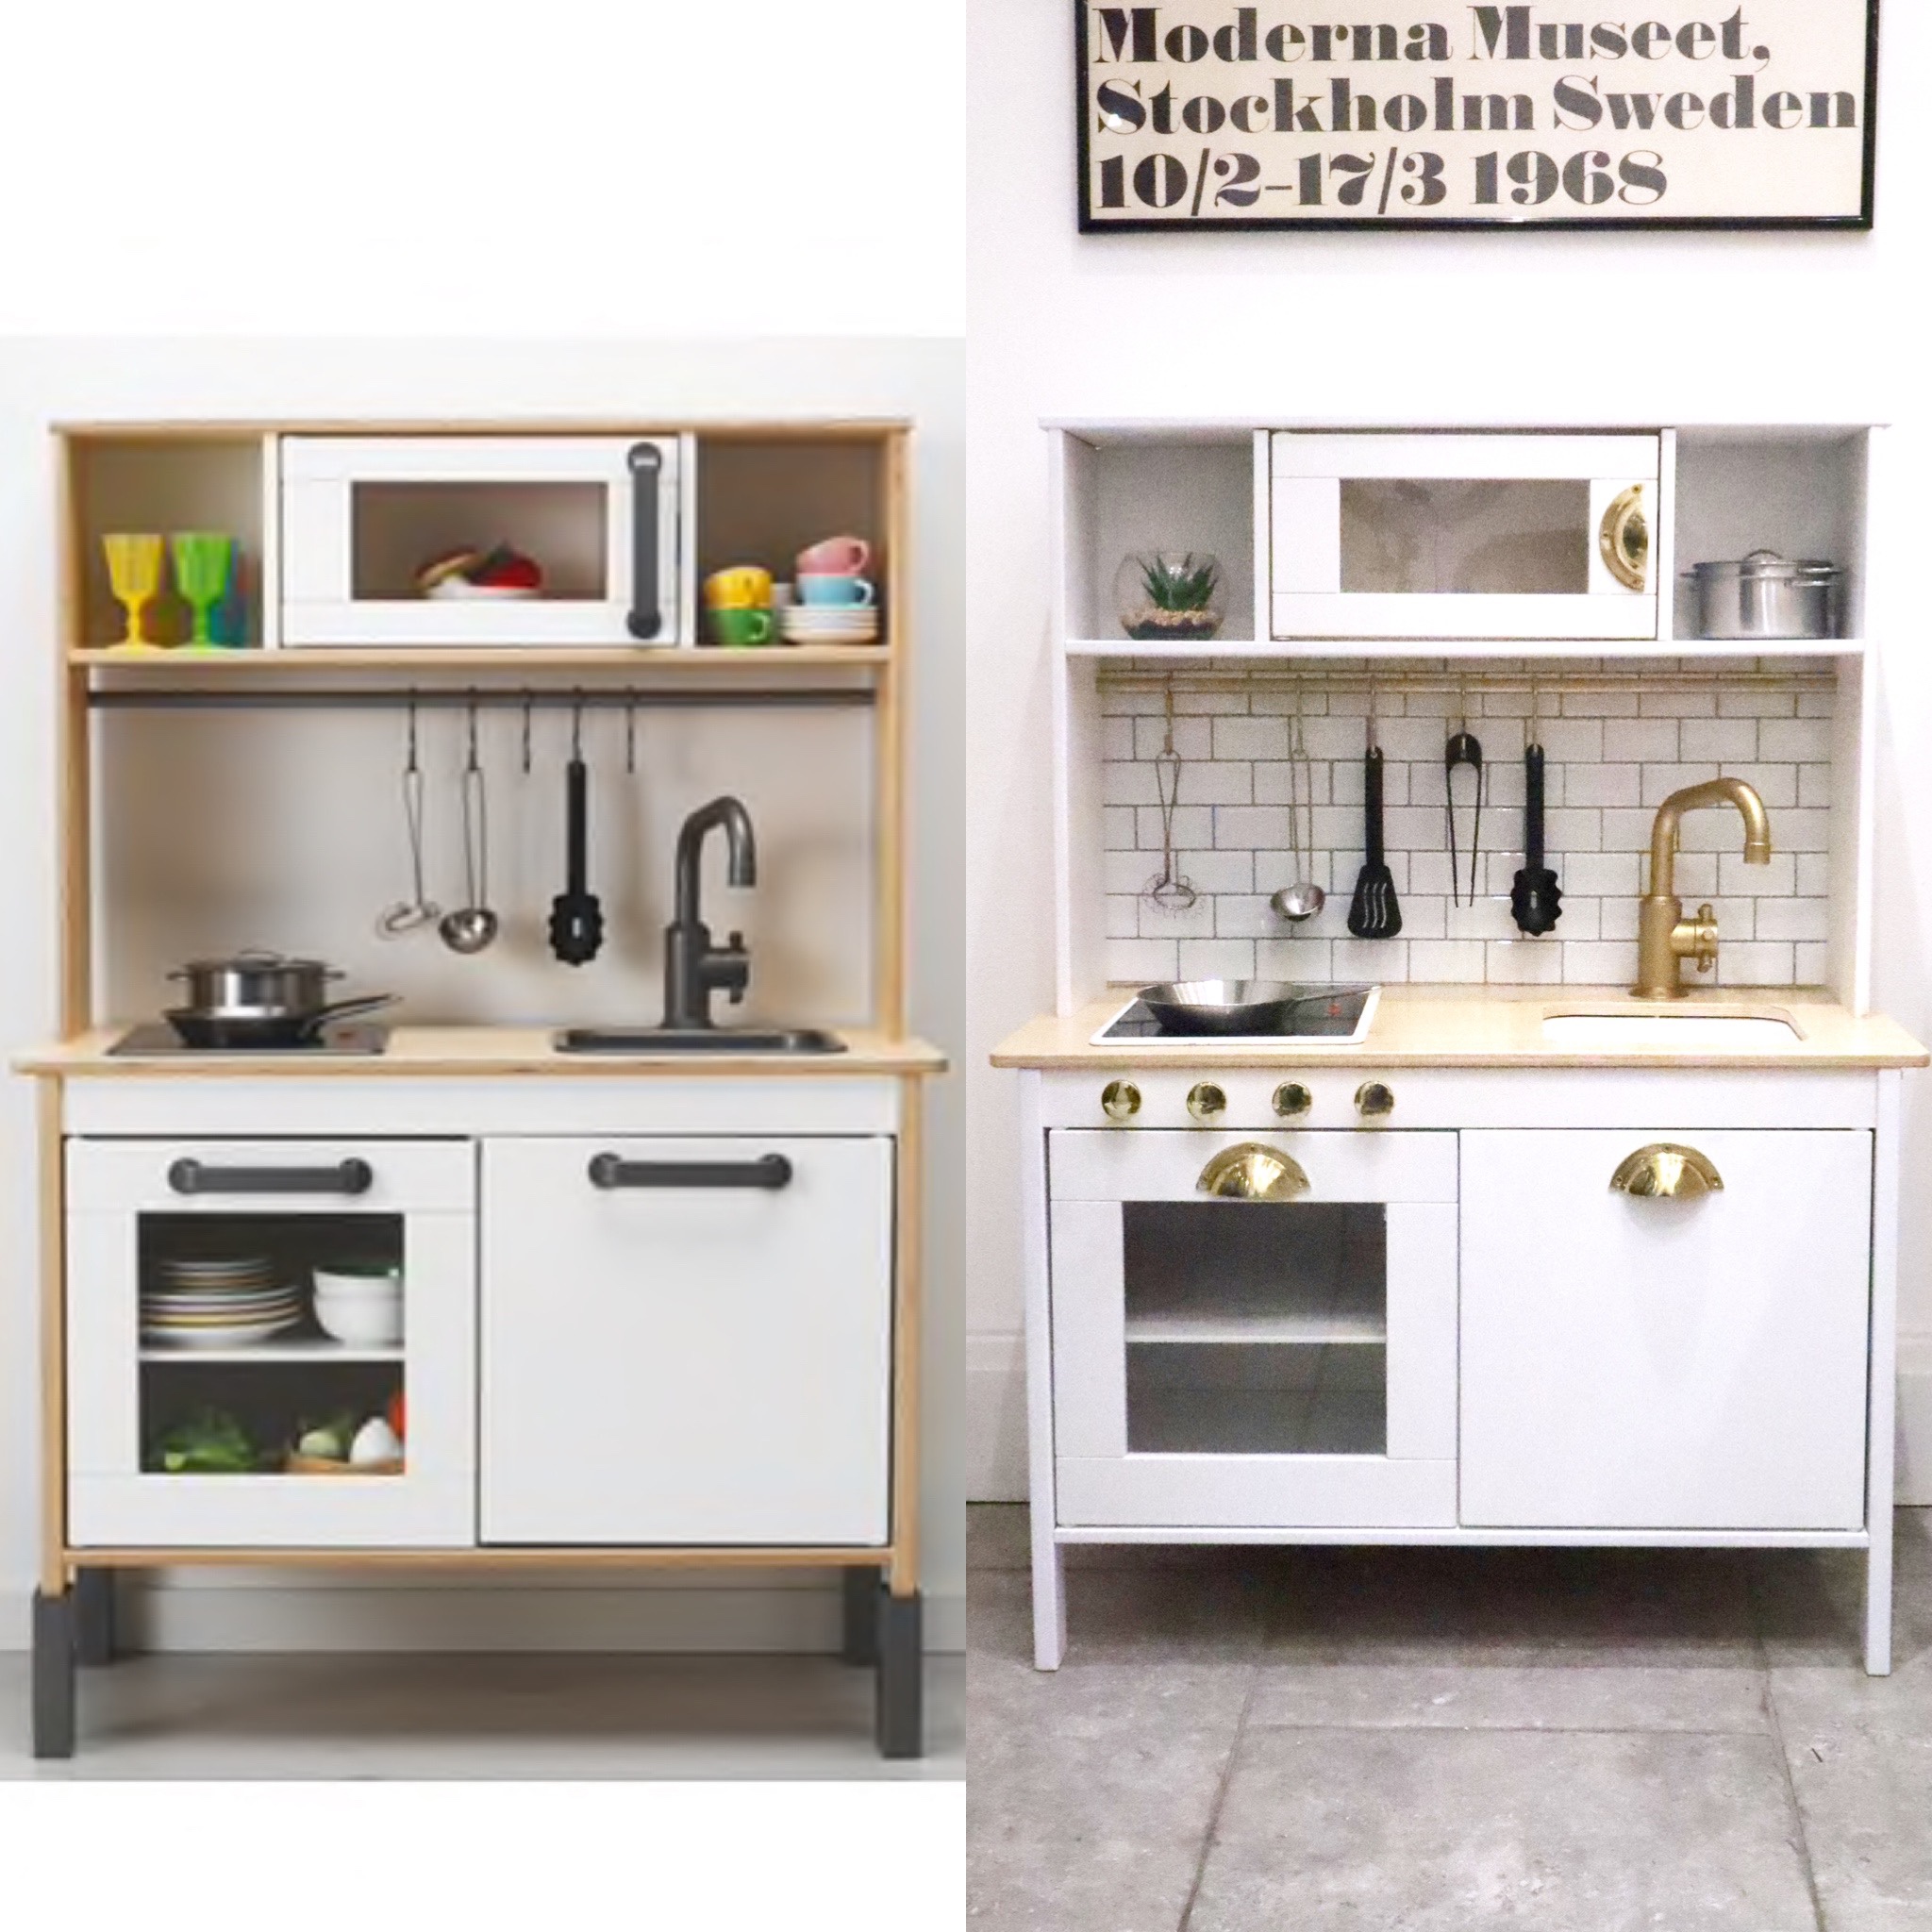
Here’s the before and after!
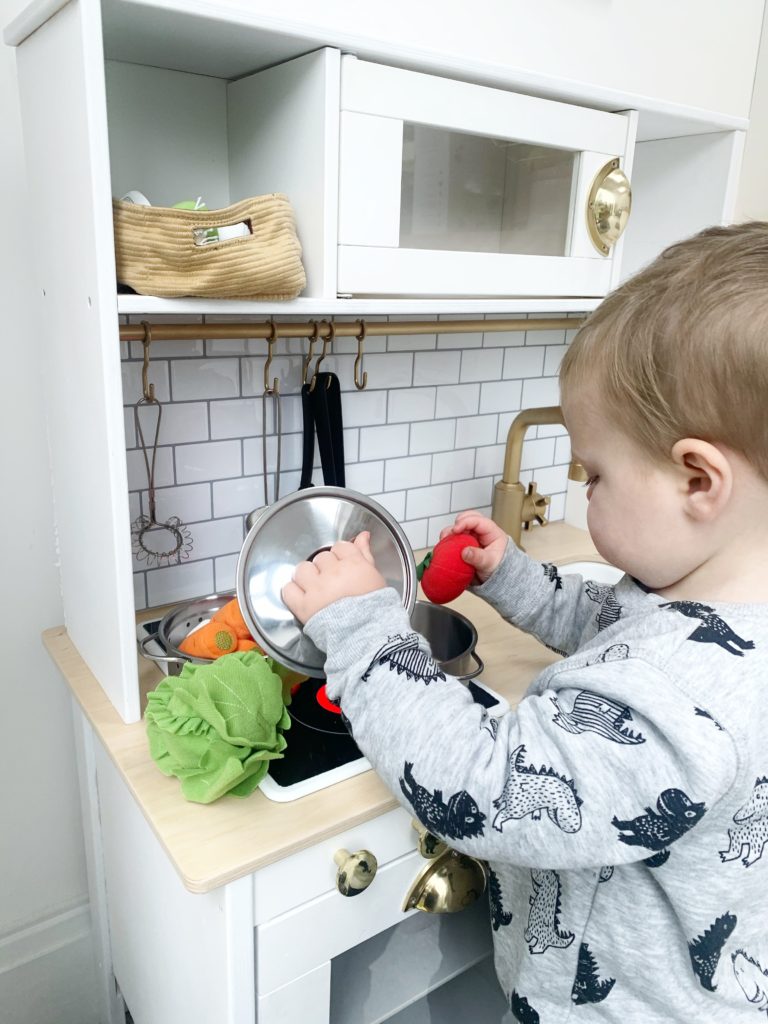
All of the utensils, pans and play vegetables are also from Ikea and are such good quality! I didn’t feel the need to spray those gold as we don’t have any kitchen accessories that are gold but you could do that too if you wanted.
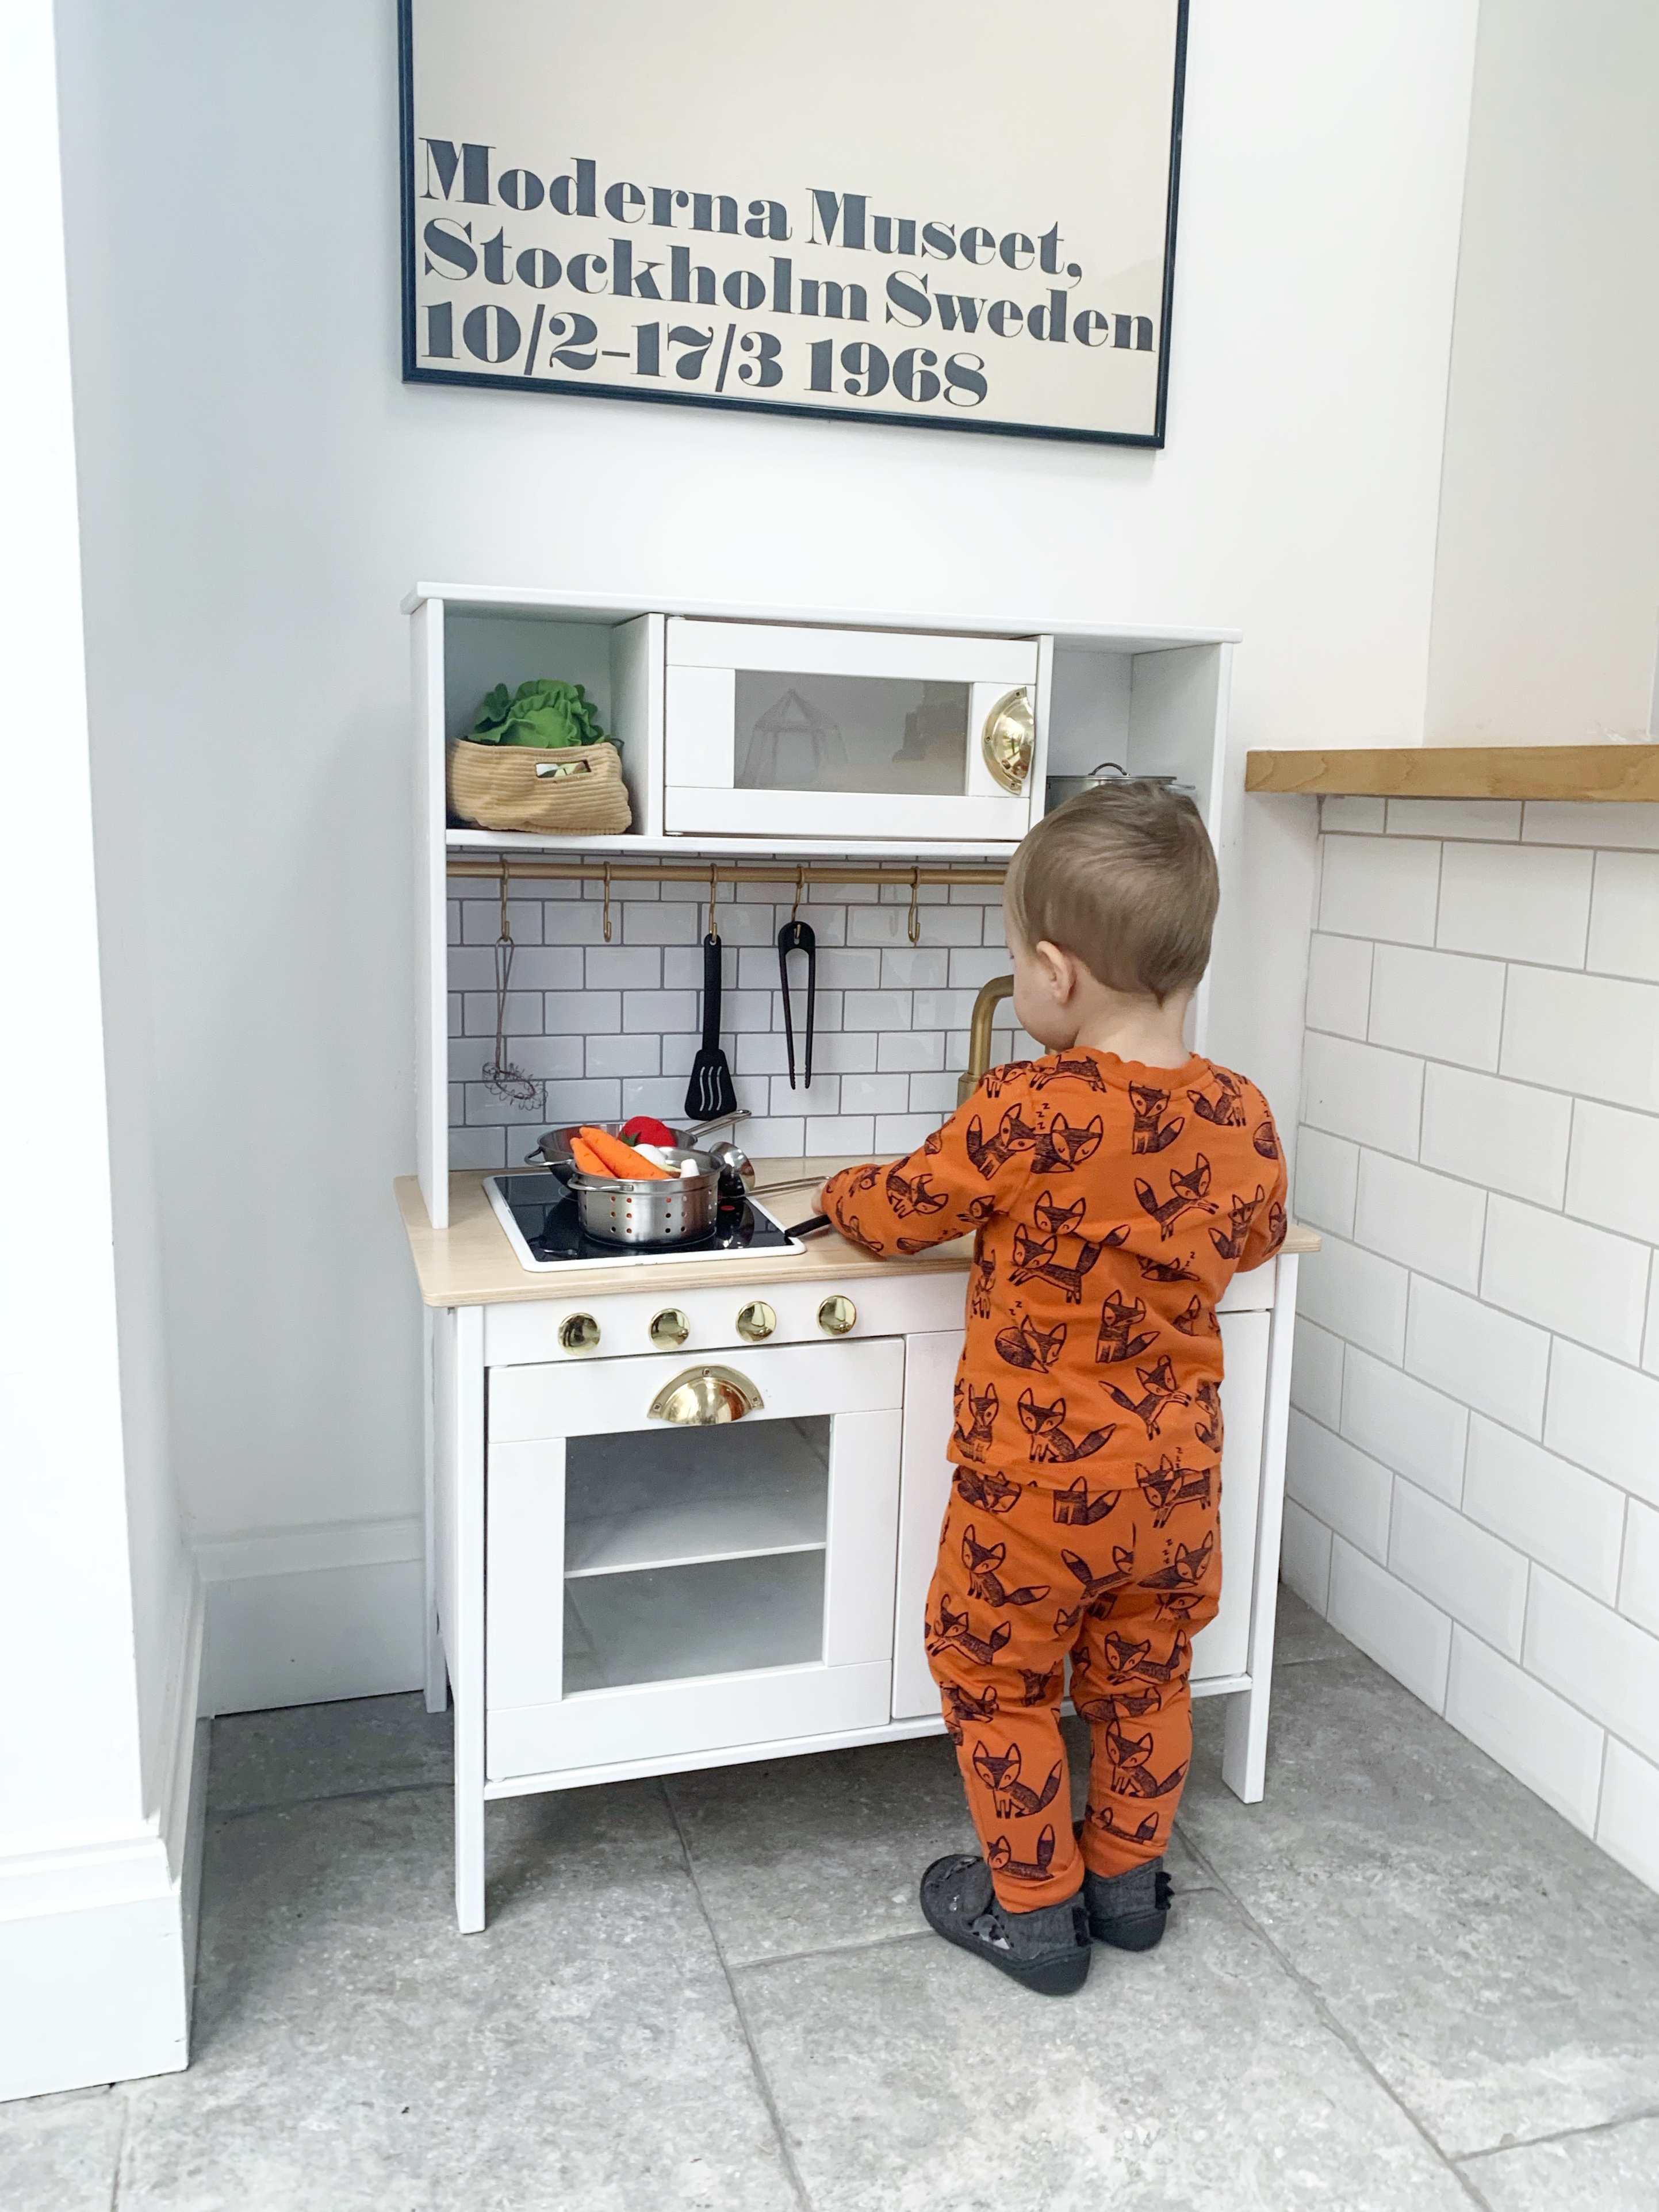
Theo absolutely loves the kitchen! To be fair, he’d love it no matter what it looked like but by doing the Ikea Duktig makeover now I love it too! It’s a feature in the kitchen now rather than just another toy cluttering up the place!
I hope you’ve enjoyed the tutorial and it has inspired you to makeover your own Duktig play kitchen! I’d love to see your efforts, follow me on Instagram @ohhidiy and tag me in your creations!
This isn’t my first Ikea hack, if you liked this one check out my post on my Ikea Latt makeover.


You May Also Like

Introducing a Dog to a Newborn Baby: the Columbo & Theo Story
My Aldi Baby Event Haul